Fetching and handling content
Learn about the central concepts and hooks for pulling content from your Sanity project into your custom app.
The App SDK provides a number of React hooks for interacting with your Sanity content. In this article we'll look at four specific hooks – useDocuments, useDocument, useDocumentProjection, and useEditDocument – and explore how they fill different needs within a single custom app.
Loading complex previews with useDocuments and useDocumentProjection
The code examples in the following section assume you have an App SDK app successfully connected to a Sanity dataset populated with the "movies" example schema and content. If you want to follow along and need help getting that set up, visit this article.
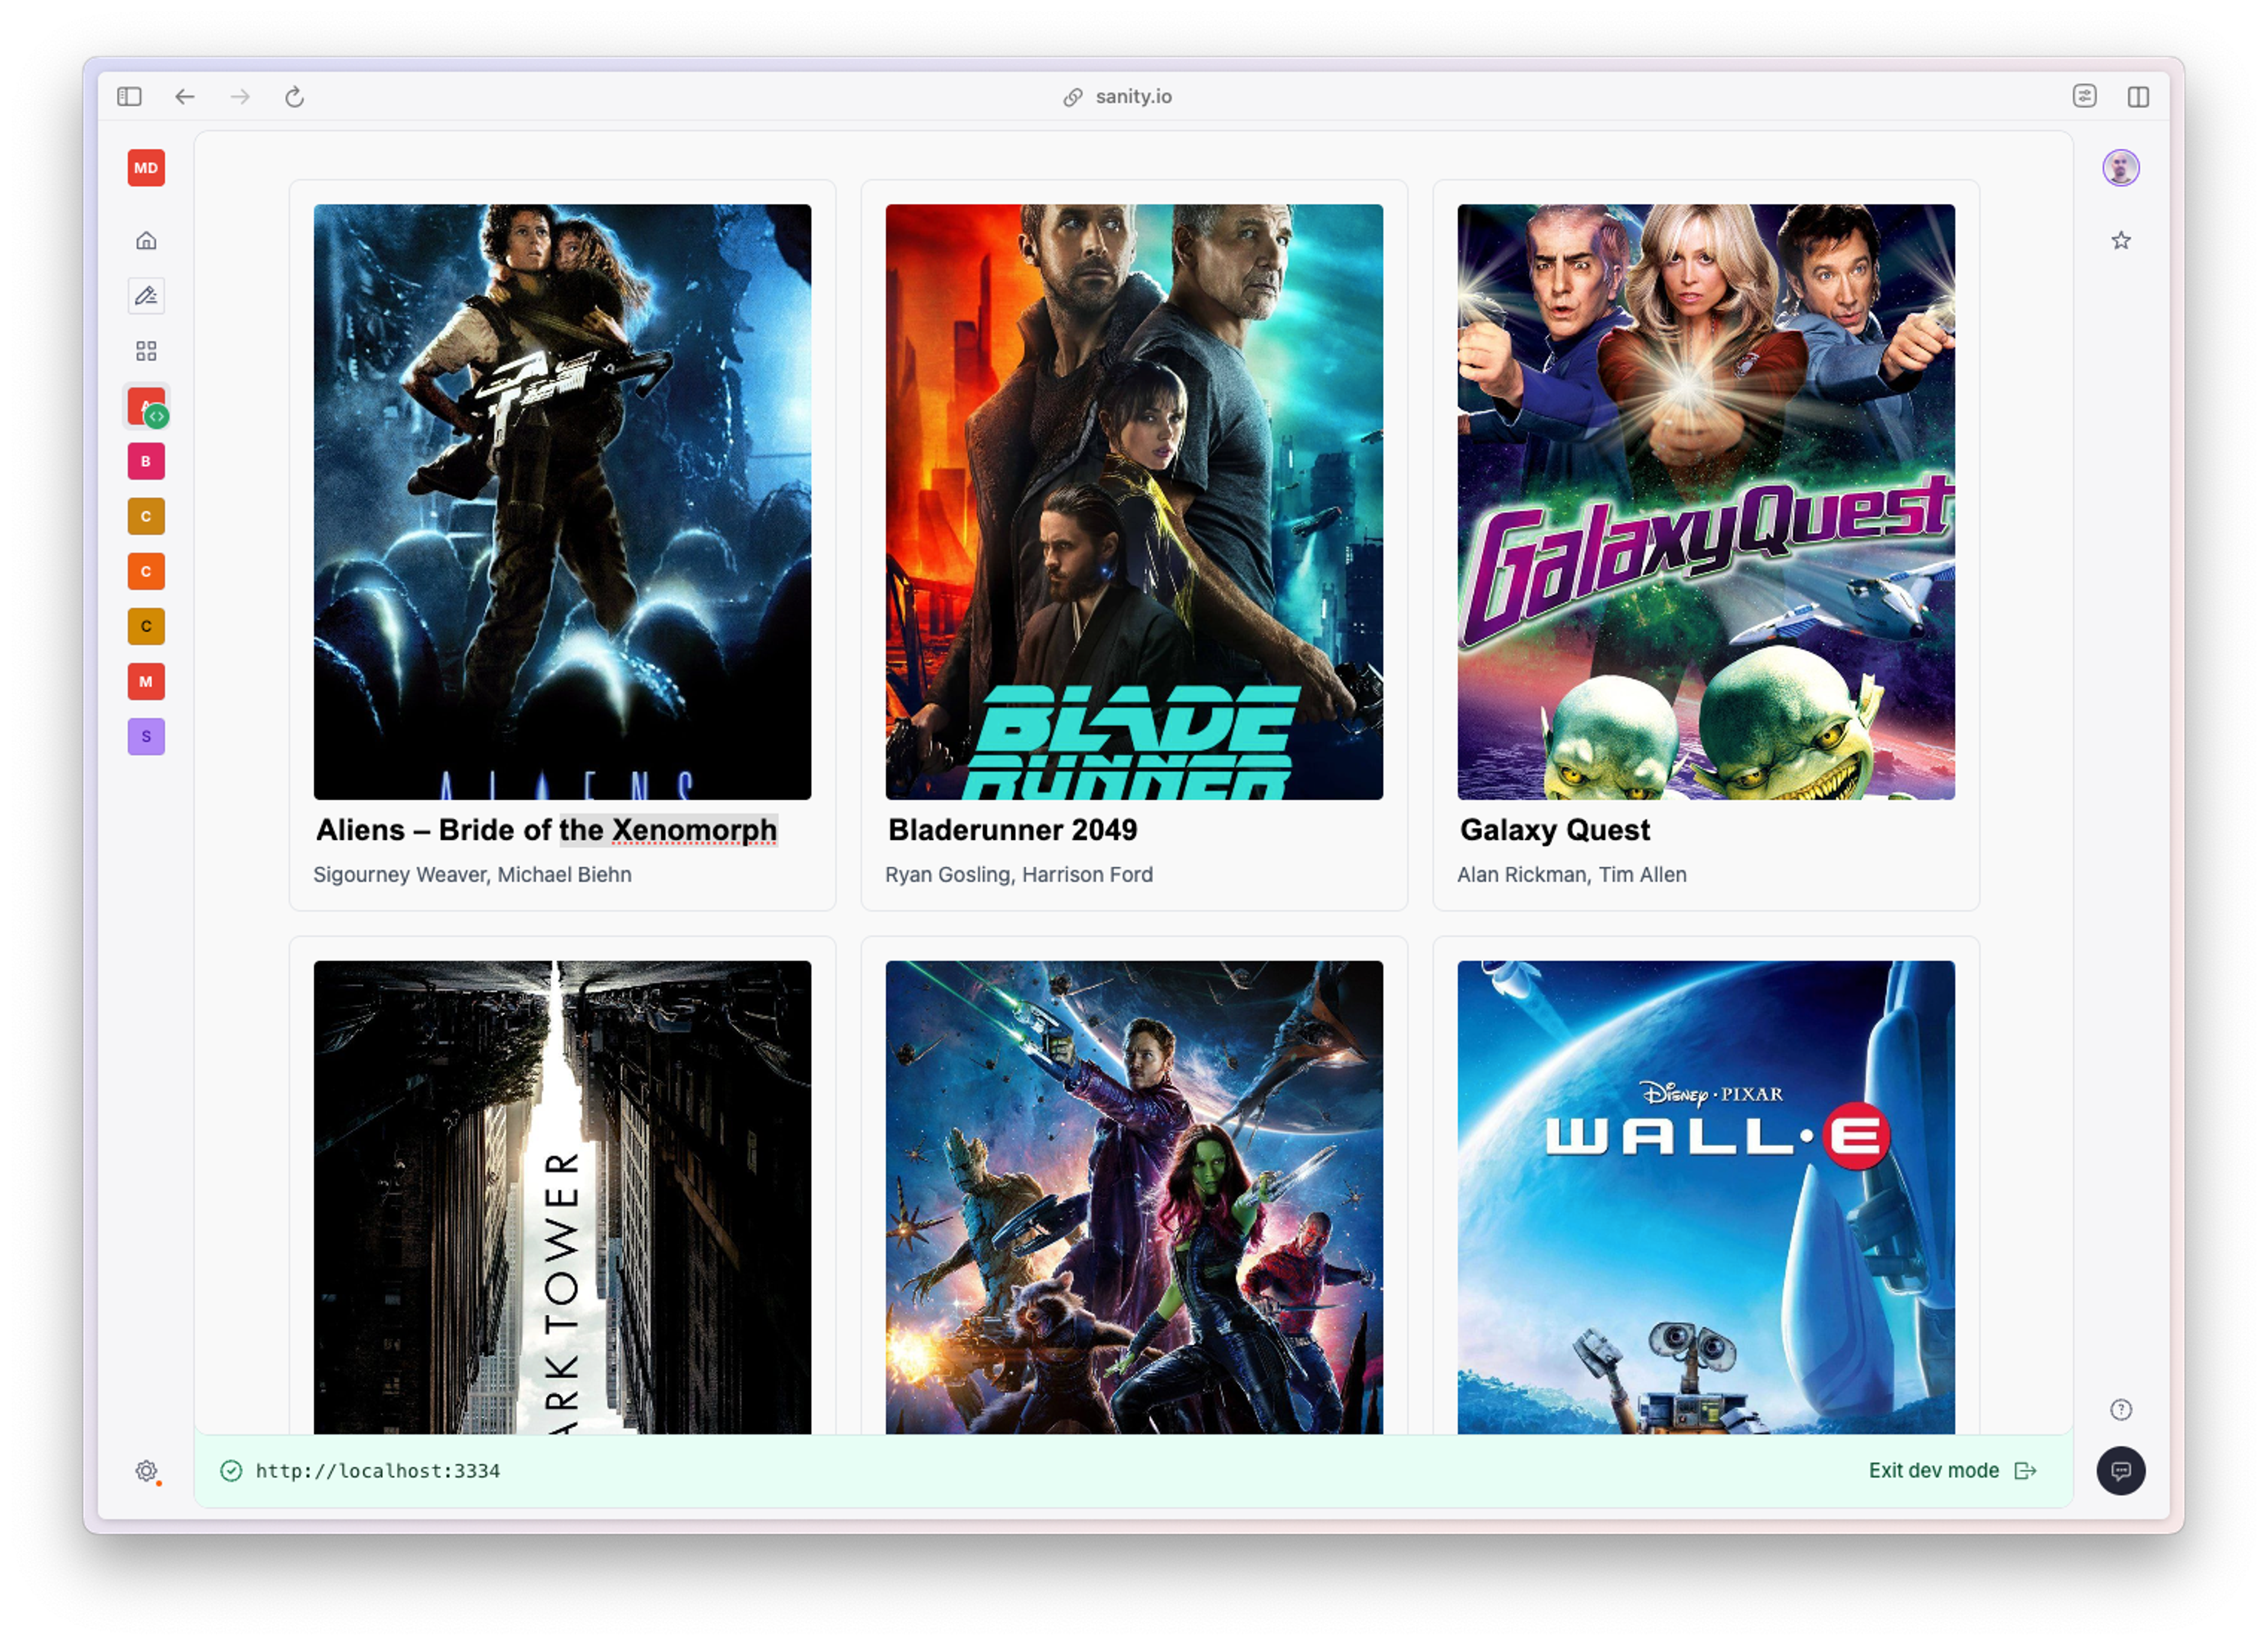
In this section we'll fetch a list of movie documents and display them in a nice grid of card elements, each containing some info and a visual.
Preparing our list view
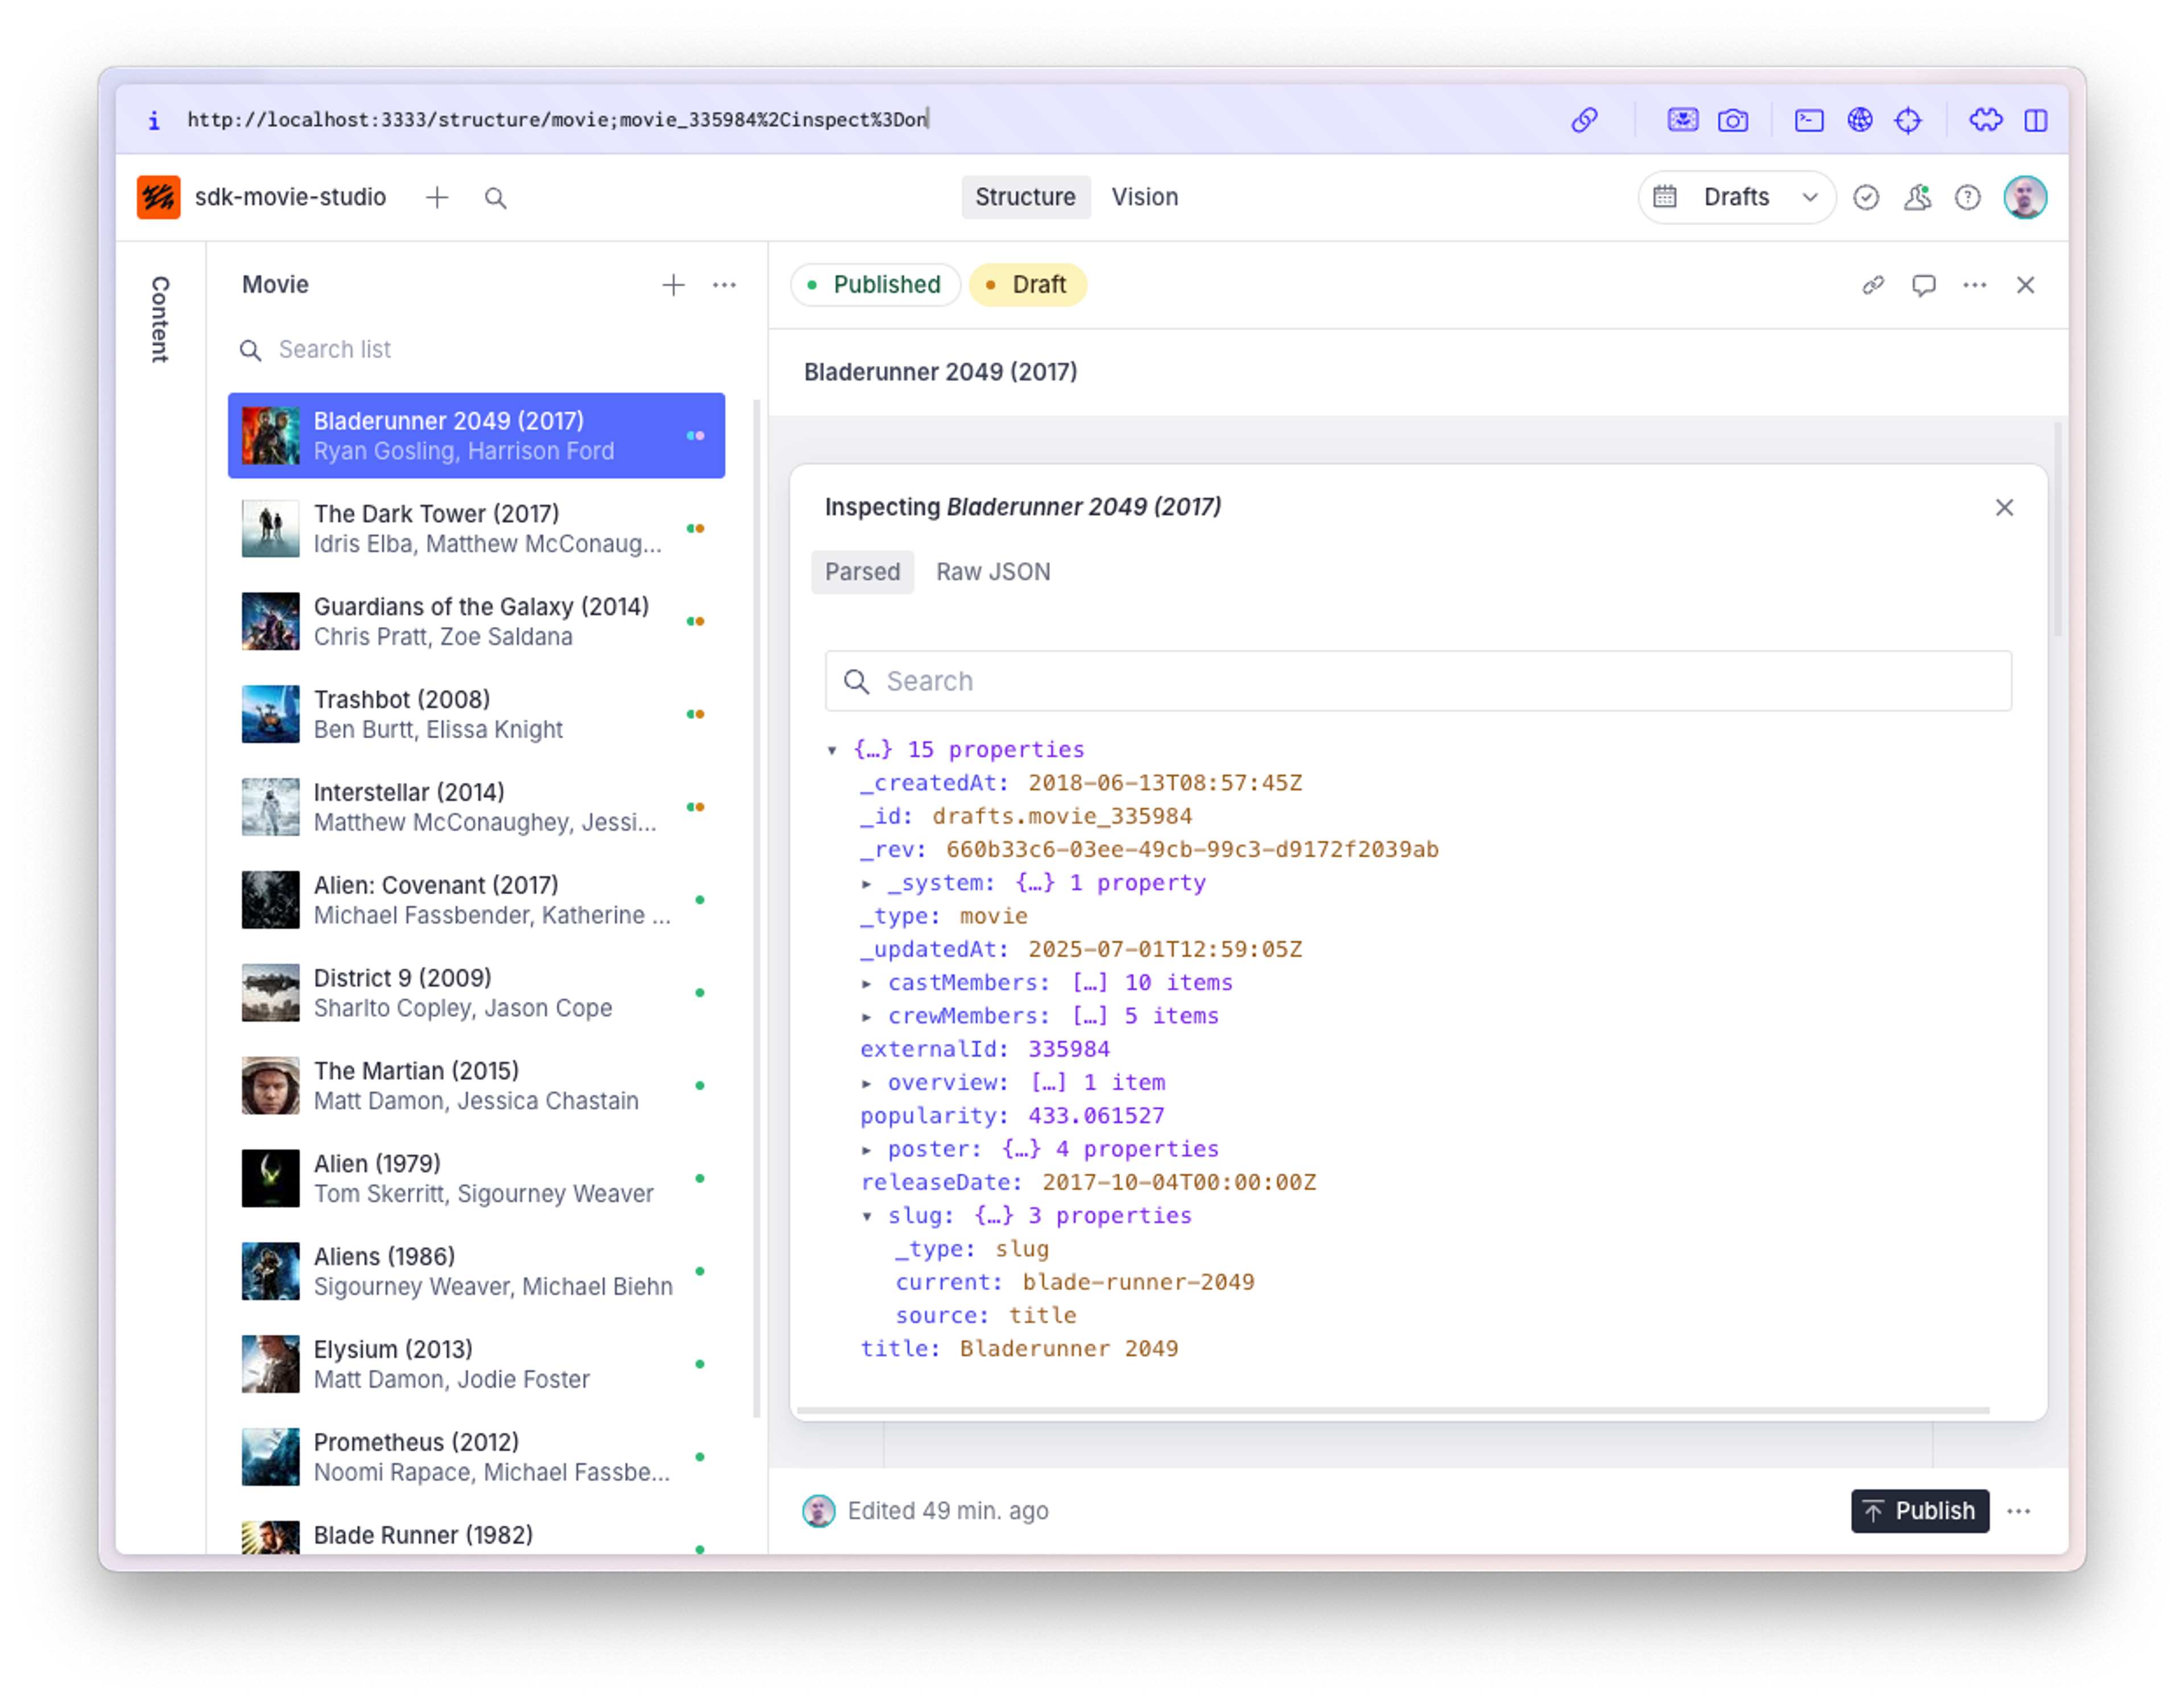
The first thing we want to do is fetch a list of document handles for all the movies we want to display. Document handles are minimalist objects that contain just the necessary amount of information to identify a document in your Content Lake.
{
    "dataset": "YOUR_DATASET",
    "documentId": "movie_679",
    "documentType": "movie",
    "projectId": "YOUR_PROJECT_ID"
}
For this task we'll use the useDocuments hook.
👉 Create a new component in your src folder named PreviewGrid.tsx and add the following code to it:
import {useDocuments} from '@sanity/sdk-react'
import {type JSX, Suspense} from 'react'
import {MoviePreview} from './MoviePreview'

export function PreviewGrid(): JSX.Element {
  // Use the `useDocuments` hook to return
  // an index of document handles for
  // all of our 'movie' type documents
  // Sort the documents by the release date, descending
  const {data: movies} = useDocuments({
    documentType: 'movie',
    orderings: [{field: '_updatedAt', direction: 'desc'}],
  })

  return (
      <div
        style={{
          display: 'grid',
          gridTemplateColumns: "repeat(auto-fit, minmax(300px, 1fr))",
          gap: '1rem',
        }}
      >
        {movies.map((movie) => (
          <Suspense key={movie.documentId} fallback={<div>Loading...</div>}>
            <MoviePreview documentHandle={movie} />
          </Suspense>
        ))}
      </div>
  )
}
This will set up a pretty grid layout for our movie previews. Note that we wrap each <MoviePreview /> component in individual React.Suspense />-wrappers. You can read more about how the App SDK employs Suspense to ensure smooth data fetching in this article.
Let's move on to the <MoviePreview />-component. This component will receive a documentHandle prop, and use that information to fetch the relevant data from the Content Lake.
Movie preview component with useDocumentProjection
The useDocuments hook is very handy for fetching document handles for a bunch of documents, but it only contains enough data to identify the relevant document. For more complex data fetching, the useDocumentProjection hook comes in handy. Note that the useDocumentProjection hook is not recommended for real-time editing. A better alternative for those situations is discussed in the next section.
Examining the schema for the movie document type, we see that it contains a number of fields. For our purposes, we'll focus on the following:
- A
titlefield of typestring - A
posterfield of typeimage - A
castMembersfield which is an array of references to apersontype which has aname.
We want to display the title along with a poster image and the names of the first two listed cast members, which means we'll need content from three different documents and an asset. Sounds like a job for GROQ!
Using a GROQ projection, we can easily drill into the referenced documents and fetch exactly the structure we need.
{
  // The title is a simple string value
  title,
  // Expand the reference to get the URL of the referenced asset
  'posterImage': poster.asset->url,
  // Expand each referenced person to get the name
  'cast': array::join(castMembers[0..1].person->name, ', '),
}
[
{
"cast": "Matt Damon, Jessica Chastain",
"posterImage": "https://cdn.sanity.io/[...]-780x1170.jpg",
"title": "The Martian",
},
// ... similar objects
]That should be all we need to display our movie cards.
👉 Create a new component named MoviePreview.tsx in your src folder, and paste the following code into it.
import {type DocumentHandle, useDocumentProjection} from "@sanity/sdk-react";
import {type JSX, useRef} from "react";

interface ProjectionResults {
  data: {
    title: string;
    cast: string;
    posterImage: string;
  };
}

// Project the title, first 2 cast members,
// and poster image values for the document
const movieProjection = `{
  title,
  'cast': array::join(castMembers[0..1].person->name, ', '),
  'posterImage': poster.asset->url,
}`;

export function MoviePreview({documentHandle}: {documentHandle: DocumentHandle}): JSX.Element {
  // Generate a ref for the outer element
  // This keeps the useDocumentProjection hook from resolving if
  // the preview is not currently displayed in the viewport
  const ref = useRef(null);

  // No async await here
  const {data: { title, cast, posterImage }}: ProjectionResults = useDocumentProjection({
    ...documentHandle,
    ref,
    projection: movieProjection,
  });

  return (
    <div
      // Assign the ref to the outer element
      ref={ref}
      style={{
        display: 'flex',
        flexDirection: 'column',
        gap: '0.5rem',
        border: '1px solid #e5e7eb',
        borderRadius: '0.5rem',
        padding: '1rem'
      }}
    >
      <img
        alt={`Poster for ${title}`}
        src={posterImage}
        style={{
          width: "100%",
          aspectRatio: "1",
          objectFit: "cover",
          borderRadius: "4px",
        }}
        width="400"
        height="400"
      />
      <p style={{
        fontSize: '1.25rem',
        fontWeight: 700,
        margin: '.8rem 0 0 0',
      }}>
        {title}
      </p>
      <p style={{
        fontSize: '0.875rem',
        color: '#4b5563',
        margin: '0'
        }}
        >
          {cast}
      </p>
    </div>
  );
}
The final step we need to do is update our src/App.tsx to display our shiny new movie grid.
👉 Edit your src/App.tsx to import and render our grid component:
import './App.css'
// import './movies.css'
import {type SanityConfig} from '@sanity/sdk'
import {SanityApp} from '@sanity/sdk-react'
- import {ExampleComponent} from './ExampleComponent'
+ import {PreviewGrid} from './PreviewGrid'
function App() {
// apps can access many different projects or other sources of data
const sanityConfigs: SanityConfig[] = [
{
projectId: 'YOUR_PROJECT_ID',
dataset: 'YOUR_DATASET',
}
]
return (
<div className="app-container">
<SanityApp config={sanityConfigs} fallback={<div>Loading...</div>}>
{/* add your own components here! */}
- <ExampleComponent />
+ <PreviewGrid />
</SanityApp>
</div>
)
}
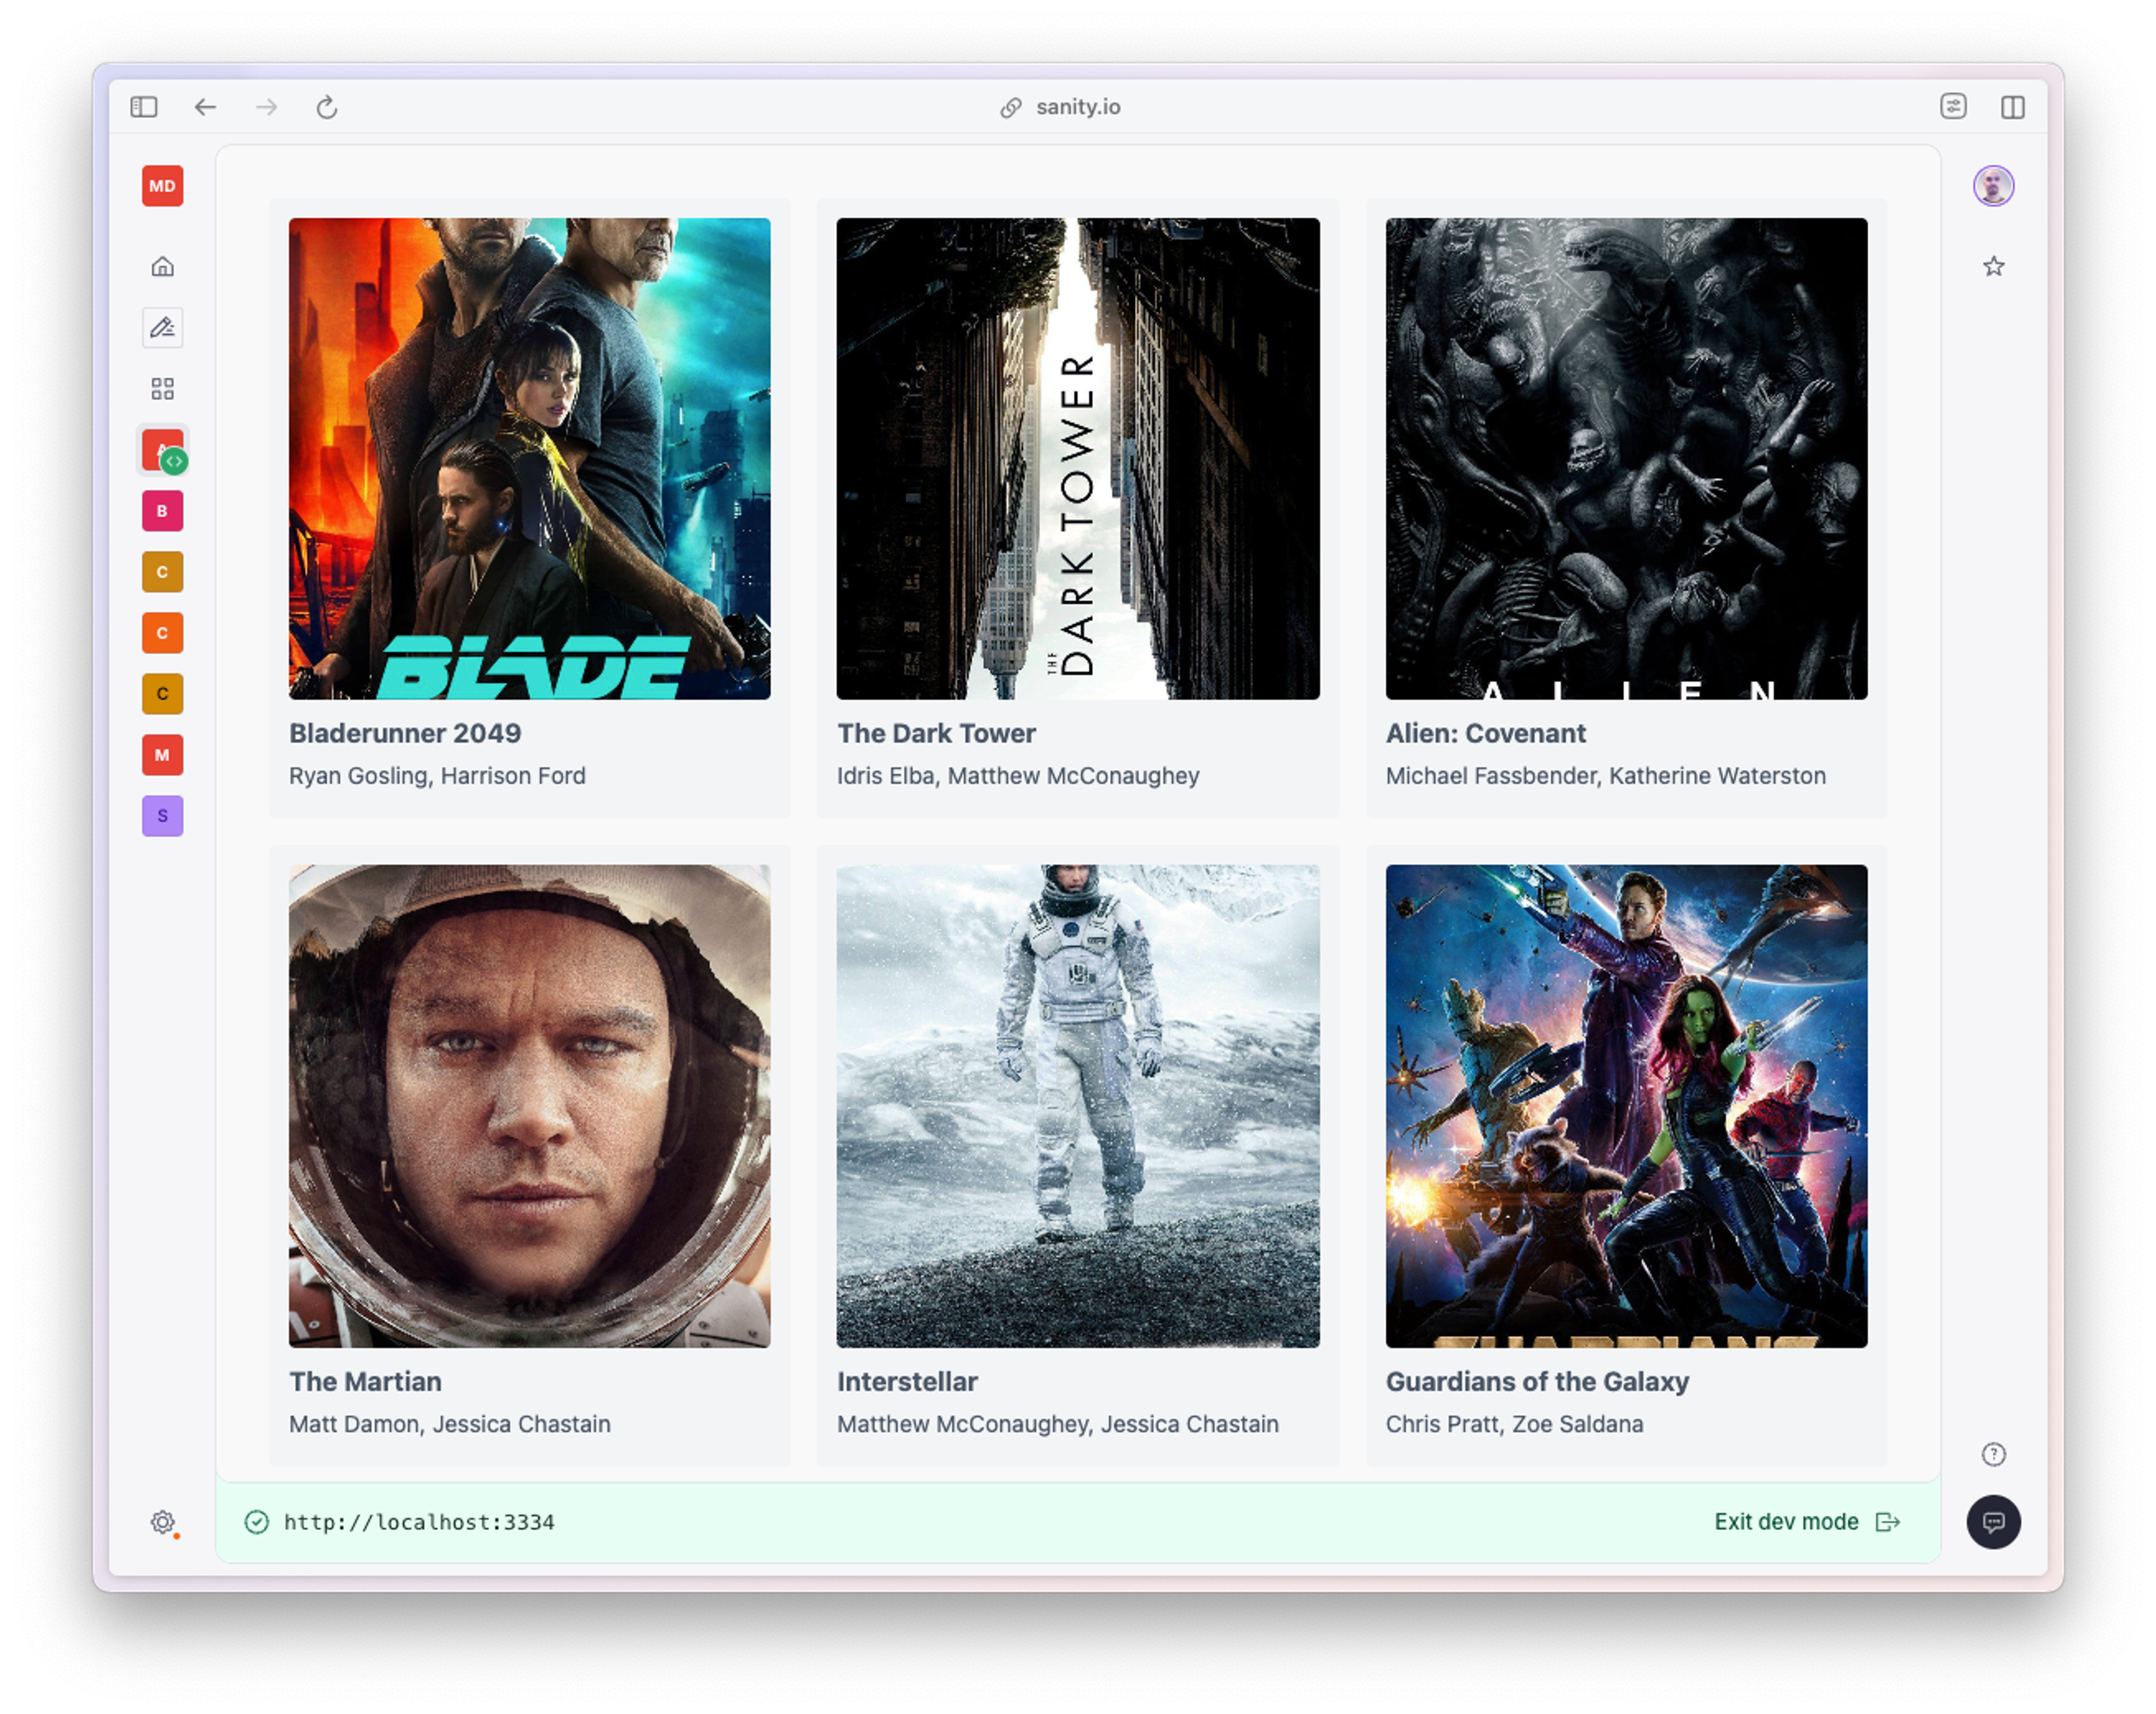
export default AppYou should now see each preview card updated with the actual information we wanted to display. Go ahead and change the title of any movie document in the corresponding studio to see the preview card live update as you make changes.
Make real-time edits with useEditDocument
useDocumentProjection is great, but it's not suitable for situations where you need down to the millisecond responsive content updates for, e.g., live collaborative editing. Let's expore this by making our movie titles editable with useEditDocument.
👉 Create a new file in src/ named TitleEditor.tsx and paste the following code:
import {
  DocumentHandle,
  useDocument,
  useEditDocument,
} from "@sanity/sdk-react";
import { type JSX, useCallback, useRef } from "react";

interface TitleEditorProps {
  documentHandle: DocumentHandle;
}

export function TitleEditor({ documentHandle }: TitleEditorProps): JSX.Element {
  const ref = useRef(null);
  // First, we fetch the current title from the document
  const { data: title } = useDocument({ ...documentHandle, path: "title" });
  // Then, we use the useEditDocument hook to create an edit function using the document handle
  const editMovieTitle = useEditDocument(documentHandle);

  // We use useCallback to create a stable event handler
  const handleTitleChange = useCallback(
    (event: React.ChangeEvent<HTMLInputElement>) => {
      const newTitle = event.target.value;
      // Use the functional updater for safe partial updates
      editMovieTitle((prev) => ({
        ...prev,
        title: newTitle,
      }));
    },
    [editMovieTitle]
  );

  return (
    <input
      type="text"
      ref={ref}
      value={typeof title === "string" ? title : ""}
      onChange={handleTitleChange}
      style={{
        fontSize: '1.25rem',
        fontWeight: 700,
        border: 'none',
        background: 'transparent',
        outline: 'none',
      }}
    />
  );
}
In this component we first use the useDocument hook to fetch the current value of title, and then we use useEditDocument to create a real-time edit function that is called on every change event from the input element.
Plural or singular? It makes a difference.
It's easy to get useDocument and useDocuments mixed up when scanning a guide like this. That rascally little s at the end means the difference between fetching lots of document handles and subscribing to the state of a single document.
👉 Remember to also update MoviePreview.tsx:
import {type DocumentHandle, useDocumentProjection} from "@sanity/sdk-react";
import {type JSX, useRef} from "react";
import { TitleEditor } from "./TitleEditor";

interface ProjectionResults {
  data: {
    title: string;
    cast: string;
    posterImage: string;
  };
}

// Project the title, first 2 cast members,
// and poster image values for the document
const movieProjection = `{
  title,
  'cast': array::join(castMembers[0..1].person->name, ', '),
  'posterImage': poster.asset->url,
}`;

export function MoviePreview({documentHandle}: {documentHandle: DocumentHandle}): JSX.Element {
  // Generate a ref for the outer element
  // This keeps the useDocumentProjection hook from resolving if
  // the preview is not currently displayed in the viewport
  const ref = useRef(null);

  // No async await here
  const {data: { title, cast, posterImage }}: ProjectionResults = useDocumentProjection({
    ...documentHandle,
    ref,
    projection: movieProjection,
  });

  return (
    <div
      // Assign the ref to the outer element
      ref={ref}
      style={{
        display: 'flex',
        flexDirection: 'column',
        gap: '0.5rem',
        border: '1px solid #e5e7eb',
        borderRadius: '0.5rem',
        padding: '1rem'
      }}
    >
      <img
        alt={`Poster for ${title}`}
        src={posterImage}
        style={{
          width: "100%",
          aspectRatio: "1",
          objectFit: "cover",
          borderRadius: "4px",
        }}
        width="400"
        height="400"
      />
      <TitleEditor documentHandle={documentHandle} />
      <p style={{
        fontSize: '0.875rem',
        color: '#4b5563',
        margin: '0'
        }}
        >
          {cast}
      </p>
    </div>
  );
}
You should be able to click any movie title and edit it. Open up your studio to observe the changes happening to the document in real time.