Functions quick start
Start building with Functions by initializing and deploying a new function to Sanity's infrastructure.
Functions allow you to run small, single-purpose code whenever your content in Sanity changes. This guide explains how to set up your project, initialize your first blueprint, add a function, and deploy it to Sanity's infrastructure.
Experimental feature
This article describes an experimental Sanity feature. The APIs described are subject to change and the documentation may not be completely accurate.
Prerequisites:
- The latest version of
sanityCLI (sanity@latest) is recommended to interact with Blueprints and Functions as shown in this guide. You can always run the latest CLI commands withnpx sanity@latest. - Node.js v22.x. We highly suggest working on this version as it is the same version that your functions will run when deployed to Sanity.
- An existing project and a role with Deploy Studio permissions (the
deployStudiogrant).
Avoid recursive loops
At this time, Sanity Functions limit recursive loops when using the @sanity/client v7.12.0 or later. Use caution when writing functions that may trigger themselves through document mutations. For example, don't publish a document with the client that meets the same criteria as the document that triggered it.
Initiating multiple recursive functions may trigger rate-limiting and may impact your usage limits sooner than expected. If you think you've deployed a recursive function or one that triggers too often, immediately override the deployment with new code, or destroy the blueprint.
Set up your project
To create your first function, you need to initialize a blueprint. Blueprints are templates that describe Sanity resources. In this case, a blueprint describes how your function and how it will respond to updates in your Sanity project. We recommend keeping functions and blueprints a level above your Studio directory.
For example, if you have a Marketing Website that uses Sanity, you may have a structure like this:
marketing-site/
├─ studio/
├─ next-app/
If you initialize the blueprint in the marketing-site directory, functions and future resources will live alongside the studio and next-app directory.
Functions and Blueprints match your workflow
While the example is our preferred way to organize Blueprints, Functions, and Sanity projects, you can initialize your first blueprint wherever you like. You can even store them inside your Studio directory.
Create a blueprint
Initialize your first blueprint with the init command. It will prompt you for the following:
- Project: Select your organization and project. This is the project that will trigger functions.
- Stack name: Create a name for your stack. Stacks are ways to identify a deployment of a blueprint. If you're just starting to test Functions, you can name this whatever you like, such as default. Learn more about stacks.
- Format: This guide uses TypeScript. For details on the other configuration types, check the Blueprint reference.
npx sanity@latest blueprints init
pnpm dlx sanity@latest blueprints init
yarn dlx sanity@latest blueprints init
bunx sanity@latest blueprints init
This creates a few configuration files in your project directory. If you selected TypeScript or JavaScript, it prompts you to install the dependencies. Follow the prompt and run the install command for your package manager of choice.
Create a function
Use the sanity blueprints add function command to add a new function. The CLI prompts you for the following:
- Function name: Set a name for your function. This determines the function name and the name of its directory. For this example, we'll call it "log-event".
- Function type: Select the document action that will trigger the function. For this example, select Document Create and Document Update.
- Function language: Select your preferred language. For this example, we'll select TypeScript.
npx sanity blueprints add function
pnpm dlx sanity blueprints add function
yarn dlx sanity blueprints add function
bunx sanity blueprints add function
After defining the name and selecting a type, follow the prompt and add the function declaration to your sanity.blueprint.ts configuration. Your file should look like this:
import {defineBlueprint, defineDocumentFunction} from '@sanity/blueprints'

export default defineBlueprint({
  resources: [
    defineDocumentFunction({name: 'log-event', event: {on: ['create', 'update']}}),
  ],
})
This is the minimal configuration for defining a function in a blueprint file. You can see all available options in the Function section of the Blueprints configuration reference documentation.
If you've followed the directory structure mentioned earlier, you'll see it grow to something like this:
marketing-site/
├─ studio/
├─ next-app/
├─ sanity.blueprint.ts
├─ package.json
├─ node_modules/
├─ functions/
│  ├─ log-event/
│  │  ├─ index.ts
After updating the sanity.blueprint.ts file, open functions/log-event/index.ts in your editor.
The documentEventHandler function
TypeScript functions can take advantage of the documentEventHandler helper function to provide type support. Examples in this article include both TypeScript and JavaScript function syntax.
Every function exports a handler from the index file.
import { documentEventHandler } from '@sanity/functions'

export const handler = documentEventHandler(async ({ context, event }) => {
  const time = new Date().toLocaleTimeString()
  console.log(`👋 Your Sanity Function was called at ${time}`)
})
export async function handler({context, event}) {
const time = new Date().toLocaleTimeString()
console.log(`👋 Your Sanity Function was called at ${time}`)
}The handler receives a context and an event. The context contains information to help you interact with your Sanity datastore, such as clientOptions to configure a @sanity/client.
The event contains information about the action that triggered the function. Most functions will use event.data, which contains the contents of the Sanity document. You can learn more in the Function handler reference.
Limit the scope with GROQ
As configured, this function will run every time any document publishes and return the entire document to event.data. This includes system documents. You'll almost always want to scope your functions to specific scenarios and document types with GROQ filters.
GROQ is a powerful query language that includes a plethora of operators and a suite of advanced functions, such as delta functions (to help you determine what in a document changed as well as how it changed) and geolocation functions. Check out the GROQ Query Cheat Sheet for ideas on different GROQ queries that can power your Functions as your content changes!
Open the sanity.blueprint.ts file and update it to include an event object with the on and filter properties:
import {defineBlueprint, defineDocumentFunction} from '@sanity/blueprints'

export default defineBlueprint({
  resources: [
    defineDocumentFunction({
      name: 'log-event',
      event: {
        on: ['create', 'update'],
        filter: '_type == "post"'
      }
    }),
  ],
})
The on property takes an array of trigger events:
create: Fires when a new document is created for the first time.update: Fires when changes are made to an existing document.delete: Fires when a document is deleted.
For existing, published documents, update will only trigger when a draft or version is published and updates the document. In many cases where you'd use update on published documents, it may be better to use ['create', 'update']. Learn more about document lifecycles.
filter accepts a GROQ filter that limits which documents will trigger the function. Only include the filter contents, the portion inside the square brackets, of your GROQ query. For example, rather than *[_type == 'post'], only include _type == 'post'.
You can also include a projection property on event to shape the contents passed to the event. If you wish for your Function to receive an object containing your document attributes, ensure your projection is wrapped in curly braces ({}).
import {defineBlueprint, defineDocumentFunction} from '@sanity/blueprints'

export default defineBlueprint({
  resources: [
    defineDocumentFunction({
      name: 'log-event',
      event: {
        on: ['create', 'update'],
        filter: '_type == "post"',
        projection: "{_id, content}"
      }
    }),
  ],
})
Projections don't limit what fields trigger the function, only which data is passed into the function.
Finally, two boolean filters are available: includeDrafts and includeAllVersions. For create, delete, and update document change events, these default to false. For the full reference, see Blueprints Configuration.
Test the function locally
You can test functions locally with the functions development playground. Local testing is a great way to experiment without affecting your usage quota.
To launch the development playground, run the following:
pnpx sanity functions dev
If you run this on the starter function from earlier, you'll see the default output message in the console pane.
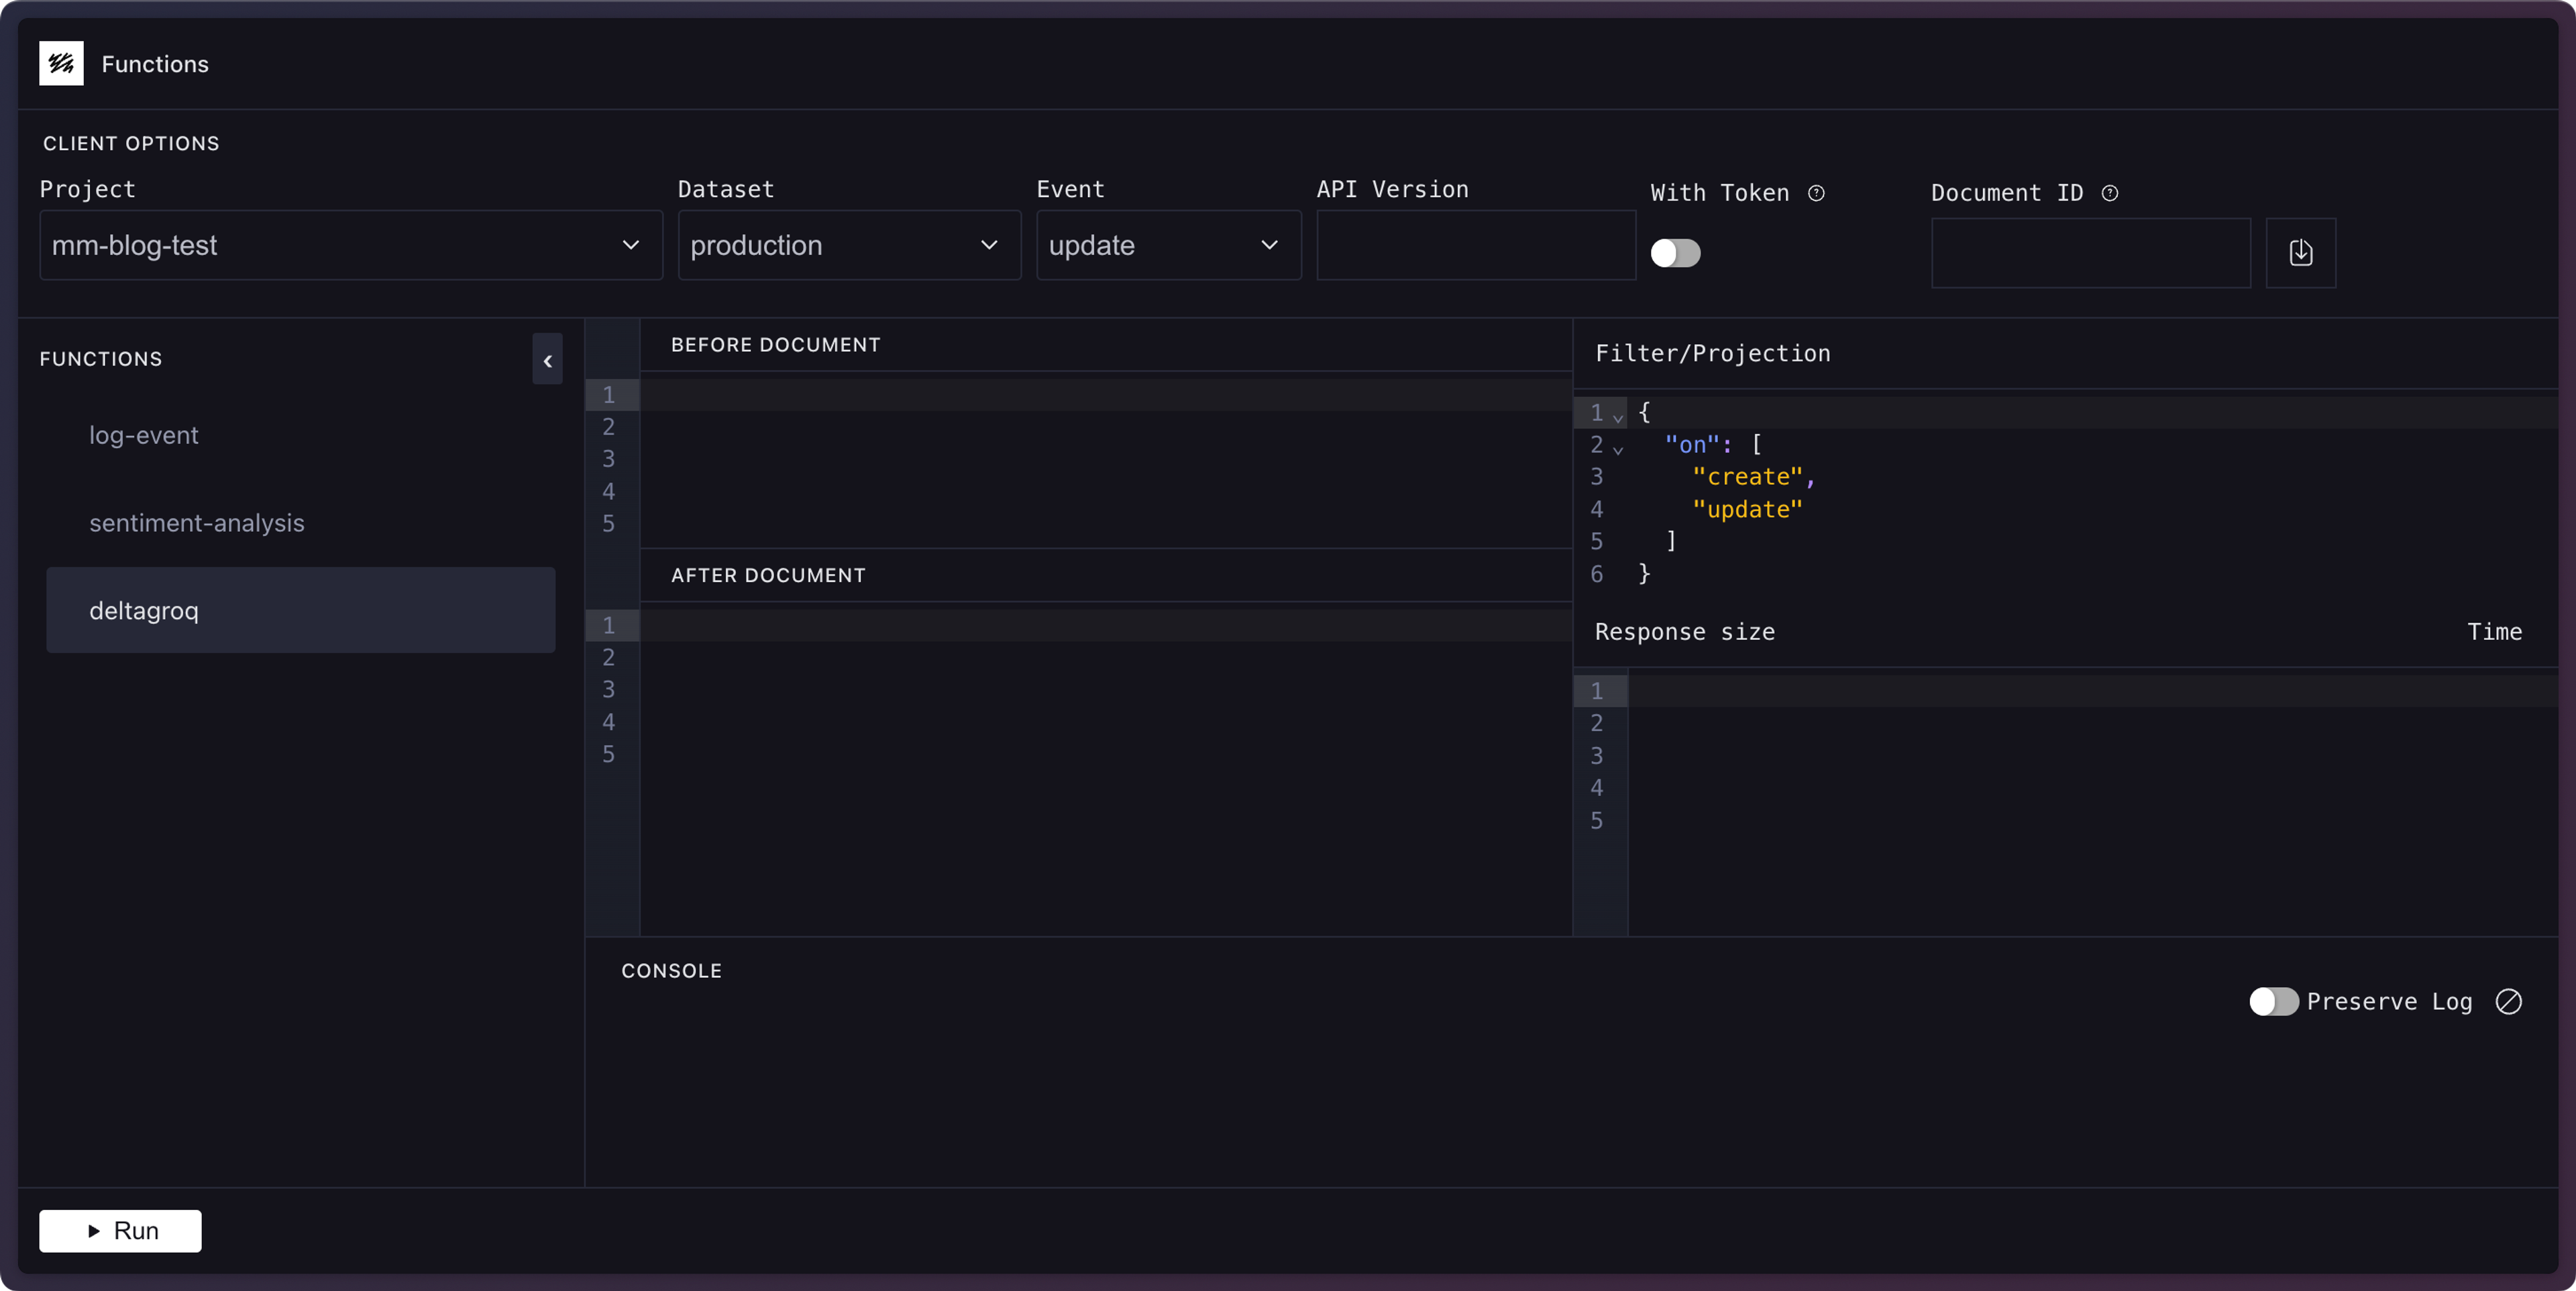
To test with real data from your project, you can pass a document _id and select a project/dataset to fetch a document and pass it to the function's event. Don't forget to press the download button next to the document ID to populate the input. You can also manually enter a document-like shape. In either case, make sure it matches your projection criteria.
Update your function to log the event and you'll see the supplied document details the next time you run the function in the playground.
import { documentEventHandler } from '@sanity/functions'

export const handler = documentEventHandler(async ({ context, event }) => {
  const time = new Date().toLocaleTimeString()
  console.log(`👋 Your Sanity Function was called at ${time}`)
  console.log('Event:', event)
})
export async function handler({context, event}) {
const time = new Date().toLocaleTimeString()
console.log(`👋 Your Sanity Function was called at ${time}`)
console.log('Event:', event)
}Development playground
In addition to the sanity functions dev command, there's also a more traditional CLI testing interface.
Run the sanity functions test functionName command to run the function locally. You can learn more in the local testing guide and the functions CLI reference.
Deploy a function
Once you're satisfied that the function works as expected, you can deploy it by deploying the blueprint.
npx sanity blueprints deploy
pnpm dlx sanity blueprints deploy
yarn dlx sanity blueprints deploy
bunx sanity blueprints deploy
You can begin using your function when the deployment is finished. If you set a filter earlier, edit a document that matches it and publish the changes to trigger the function.
If you need to change the function, update your code and re-run the deploy command to push the new changes live.
Check the logs
When you tested the function locally, you saw the logs directly in your console. Once deployed, the function and its logs are in the cloud.
View the logs with the functions logs command. Replace log-event with your function name.
npx sanity functions logs log-event
pnpm dlx sanity functions logs log-event
yarn dlx sanity functions logs log-event
bunx sanity functions logs log-event
This command outputs the function's logs. Try updating your document, publishing the change, and running the command again to see new logs.
System documents
If you didn't limit the scope of the function by setting a GROQ filter earlier, every change to a published document will run the function. This can greatly increase your usage, so it's best to create specific filters for your documents.
Destroy a deployed blueprint
Sometimes you want to remove a deployed function so it won't run anymore or affect any future usage quotas. The blueprints destroy command removes, or undeploys, the blueprint and all of its functions from Sanity's infrastructure. It does not remove your local files.
Remove the test function:
npx sanity blueprints destroy
pnpm dlx sanity blueprints destroy
yarn dlx sanity blueprints destroy
bunx sanity blueprints destroy
To remove the function from the blueprint locally, you can remove it from the resources array in the sanity.blueprint.ts file, then delete the log-event folder from the functions directory.
Redeploying a destroyed blueprint
When you run blueprints destroy, it's as if you never used blueprints init during setup. The only difference is you still have all the files in your directory. To use this blueprint again and redeploy it, you'll need to let Sanity know about it. You can do this by running init again:
npx sanity blueprints init
pnpm dlx sanity blueprints init
yarn dlx sanity blueprints init
bunx sanity blueprints init
This launches an editing interface that lets you reconfigure the blueprint, if needed, and it reconnects the blueprint to Sanity. Now you can add more functions or redeploy. Keep in mind that any environment variables added before destroying the blueprint will not carry over.
Was this page helpful?