Roles
Sanity enforces user access control with roles. Roles help control resource access to datasets and documents.
You can manage access to content and settings in your Sanity Content Lake by setting roles and permissions for project members. Each member may have different roles for granular access control to your Content Lake. All projects have default roles available, but you can also create custom roles that define granular access to datasets and project settings. You can also use GROQ to define custom content resources. Content permissions are typically set to either all or individual datasets, but you can use Tags to group datasets that should share permissions.
Roles and permissions can be configured through the API, or through the project settings available at sanity.io/manage. This article will focus mainly on the latter option.
Default roles per plan
Each plan type has access to specifically defined roles. Custom roles are available for Enterprise customers.
Administrator
All plans
Read and write access to all datasets, with full access to all project settings.
Viewer
All plans
Read-only access to all datasets, with no access to project settings. Note: viewers can comment in projects where comments are enabled.
Editor
Growth and Enterprise
Read and write access to all datasets, with limited access to project settings.
Editors can modify existing datasets, but cannot create new ones.
Developer
Growth and Enterprise
Read and write access to all datasets, with access to project settings for developers.
Contributor
Growth and Enterprise
Read and write access to draft content within all datasets, with no access to project settings. Can write but not publish documents.
Custom
Enterprise
Fully custom roles and permissions, with custom access to project settings.
Assigning roles to members
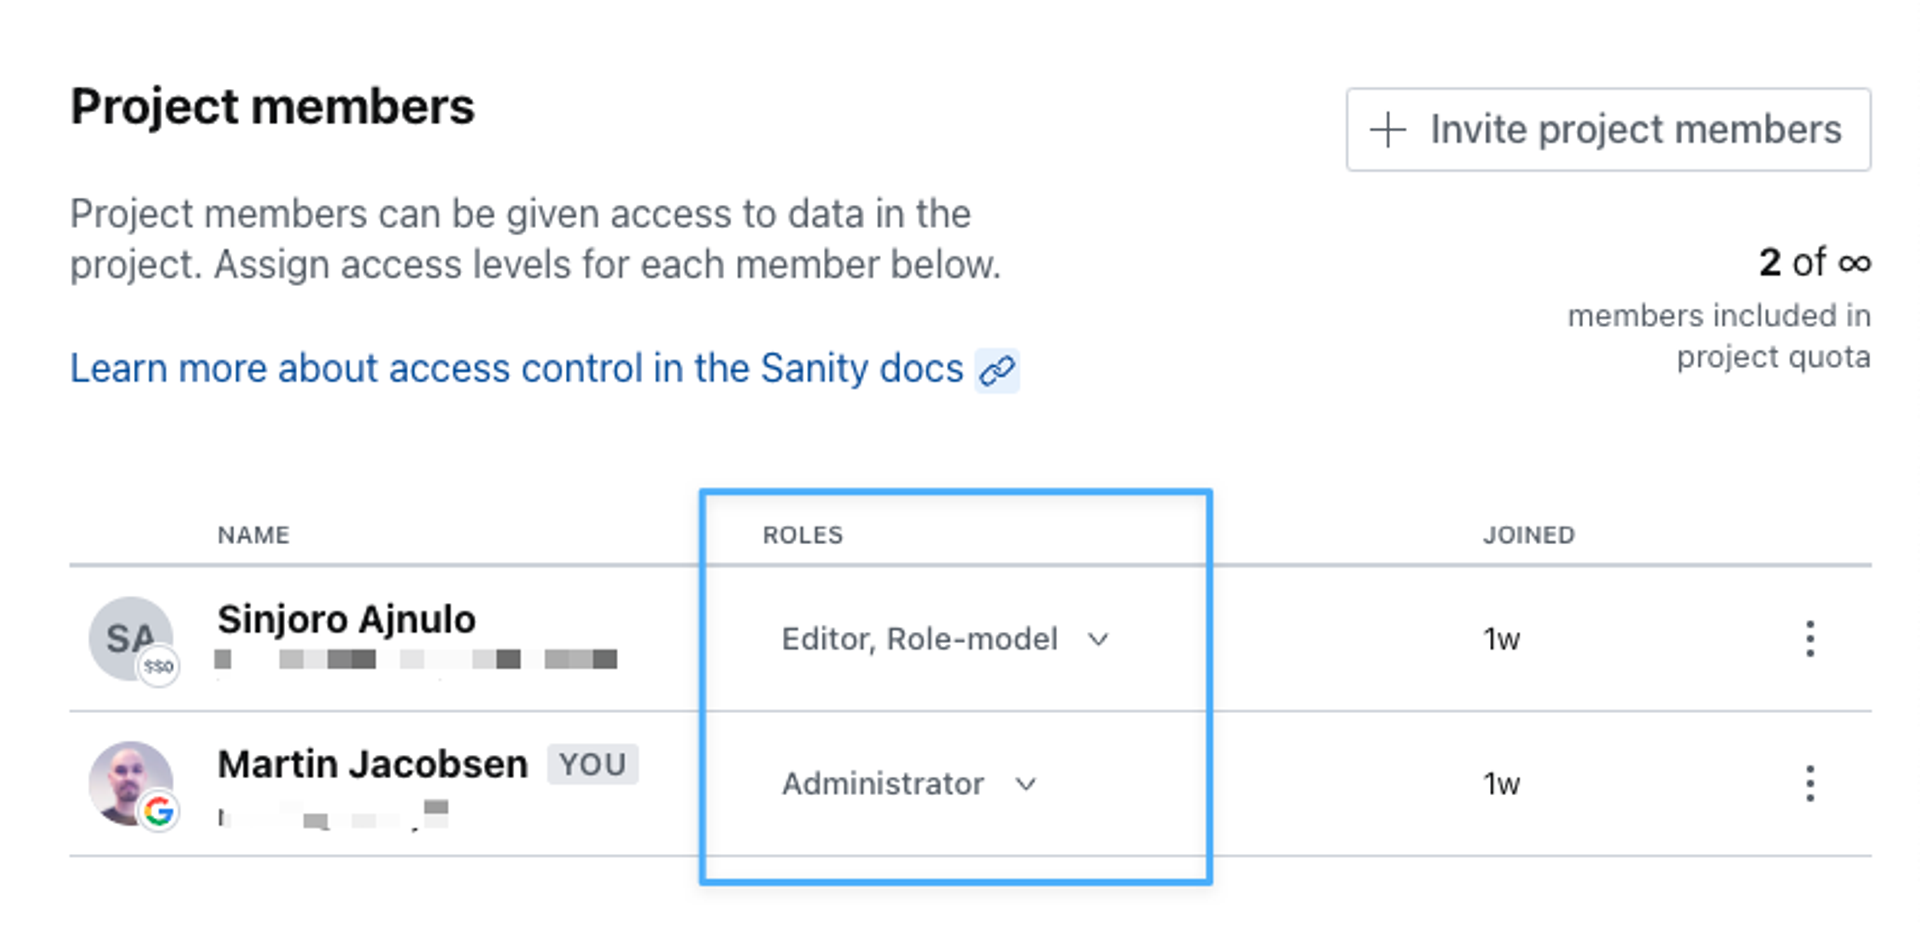
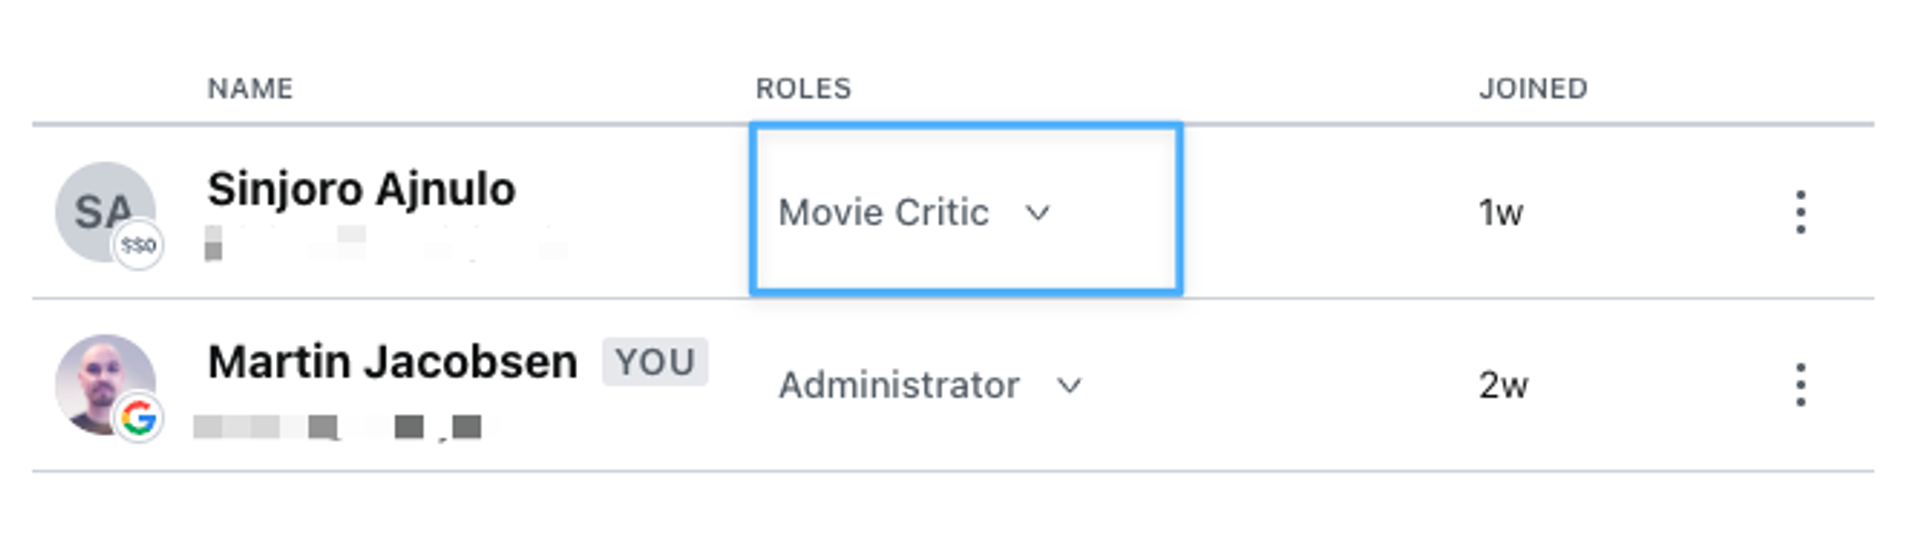
To assign roles to users, navigate to the Member section in your project settings at sanity.io/manage. You'll see each project member's roles listed by their name and login info.
When using Single Sign-On (SSO), roles can be automatically assigned to users using rules that evaluate each user’s group membership in your identity provider. Role assignment can be restricted to be set only through mapping rules, or allow for manual modification. If role assignment is restricted to be set only through mapping rules, you cannot manually change the role of a user in this screen.
Creating custom roles
This is a paid feature
This feature is available on certain Enterprise plans. Talk to sales to learn more.
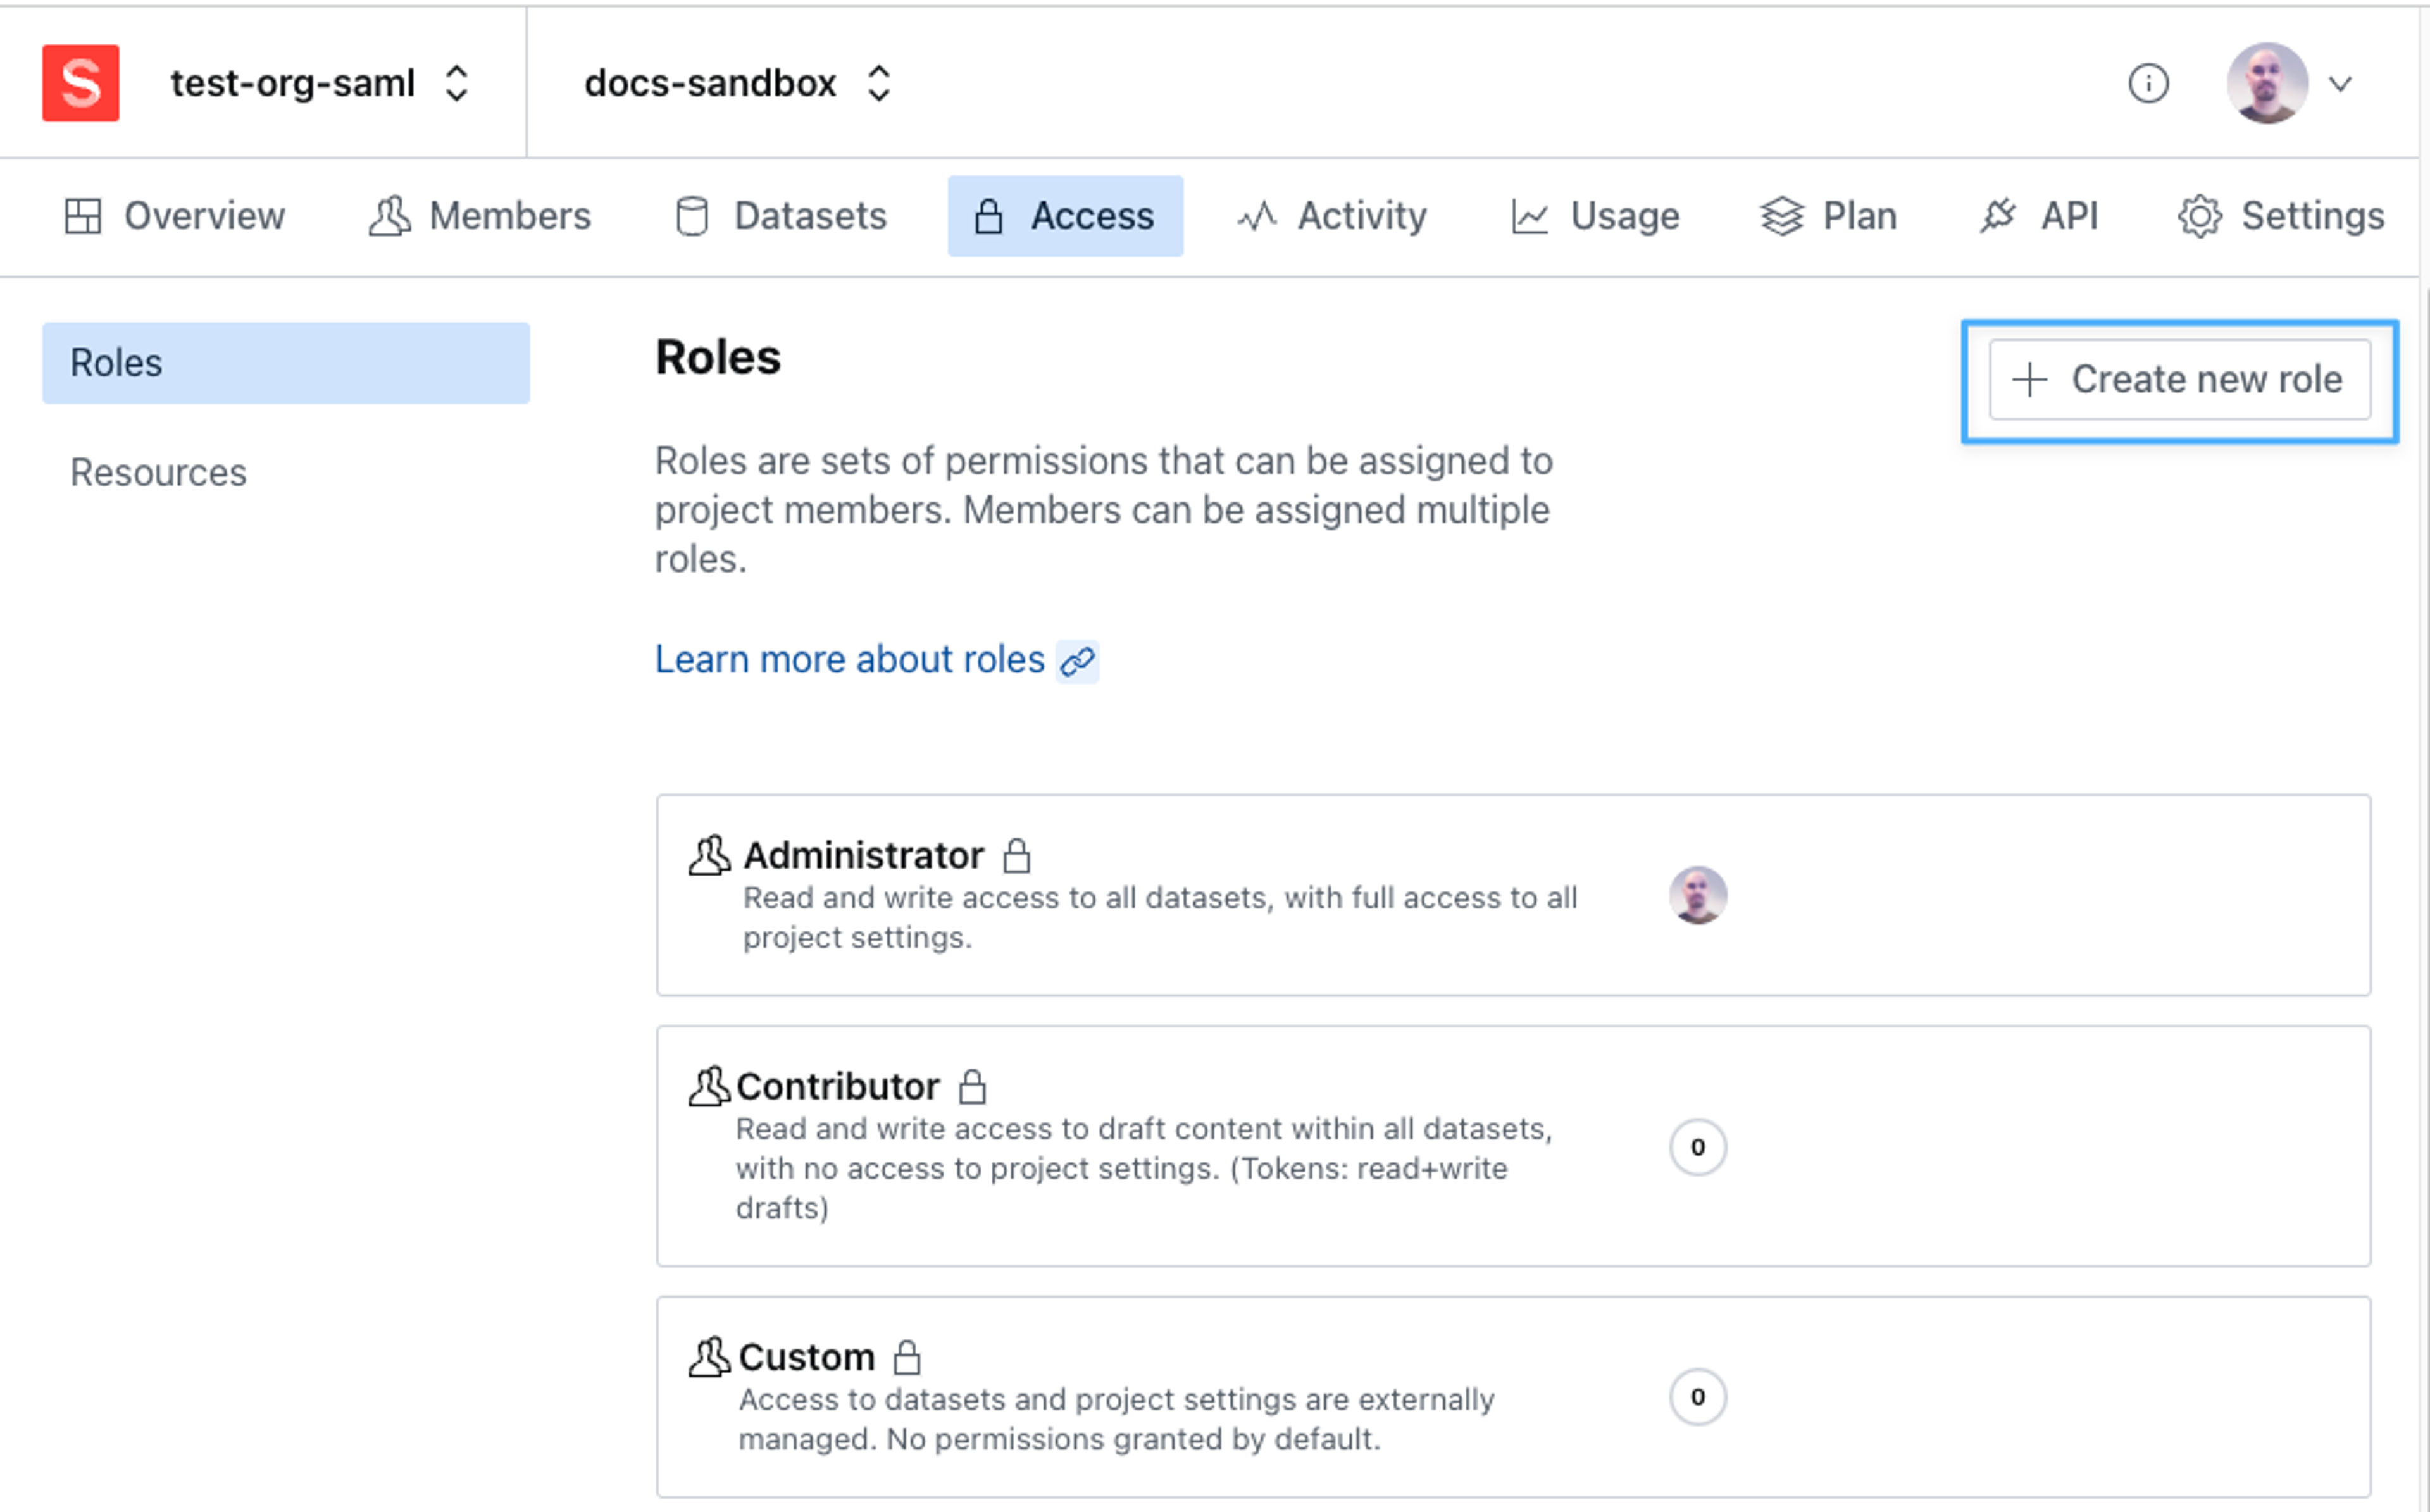
To define custom roles, navigate to the Access tab in your project settings. You will see a list of your currently defined roles with a summary of each role's access privileges. To create a new custom role, click the button in the upper right corner.
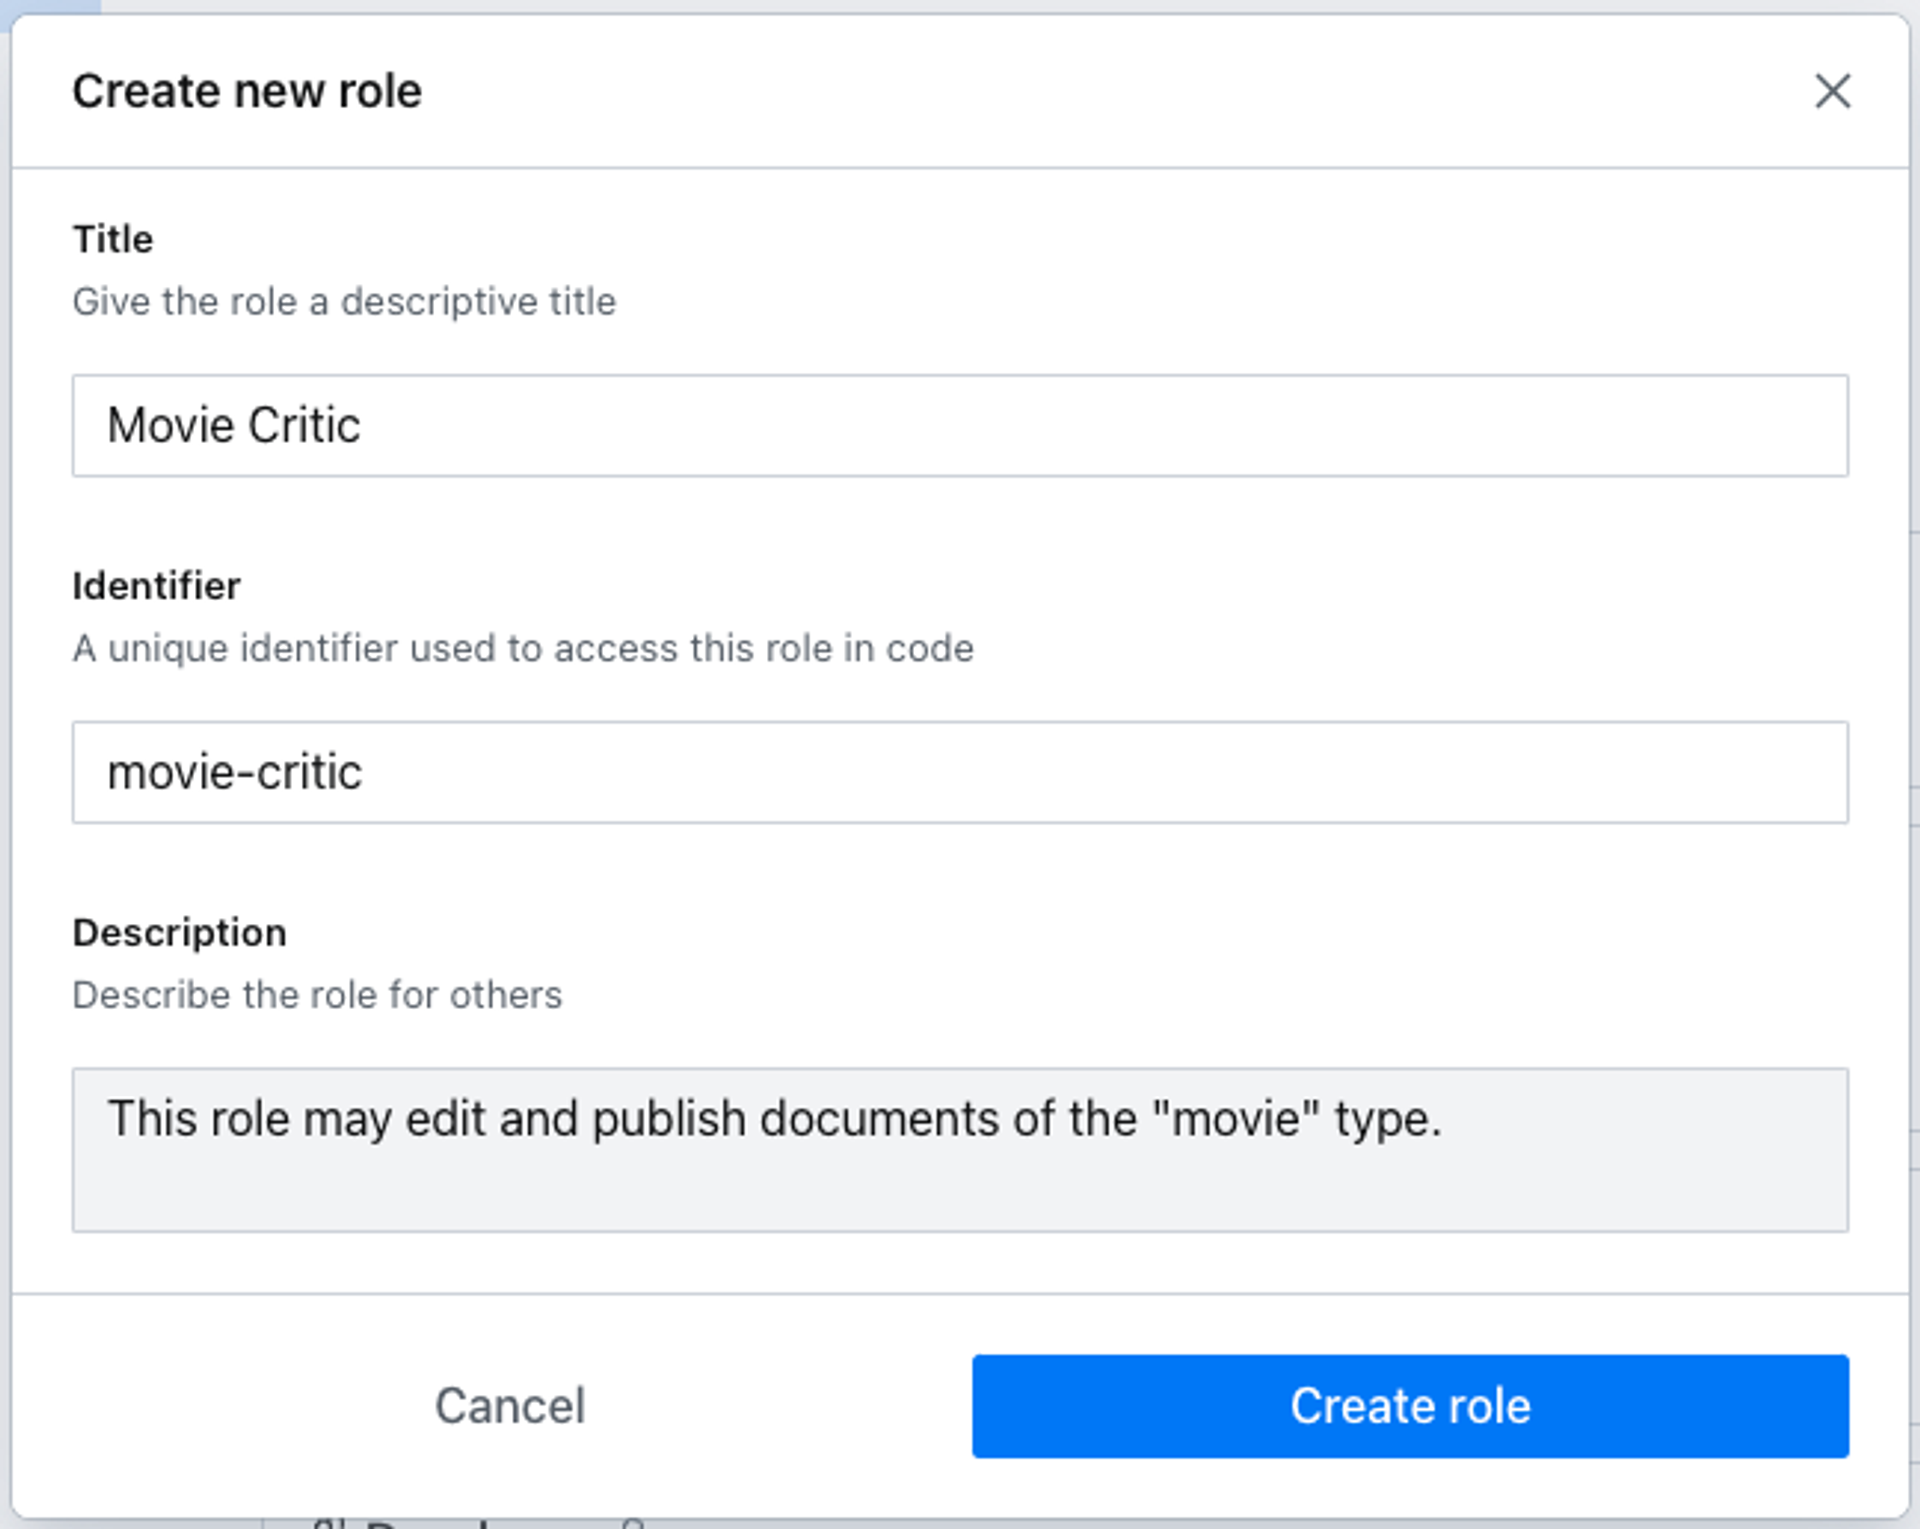
You will be asked to provide some basic details for your role.
Once created you'll have the option of adding members to the role or proceeding to define permissions and restrictions. These are divided into two main categories: Content Permissions and Management Permissions.
About viewer roles
Users with the "Viewer" role are free and don't count toward a plan's available seats. If a user with the viewer role is assigned an additional role, that user will count as a billable user.
Gotcha
Only the built-in viewer role is considered a "free viewer." Any custom role, even if it only grants read-only access, is billed as a regular user.
Management Permissions
These settings grant a role access to your project's settings which are typically accessed in the project management console at sanity.io/manage. Access to a project's details and usage statistics, members and roles, API settings, and datasets and tags are currently available for configuration.
Gotcha
In order for a role to have access to the project, Project Details should be set to read. For content editor roles, also setting Project Members to read will ensure they get the best studio experience with the full advantage of Presence features.
Content permissions
This is where you define the role's access to your Content Lake. You can grant any role wide-reaching privileges that extend to all your datasets or use GROQ filters to set up granular access to only certain content types.
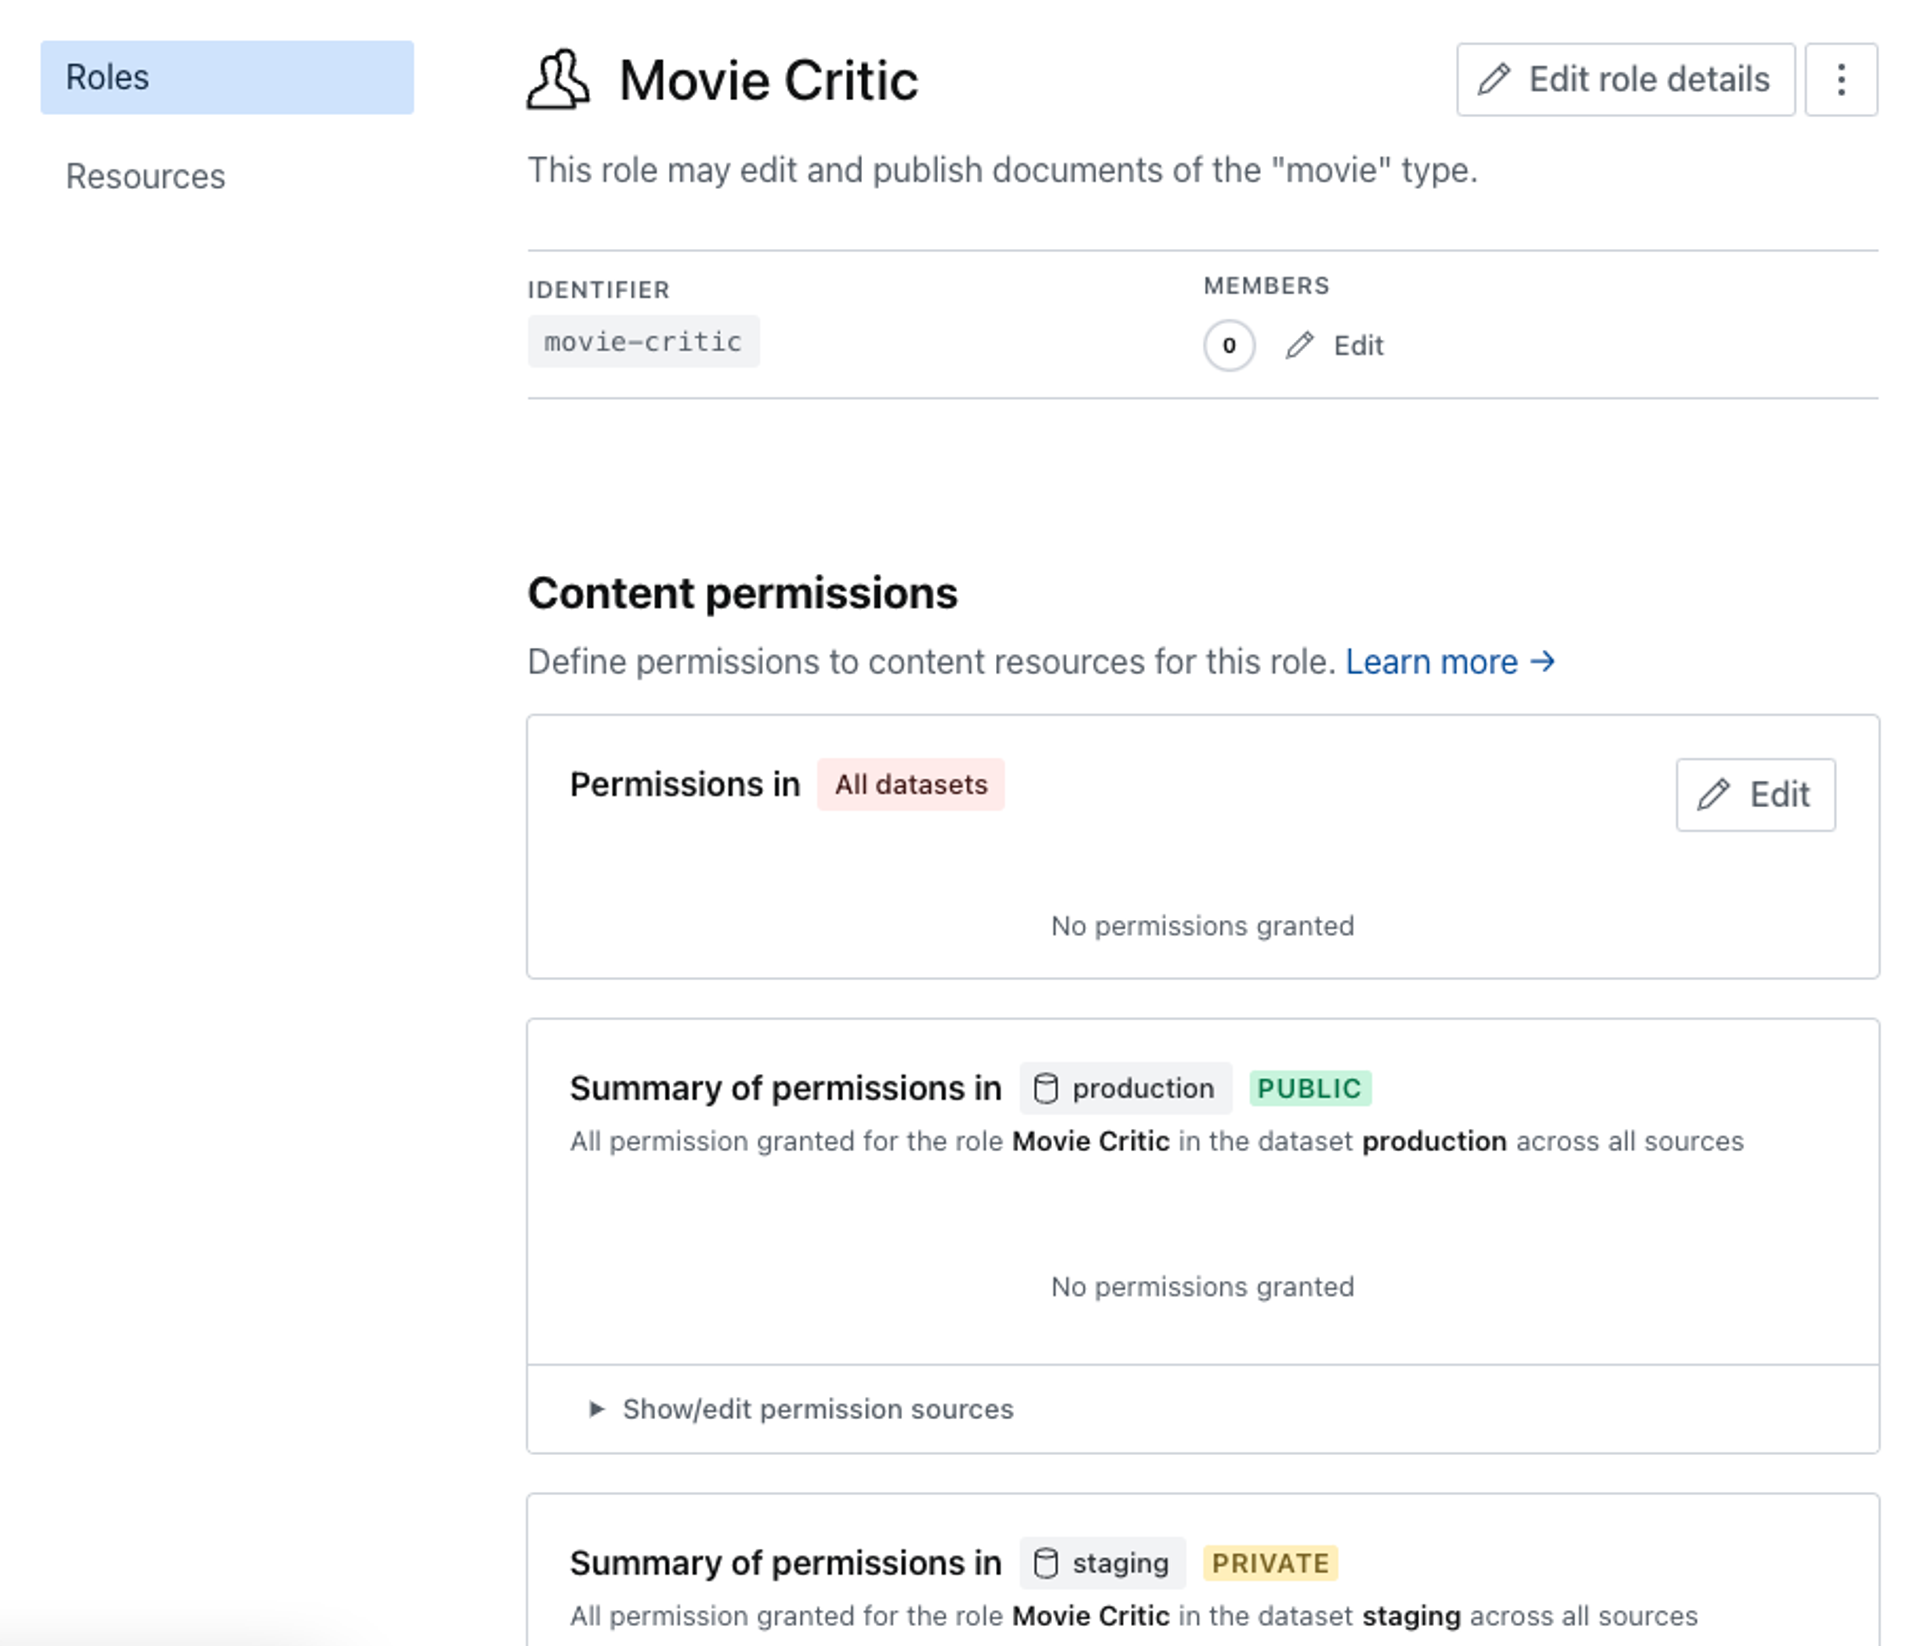
Once you've navigated to the role you want to configure you'll be presented with a list of your datasets that can be individually configured, as well as the opportunity to set some base permissions for all datasets.
By default, all permissions are set to No access. Permissions cascade down from more general contexts to more specific ones, so it's generally better to start restrictive and grant privileges on each dataset separately as any permission granted on All datasets will override more restrictive settings in the individual datasets.
Gotcha
Permissions are additive in nature.
That means you cannot remove a permission that has been granted to a role elsewhere.
Example: If you defined that a role has publish rights for all documents in all datasets, it is impossible to define a resource (via GROQ filter) which only grants read access to a specific subset of documents.
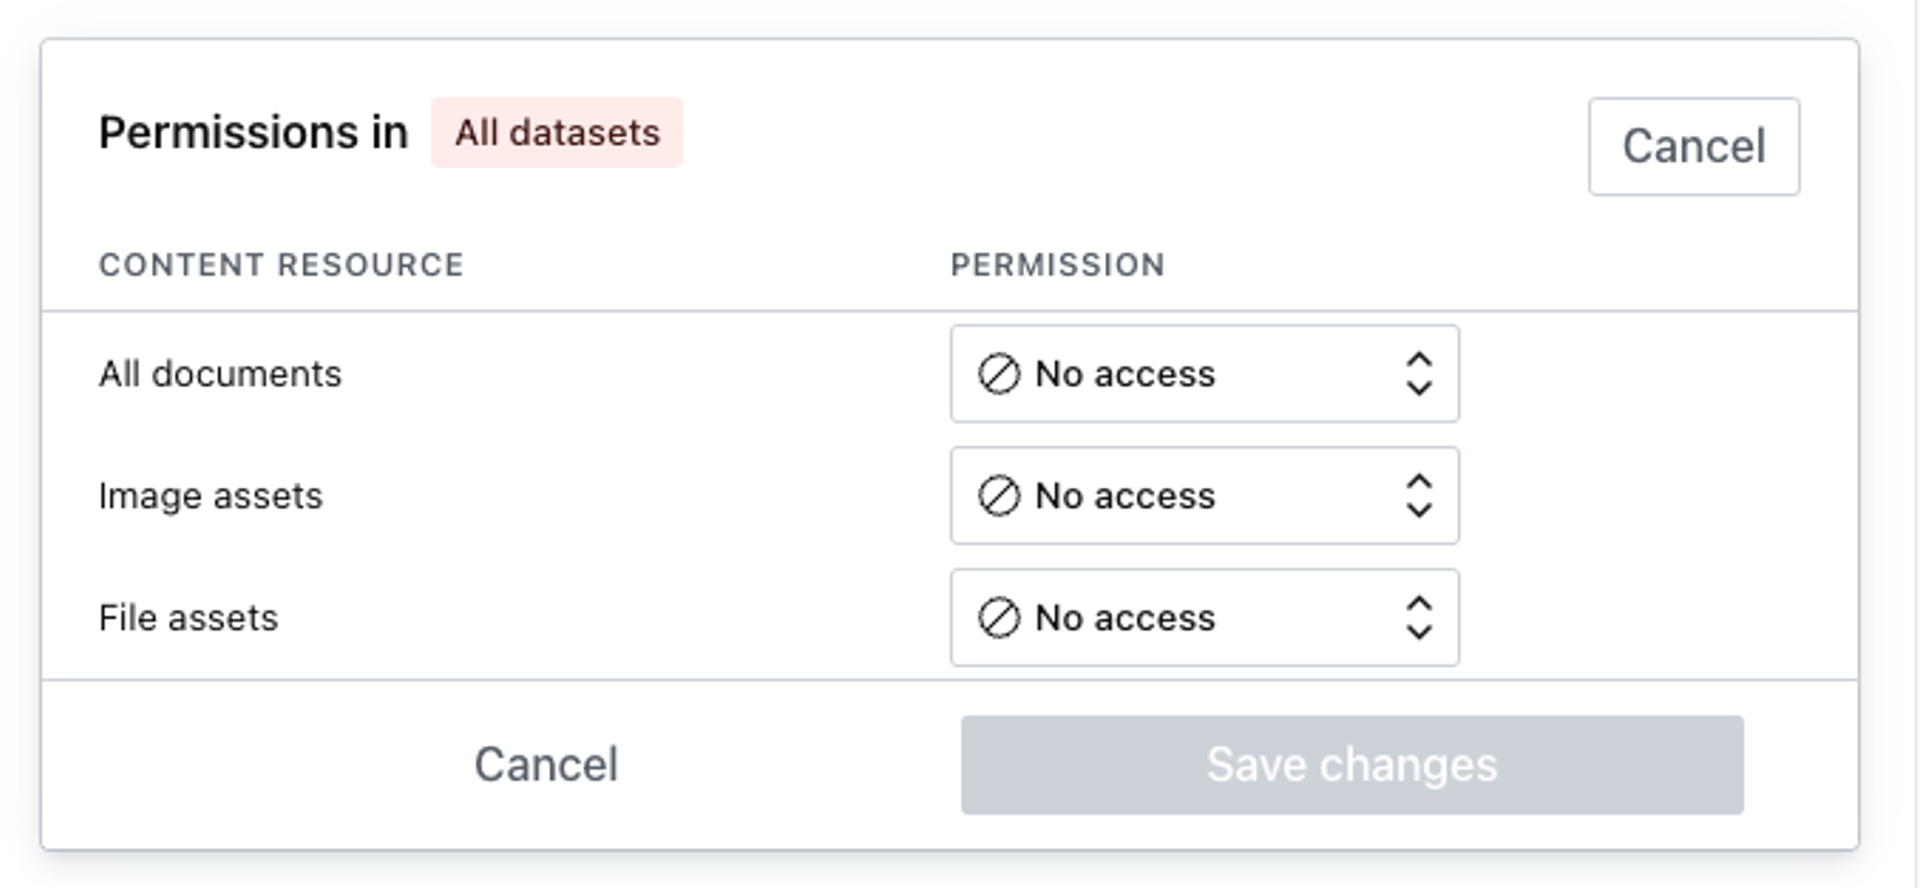
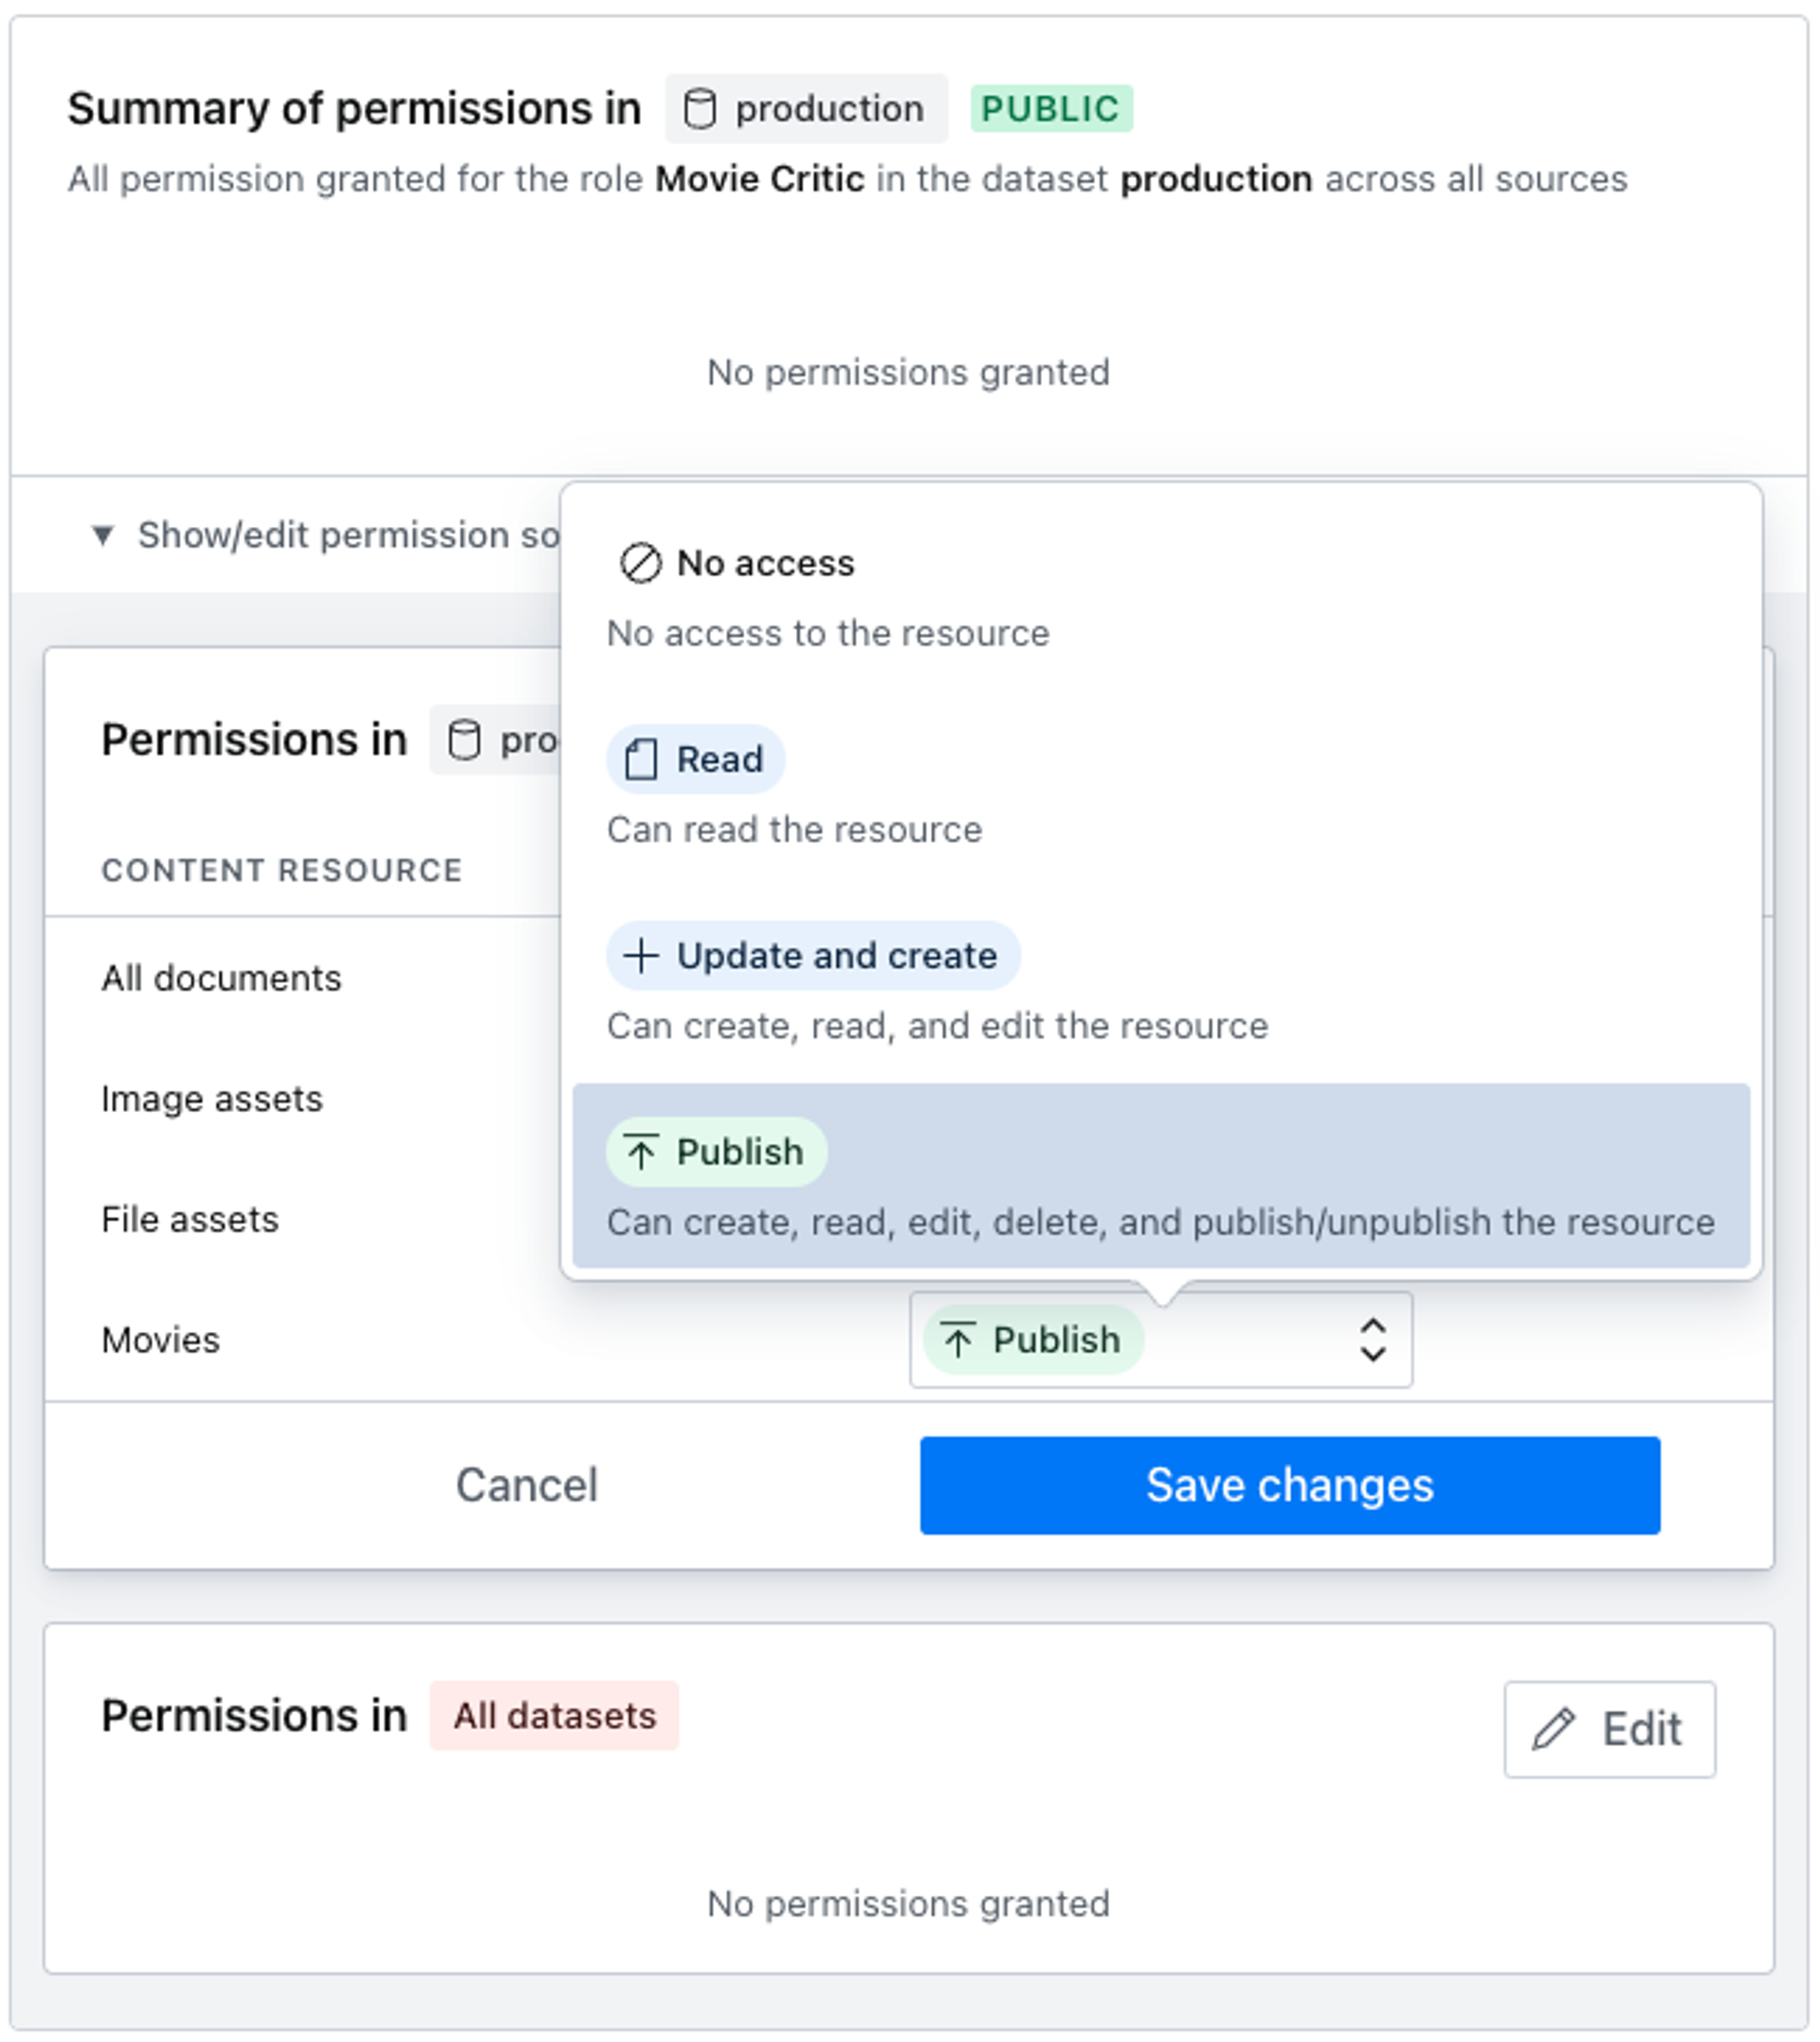
This hereditary characteristic of permissions is visualized when you go to edit the permission for a single dataset. The dialog shown below demonstrates how the final permissions for the dataset are derived from both the privileges set generally for all datasets and from the privileges set specifically for this dataset.
The base set of content resources available for access control are general in nature but powerful enough to cover many use-cases. You may grant privileges to read, create and update, and publish each of the widely encompassing options; All documents, Image assets, and File assets.
Gotcha
If your dataset is public all project members will have read access to your published content even if their role is set to no access!
Content resources
This is a paid feature
This feature is available on certain Enterprise plans. Talk to sales to learn more.
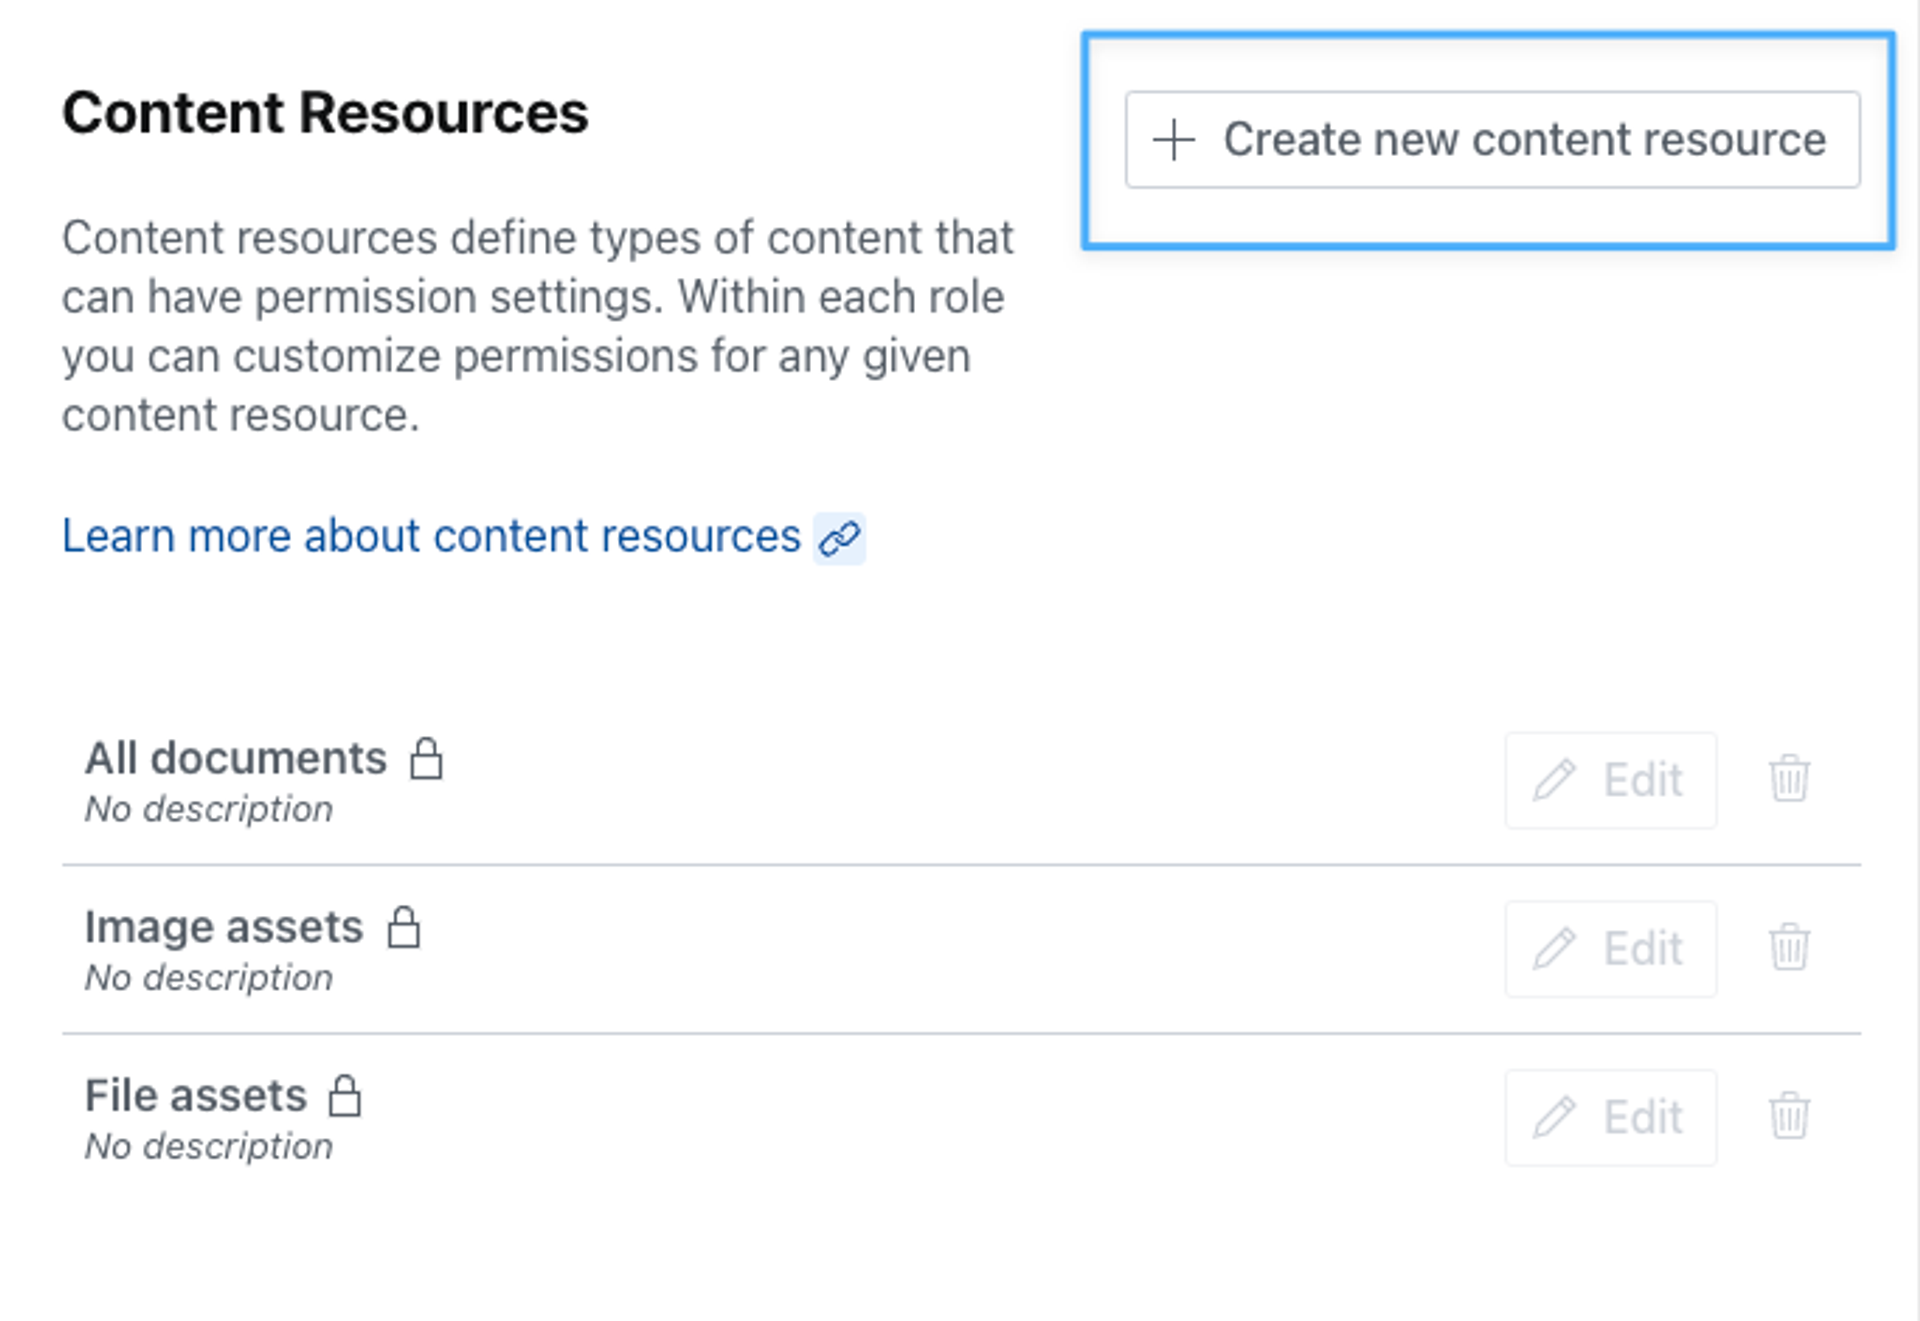
In addition to the basic set of permission scopes that lets you configure access to All documents, Image assets, and File assets, you may also create custom content resources to control access to particular content types, which you may then control the access to with your custom roles. To create a new content resource, find the Resources section in the left column menu, under the Access tab.
Gotcha
The filter does not support dereferencing! This will not work: referenceField->! Instead, check against the _ref property when creating custom resources: referenceField._ref == "my-referenced-doc-id".
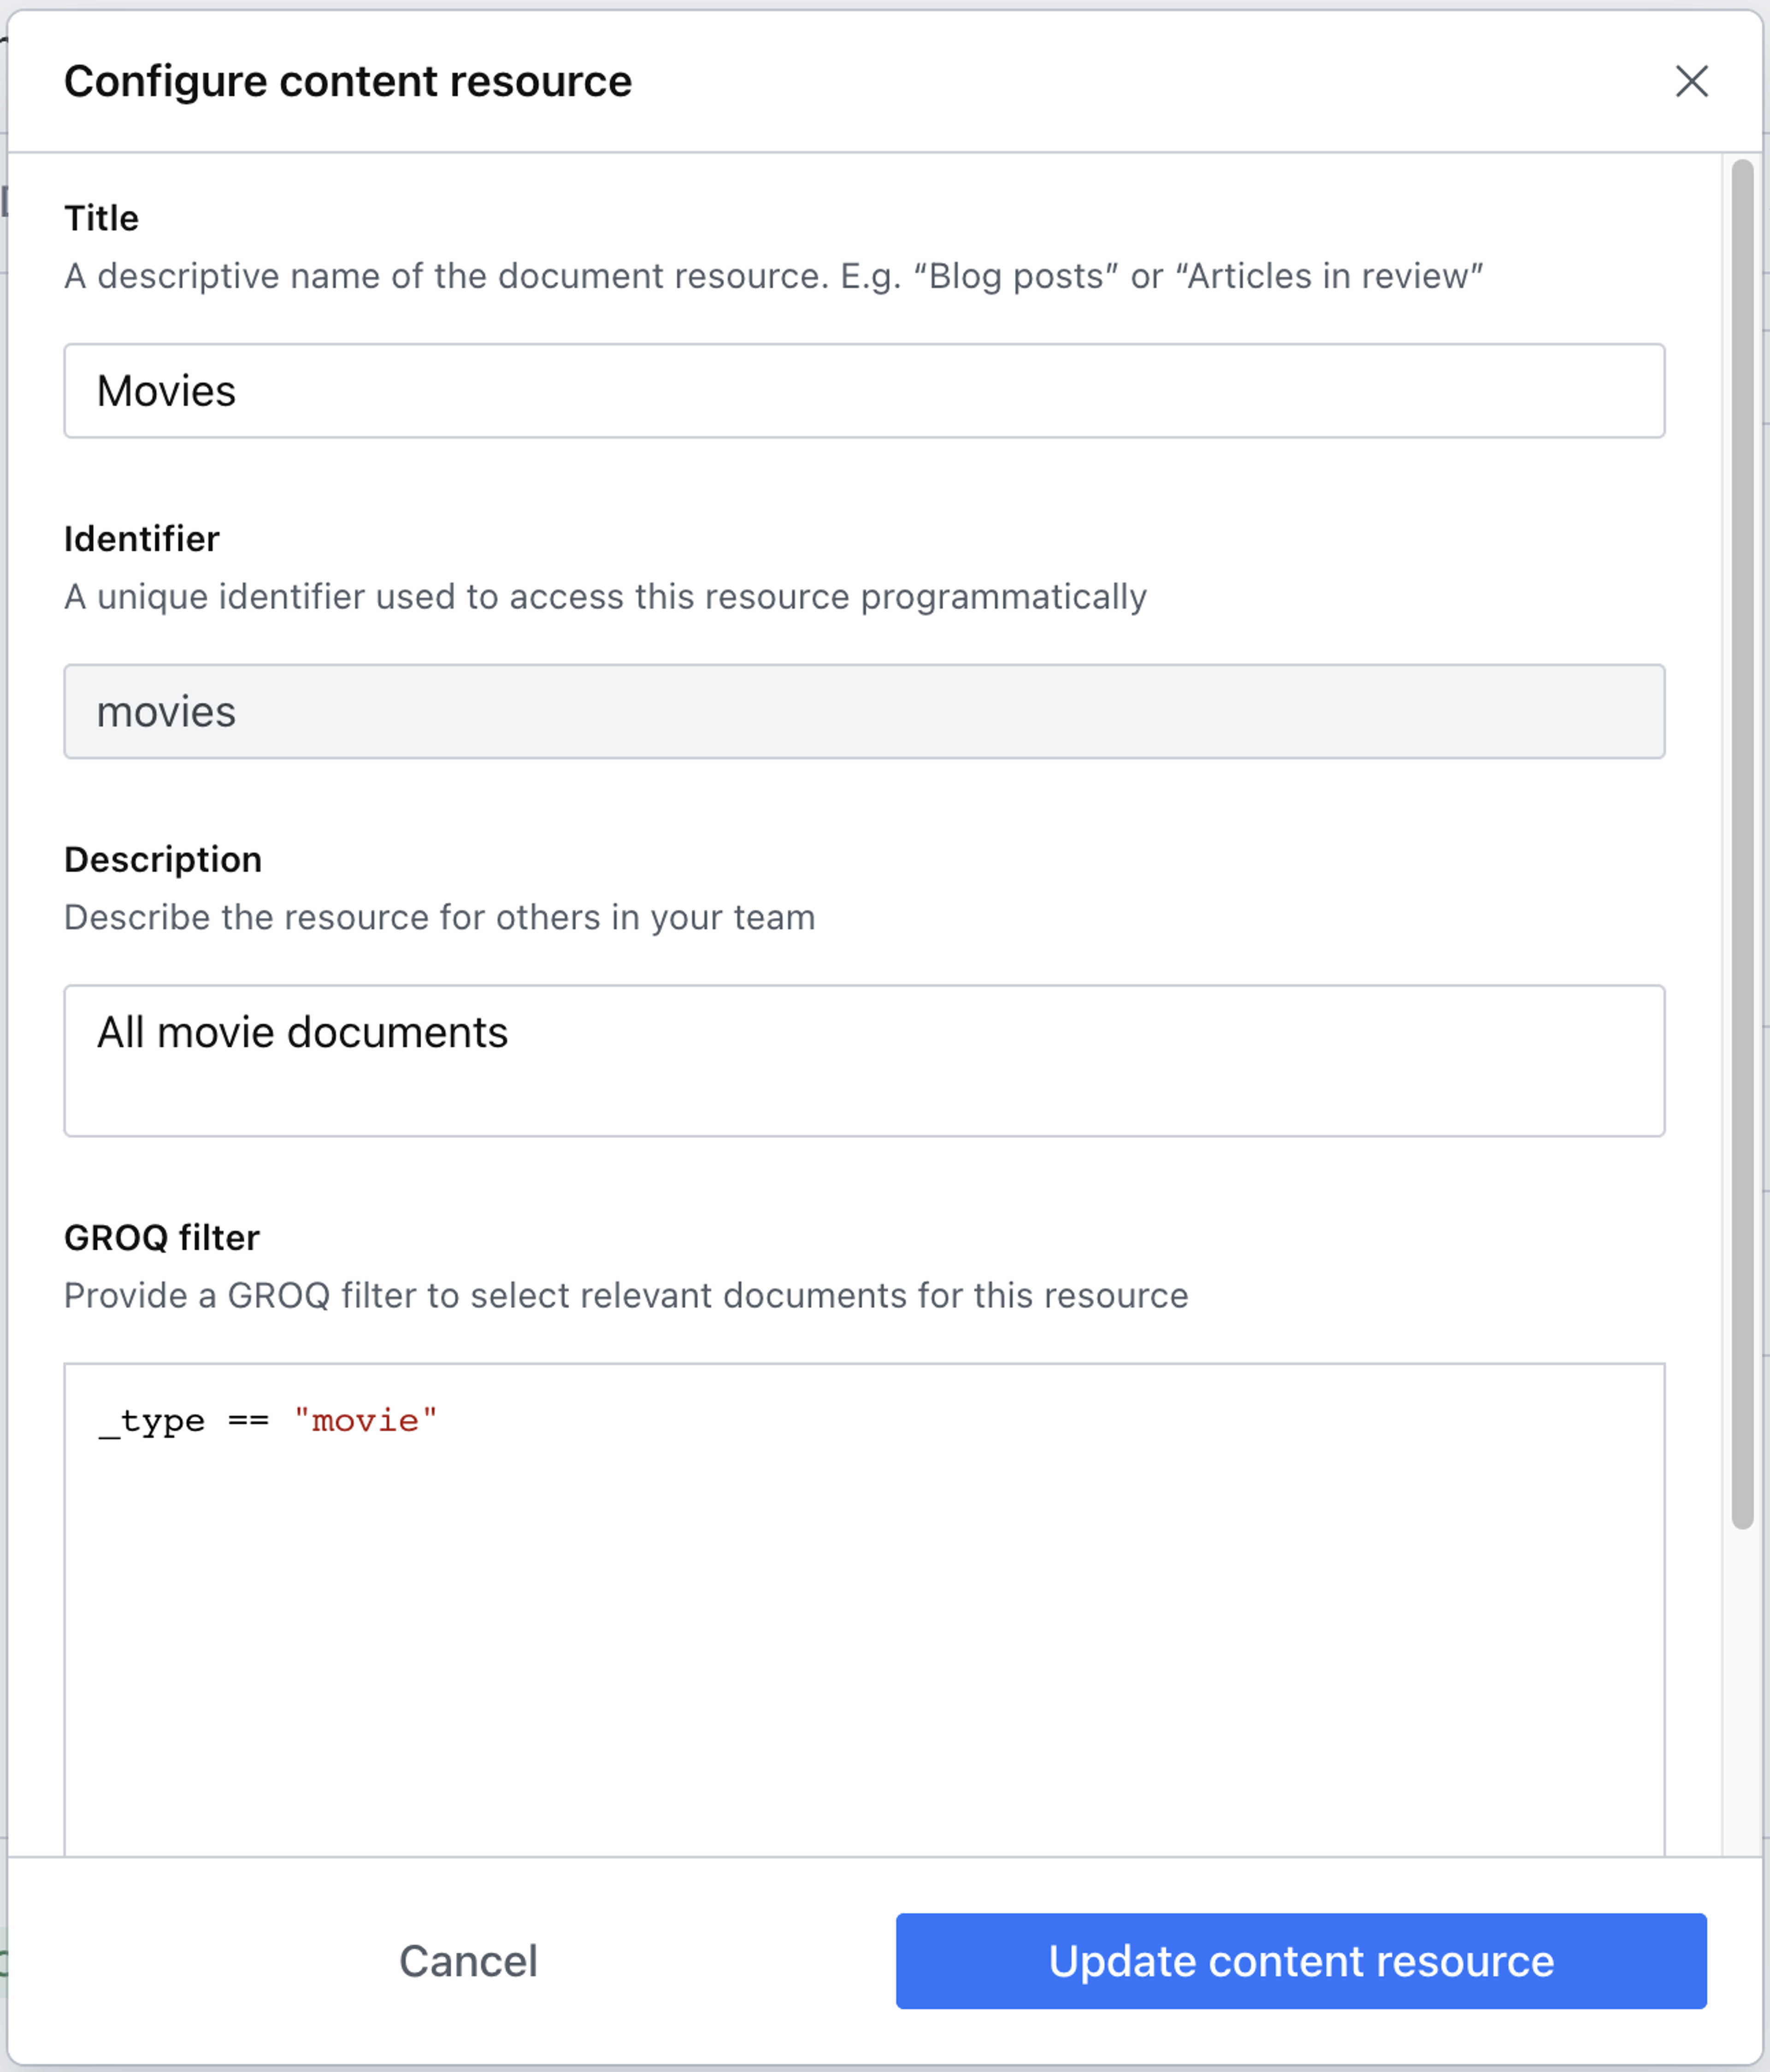
In our example, we'll be working with the default starter template called Movie Project. This gives us a prefilled dataset with content types like movie, person, and screening. Click the button in the top right of the section to create a new content resource.
Content resources leverage the power of GROQ to filter which content types are affected by the privileges you choose to grant. In this example, we're using a simple but powerful GROQ expression to return only documents of type movie.
Protip
GROQ is Sanity's open-source query language for JSON. Learn more about GROQ in the docs!
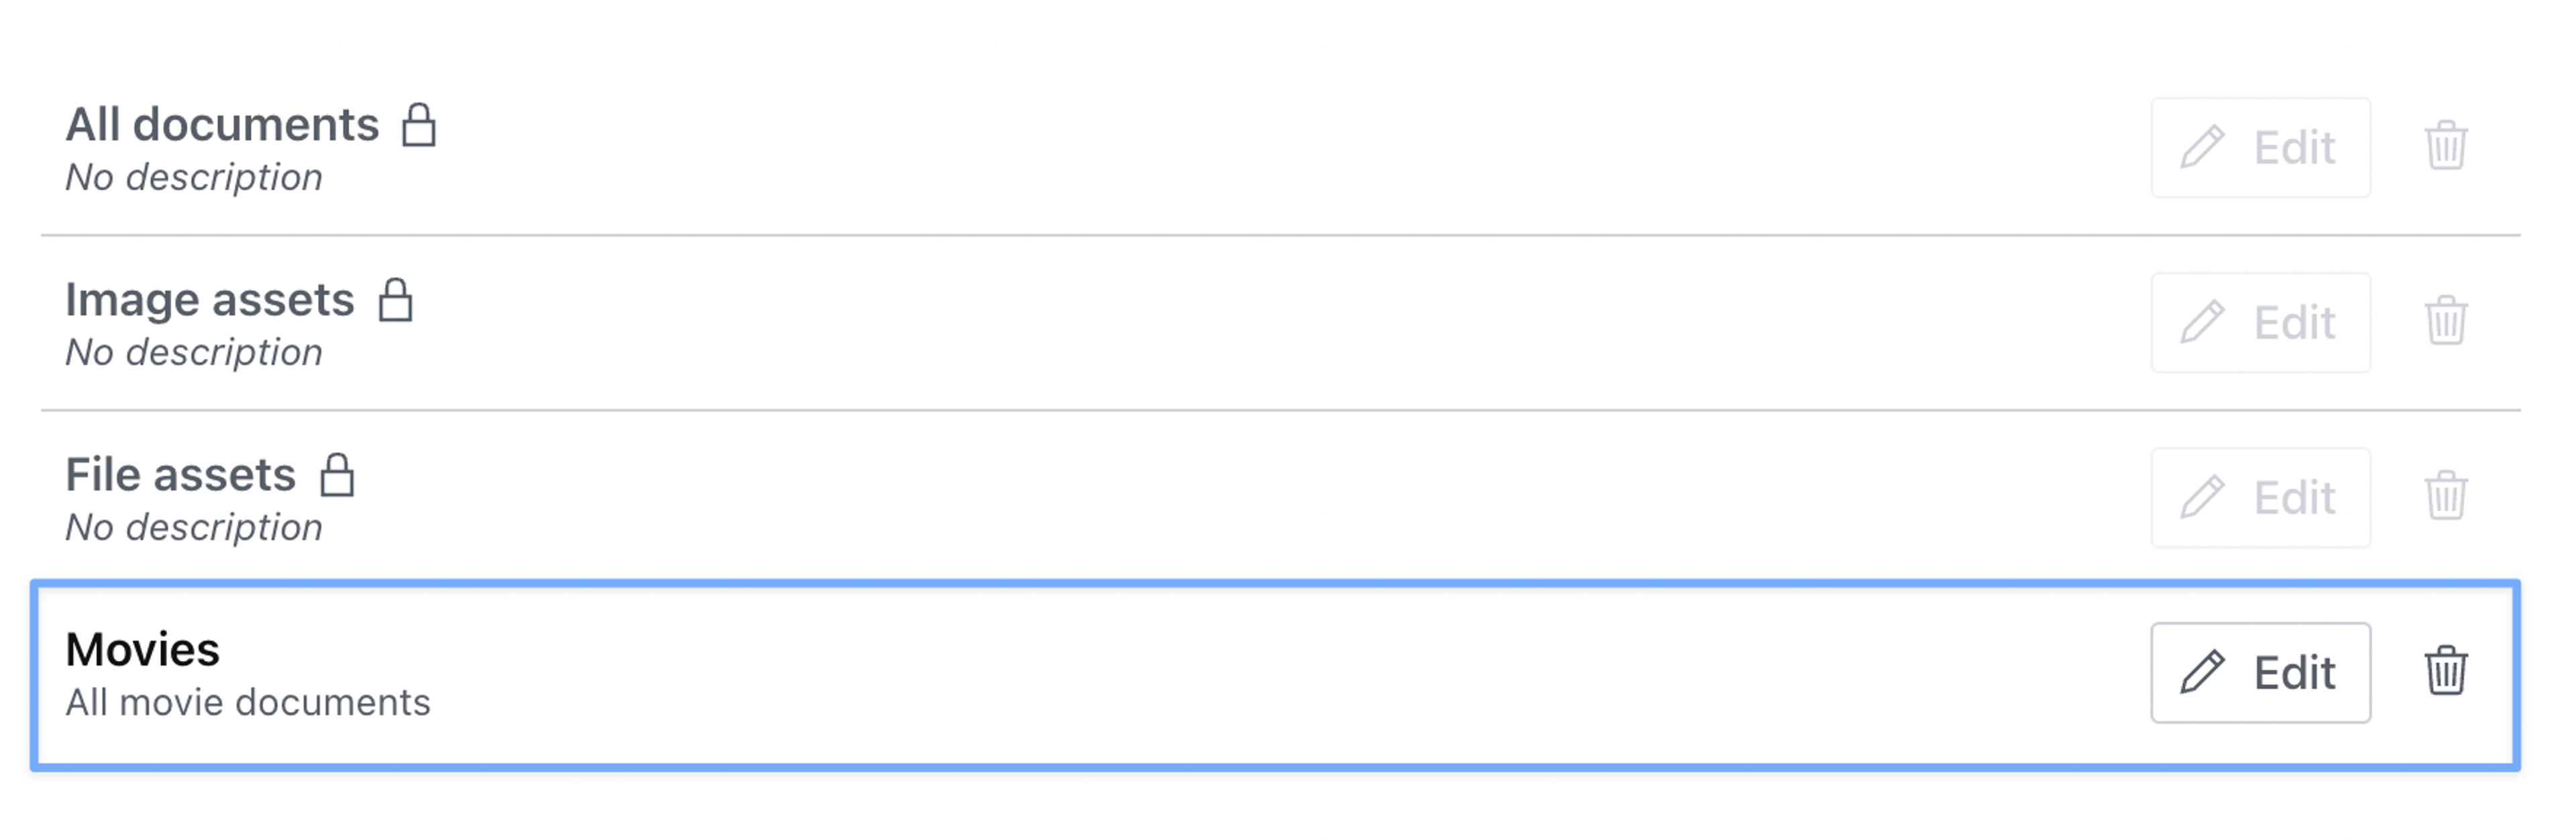
Once you hit save, you should see your new content resource added to the list.
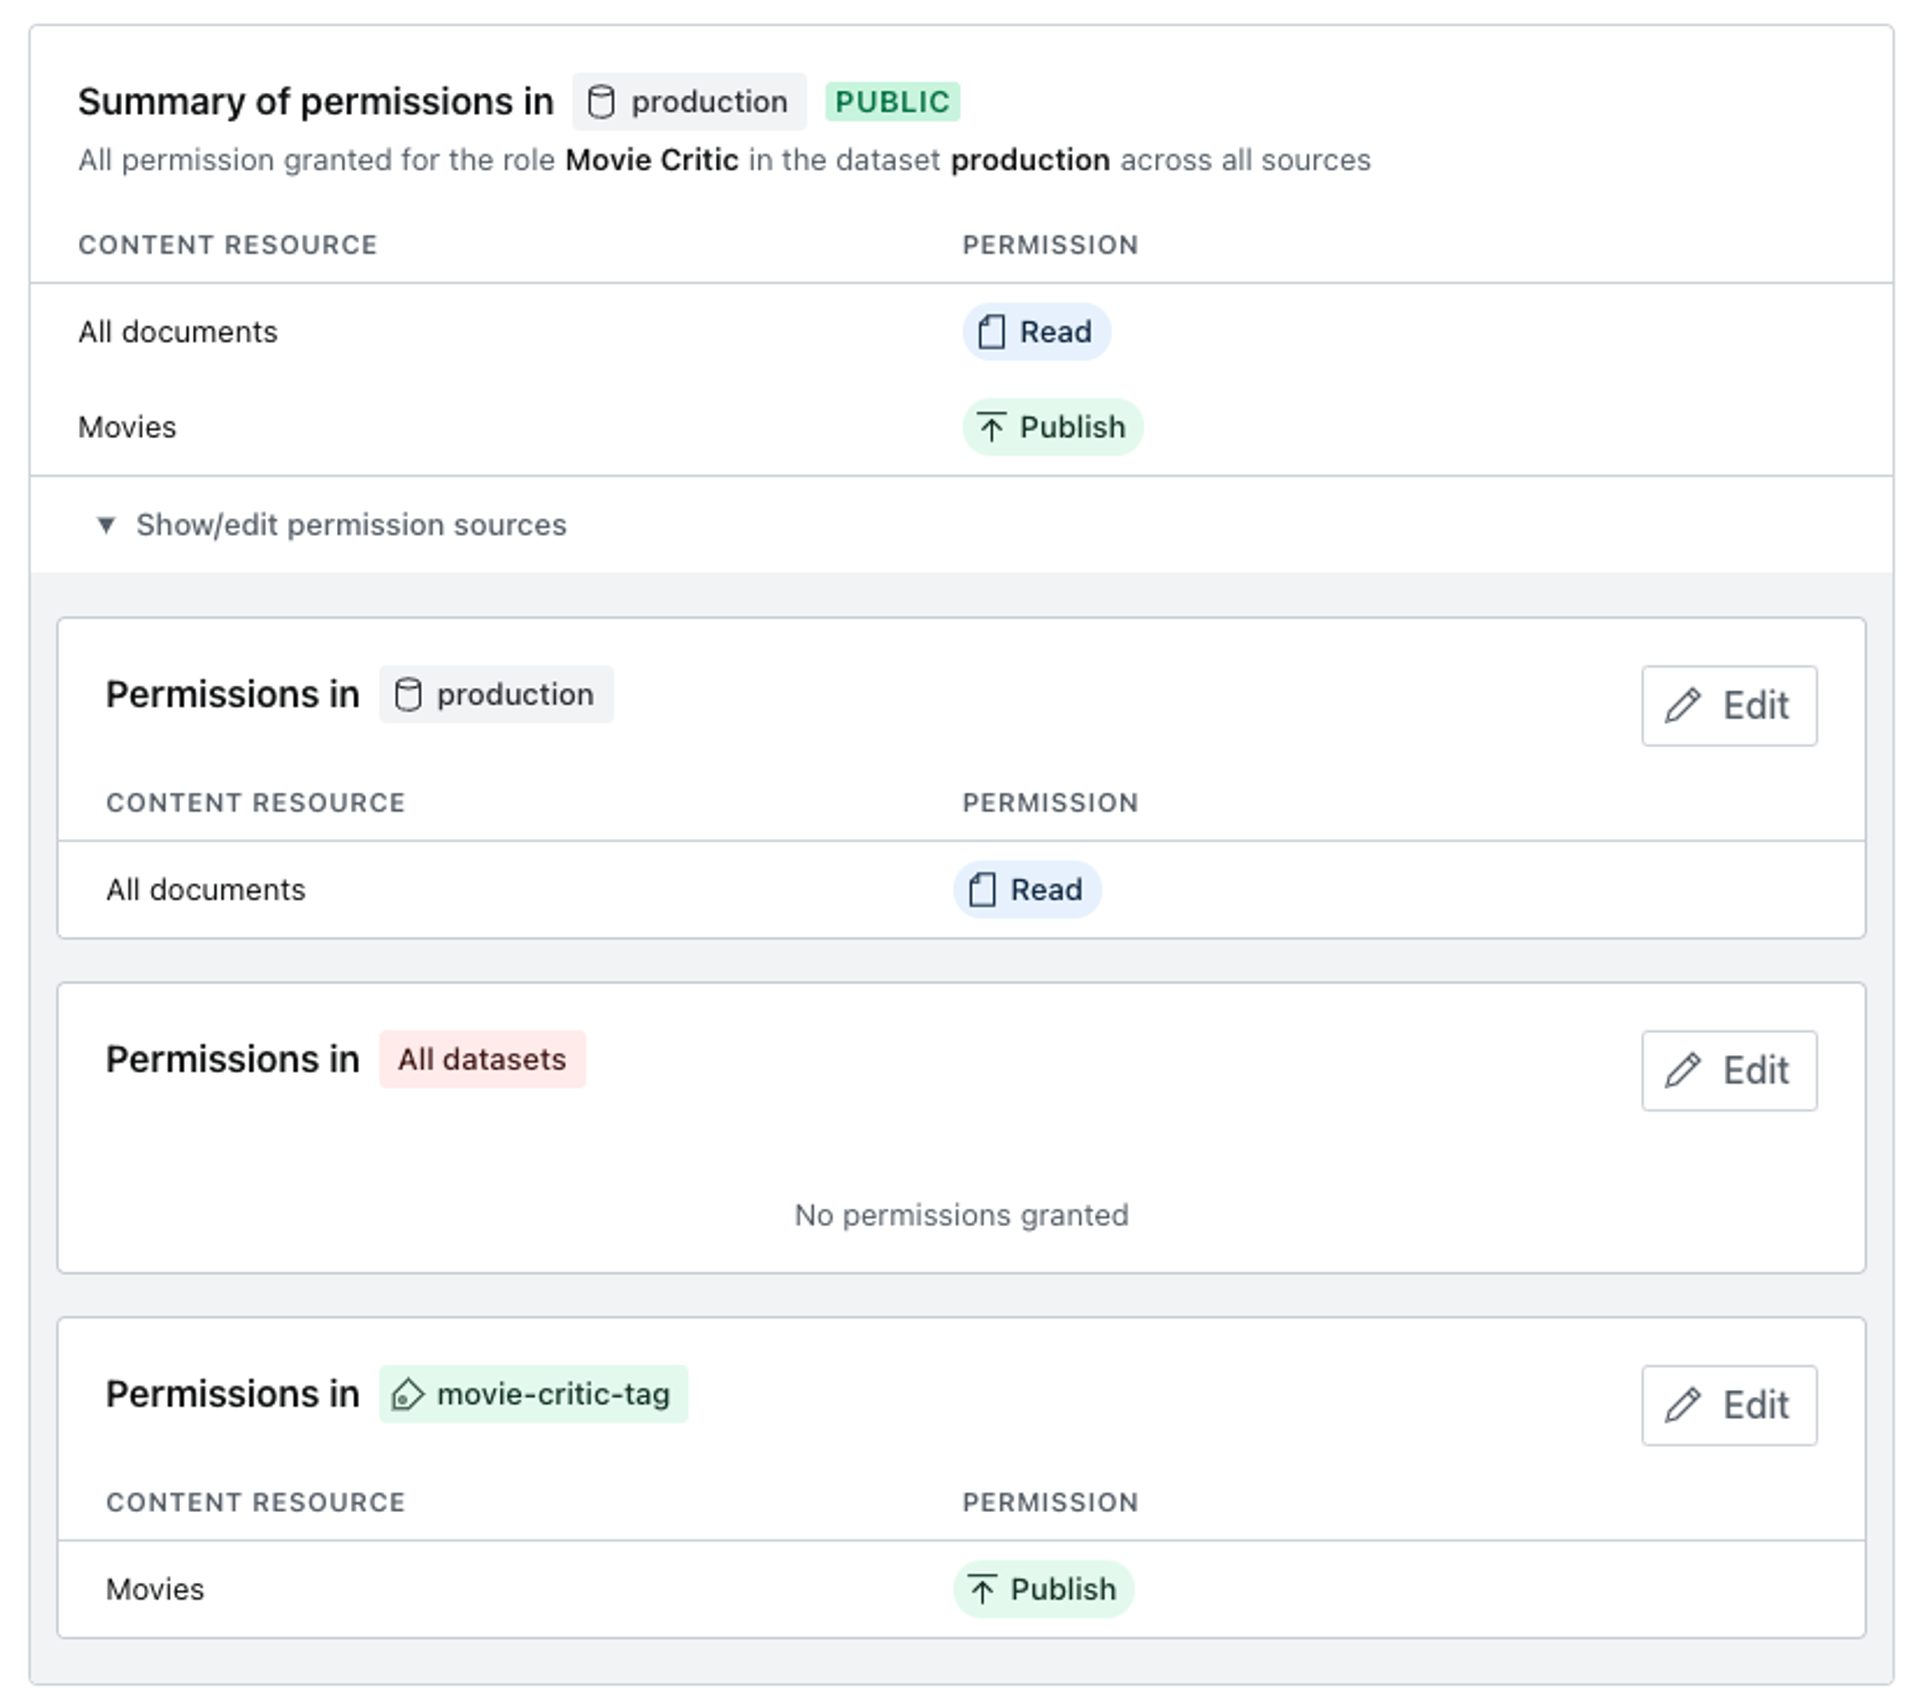
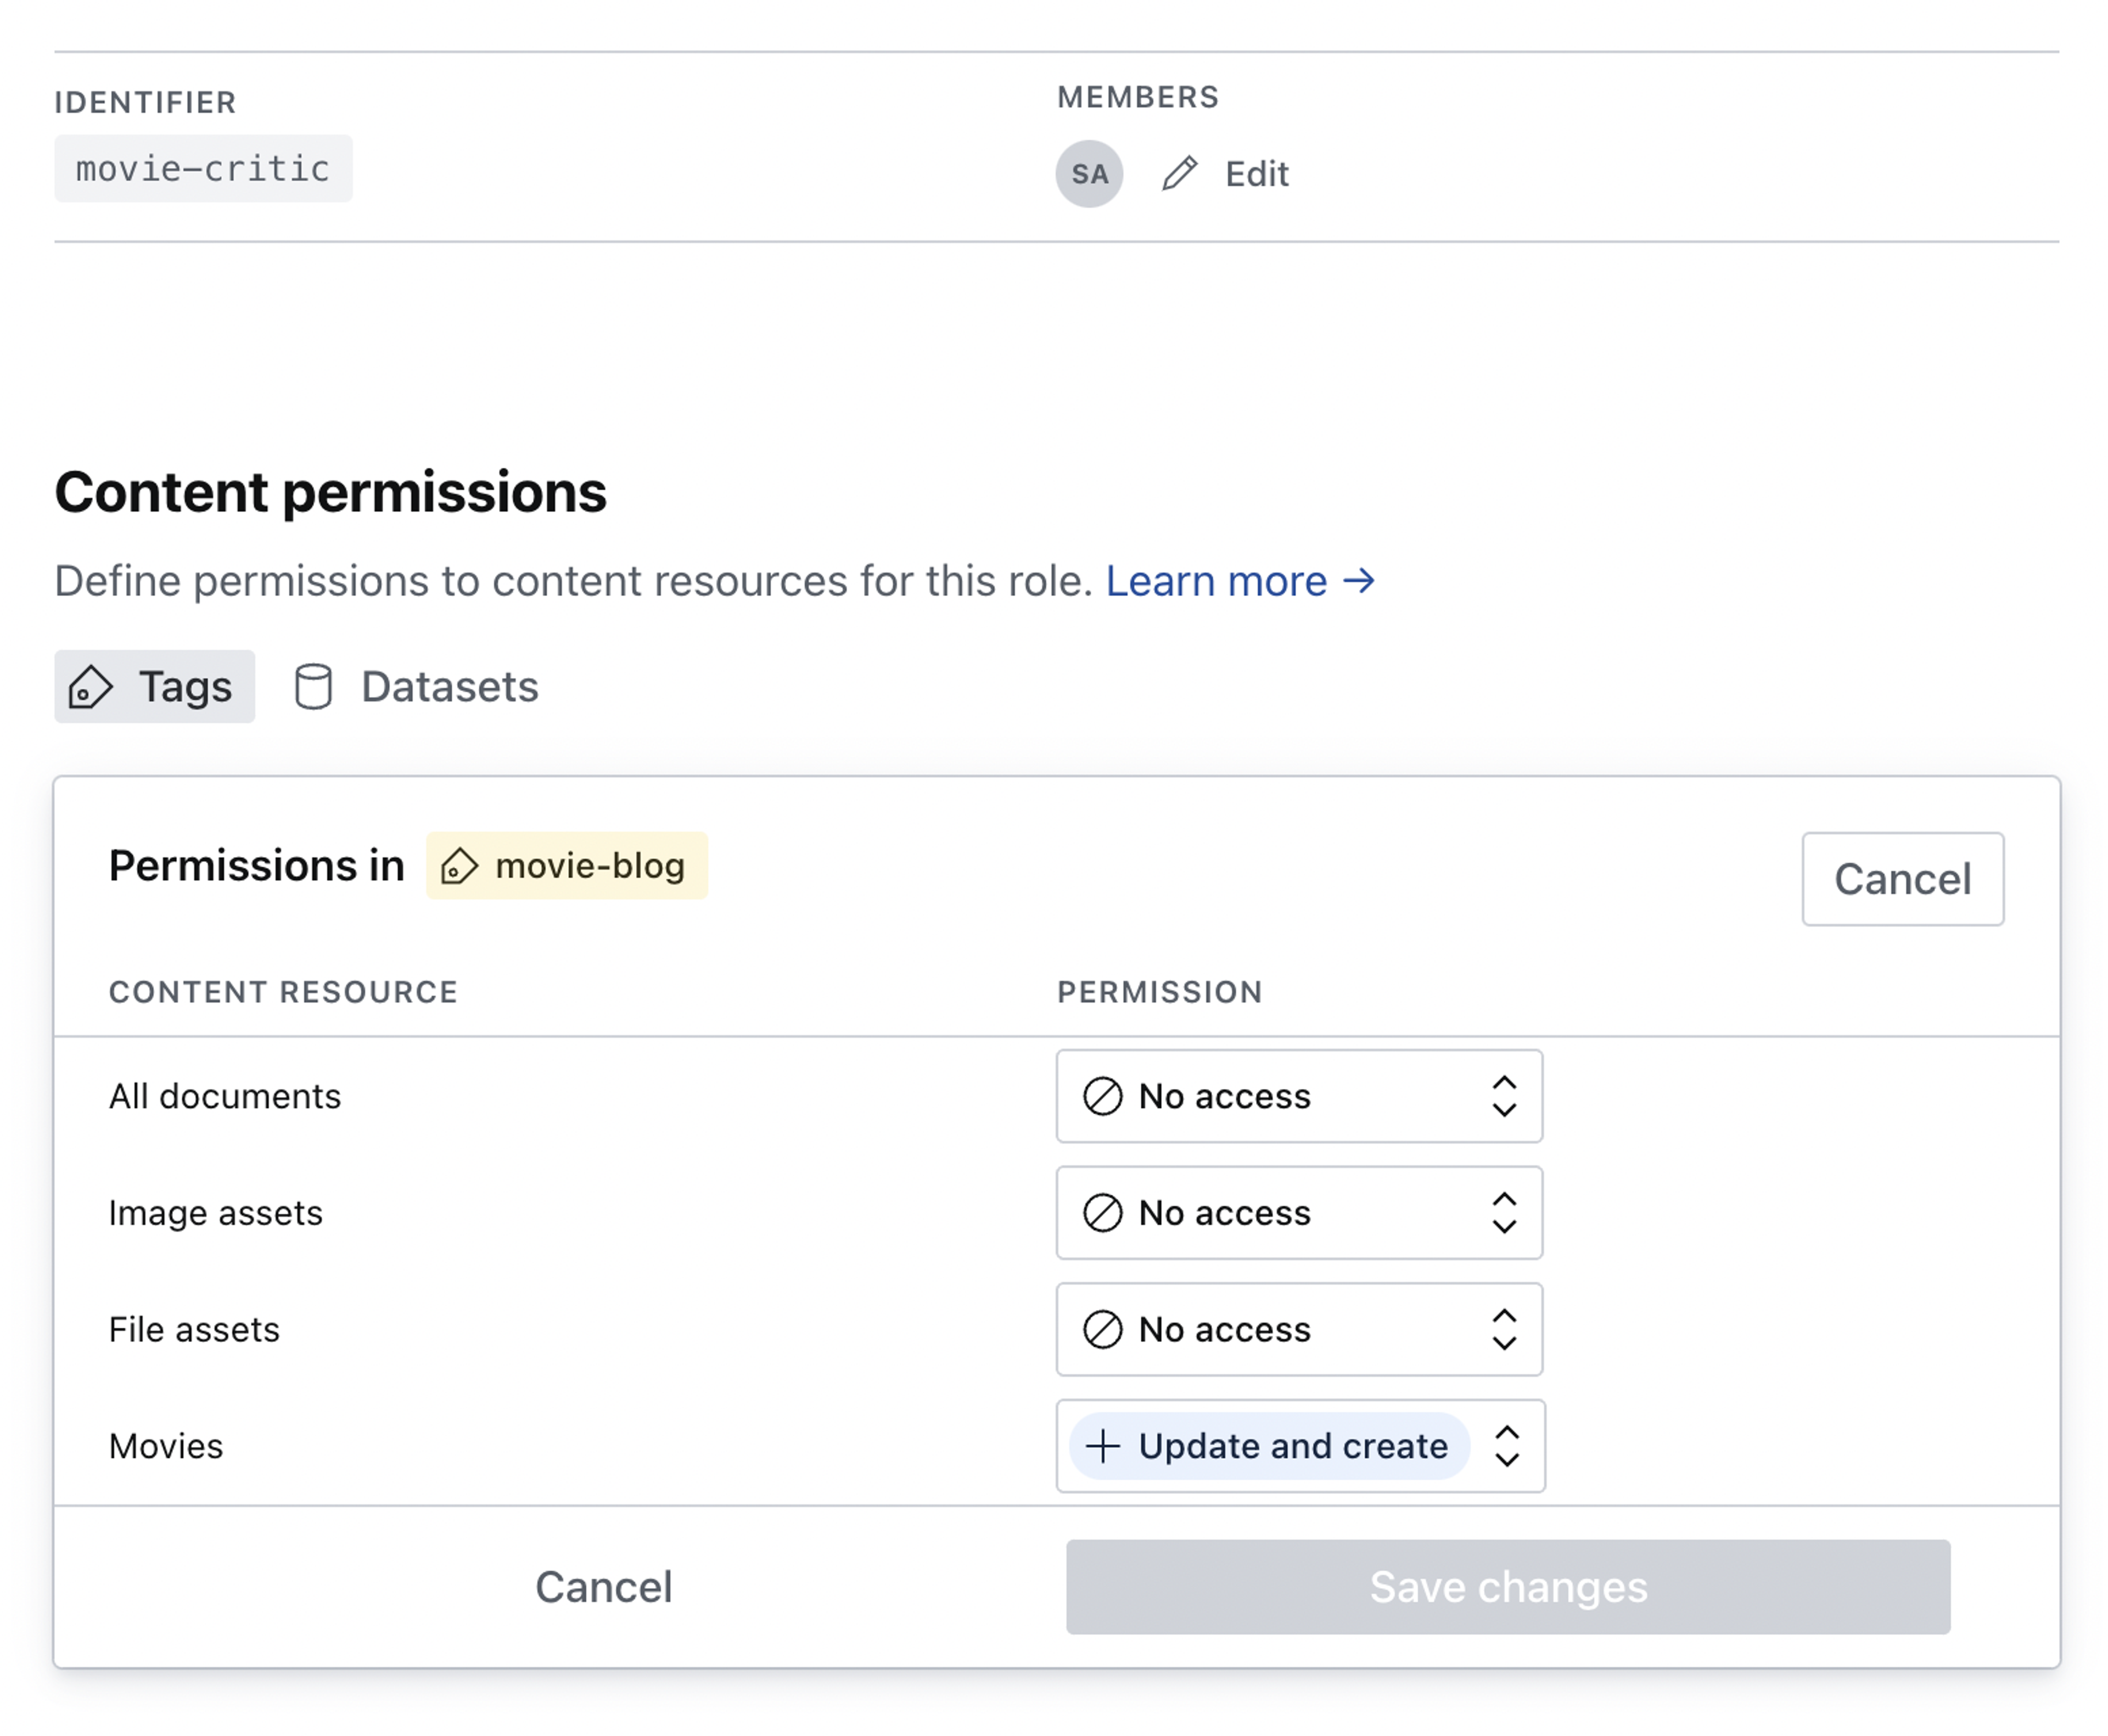
Revisiting the Roles section in the left column menu, we can now set movie-specific privileges on our custom role.
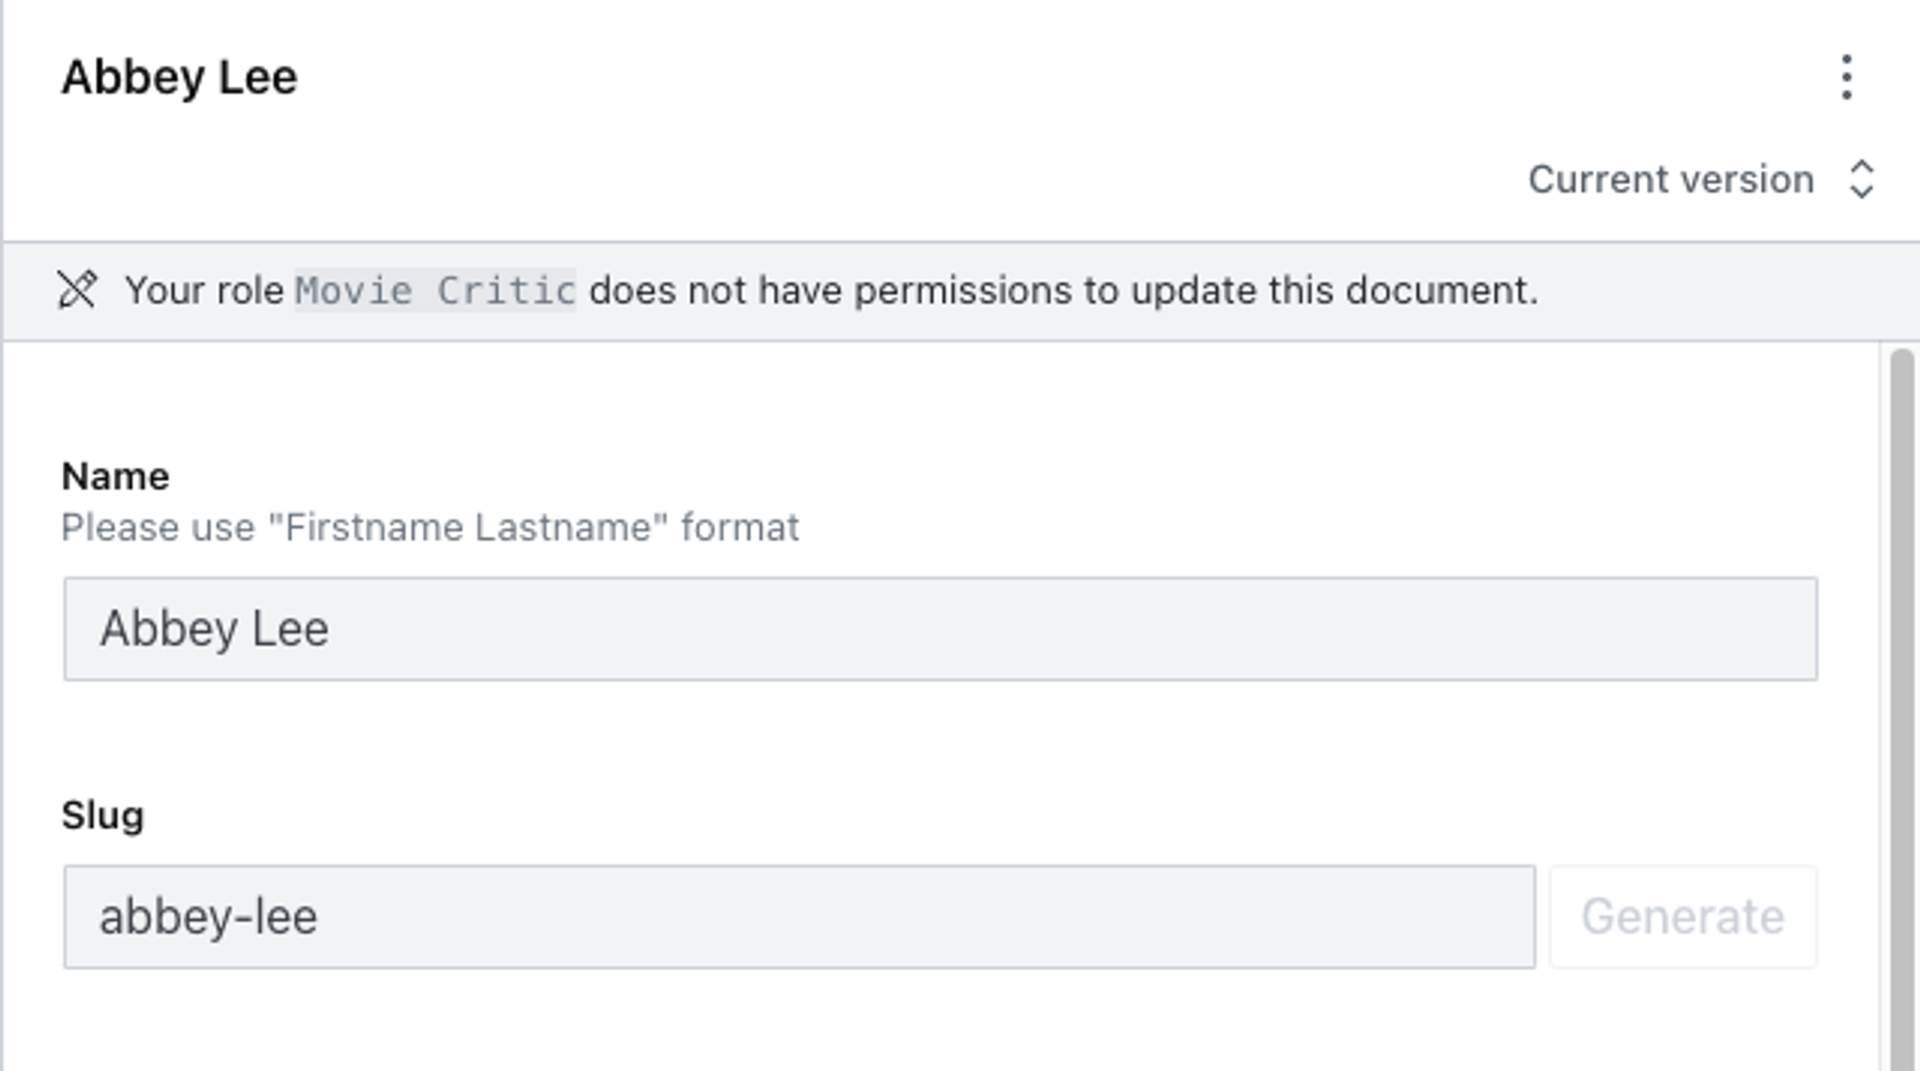
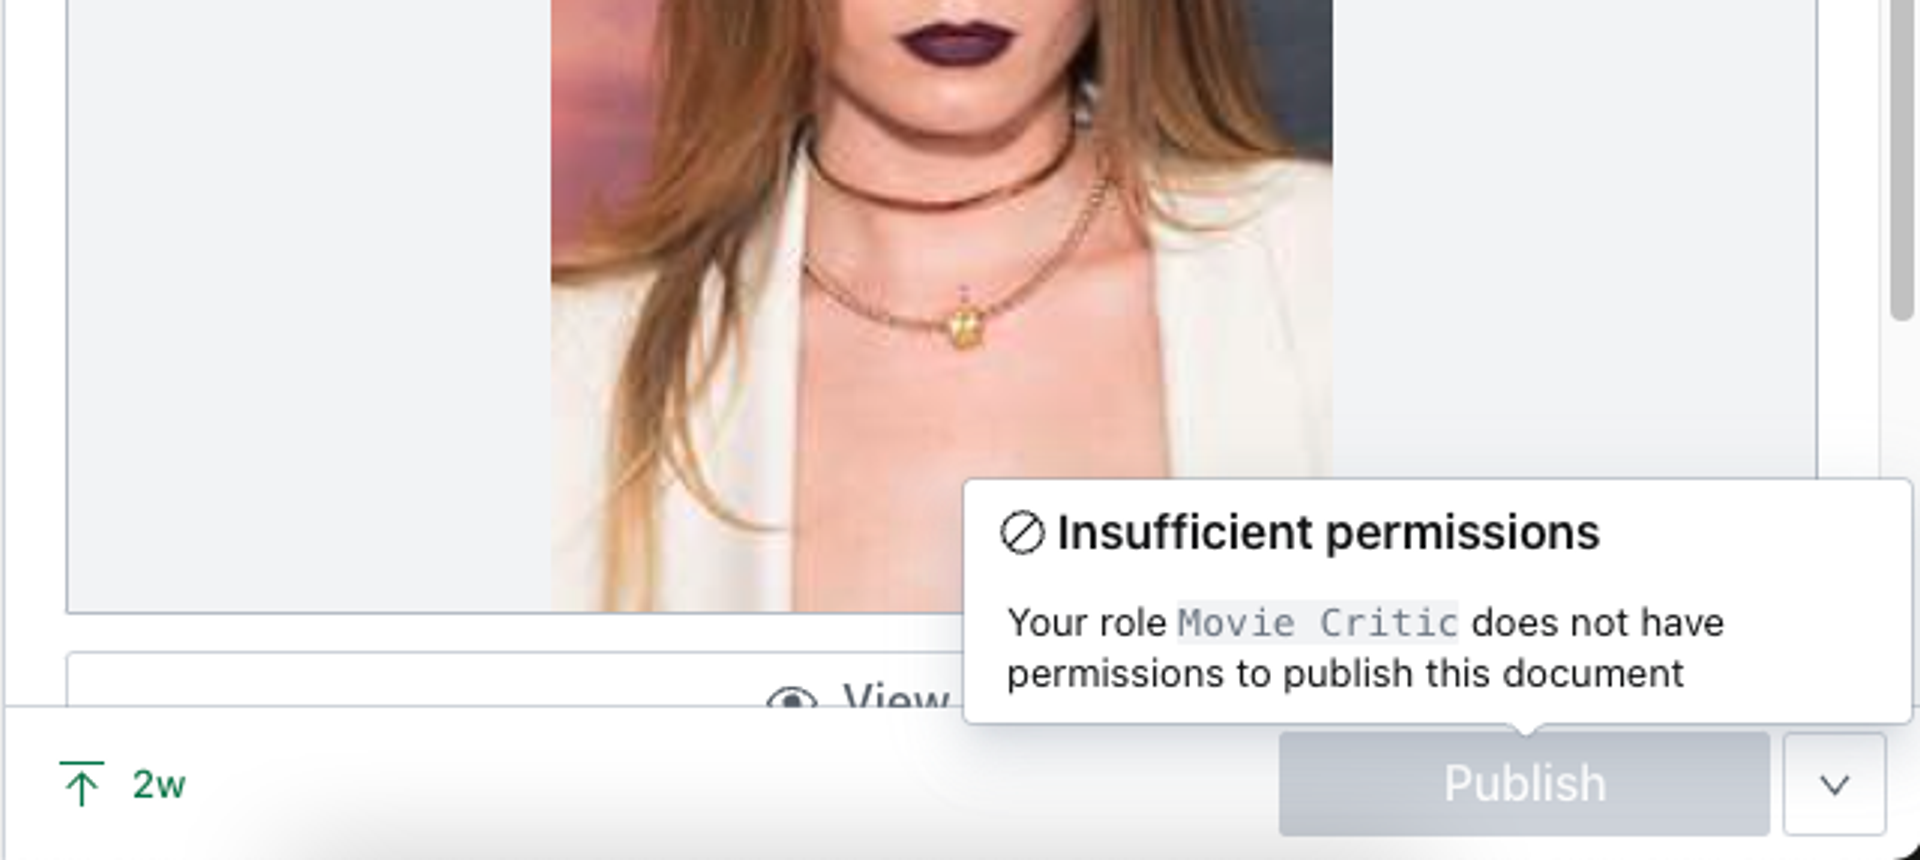
To test your role, make sure you have actually set the role on a member account and then proceed to log into the studio with the account in question.
Your account should be able to view, create, update and publish any document of the movie type, but should be unable to edit documents of any other type.
User attributes
This is a paid feature
This feature is available on certain Enterprise plans. Talk to sales to learn more.
User attributes are key-value pairs that describe a user within your organization; things like location="torrevieja", department="front_desk", or year_joined=2019. You can reference these attributes in content resource filters to create parameterized roles that adapt to each user automatically, rather than creating separate roles for every location, department, or team.
Where attributes come from
Attributes can come from two sources:
- SAML: When users authenticate via SSO (Okta, Azure AD, Auth0, etc.), Sanity automatically captures all attributes included in the SAML assertion. These are refreshed on every login. No pre-configuration is needed. If the identity provider sends it, Sanity stores it.
- Sanity (manual): Administrators can define additional attributes and set values directly in Manage or through the API. You can also use manual attributes to override a SAML-provided value for a specific user.
When both SAML and Sanity provide a value for the same attribute key, the Sanity value takes precedence. Removing the Sanity override reveals the SAML value again.
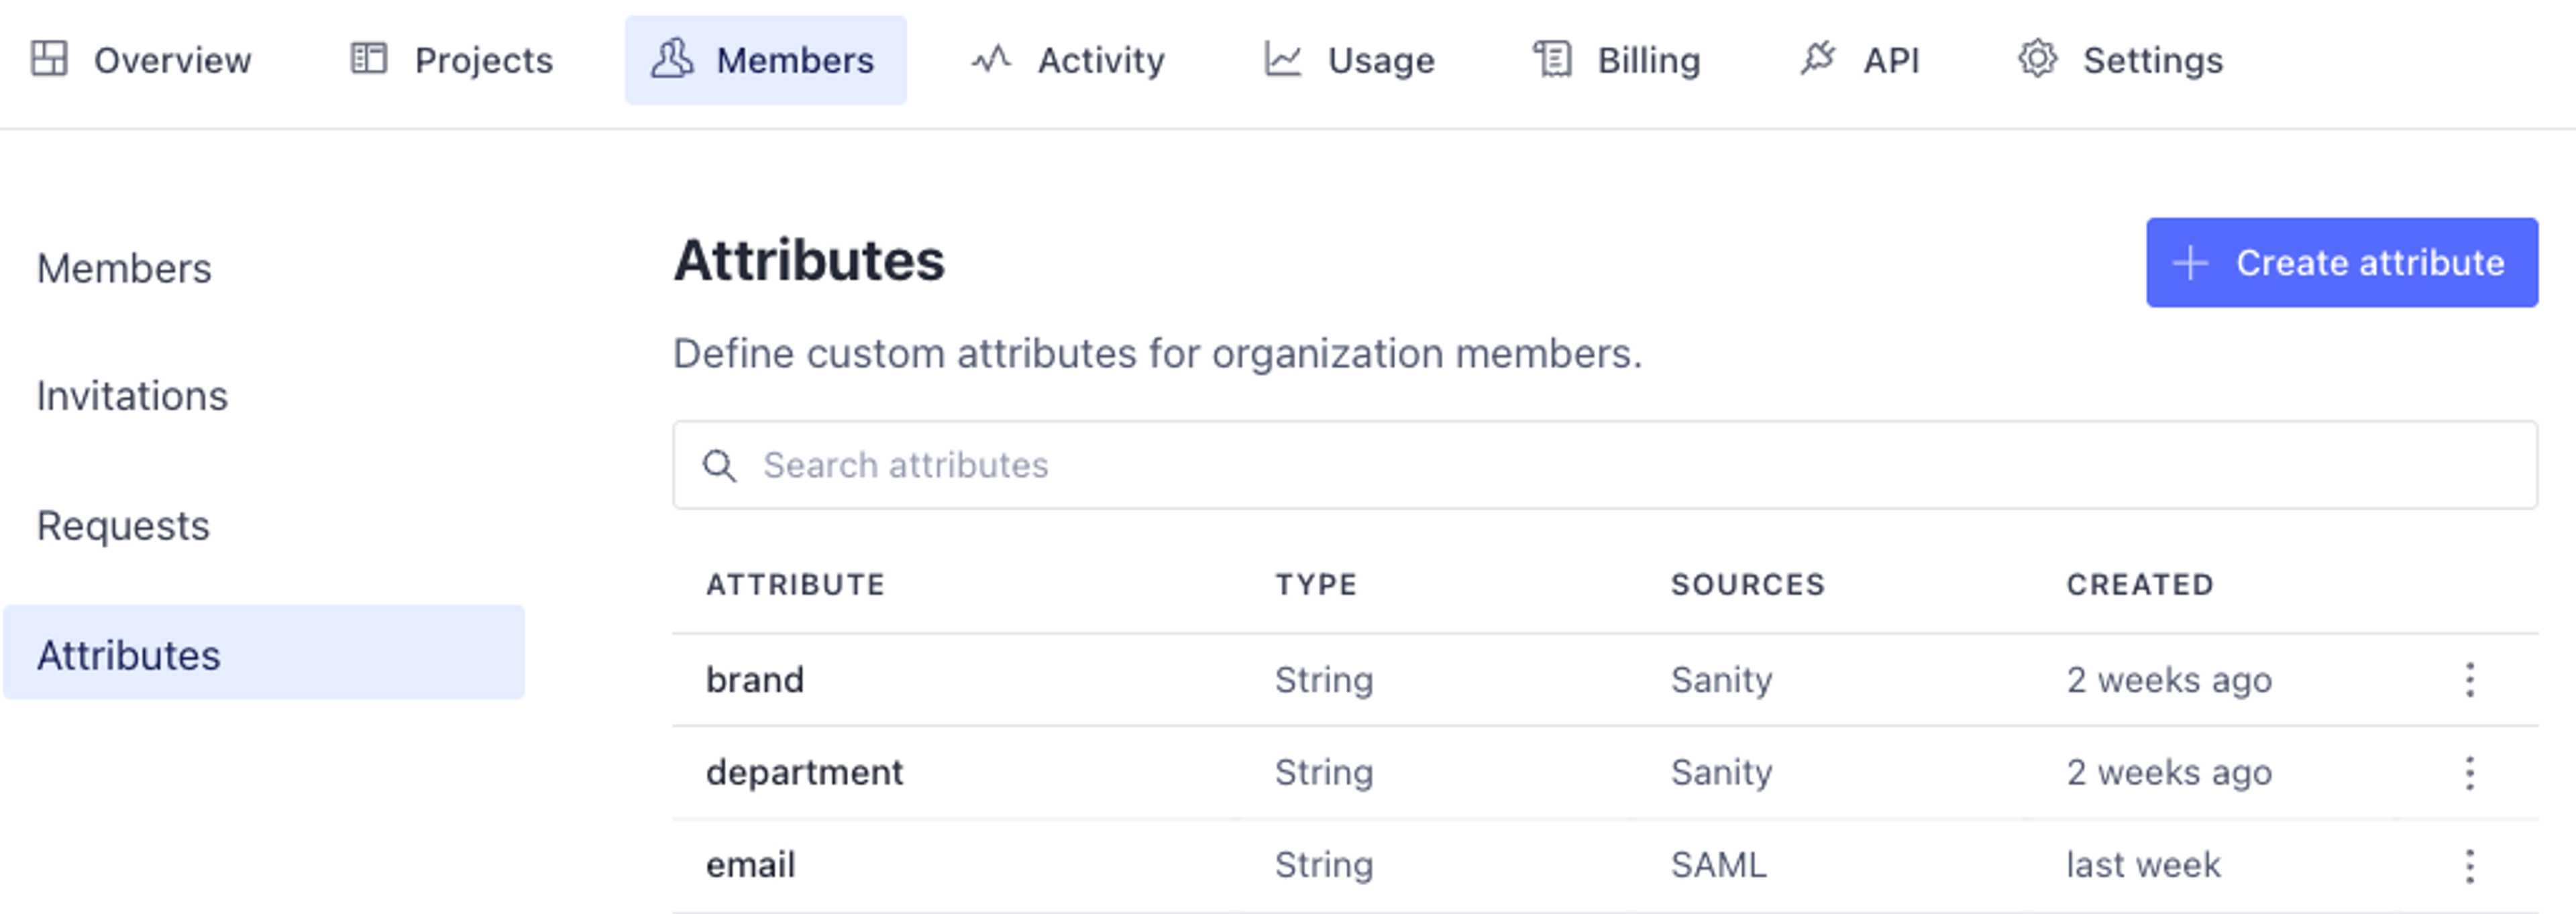
Defining attributes
To define and manage attributes, navigate to the Members tab in your organization settings and find the Attributes section. Any attributes that have been captured from SAML logins will appear here automatically.
Gotcha
User attributes are defined and managed at the organization level, not on individual projects. If you don't see the Attributes section, make sure you're viewing your organization's settings in Manage rather than a project's settings.
To create a new attribute, click the button in the upper right corner. You'll be asked to provide an attribute key (the name) and a type. Supported types are string, integer, number, boolean, and array variants of each (except boolean).
Gotcha
You cannot create a Sanity attribute definition when a SAML definition already exists for that key. If your identity provider sends an attribute like location, it will appear automatically—you don't need to define it again. You can set Sanity override values directly on individual users.
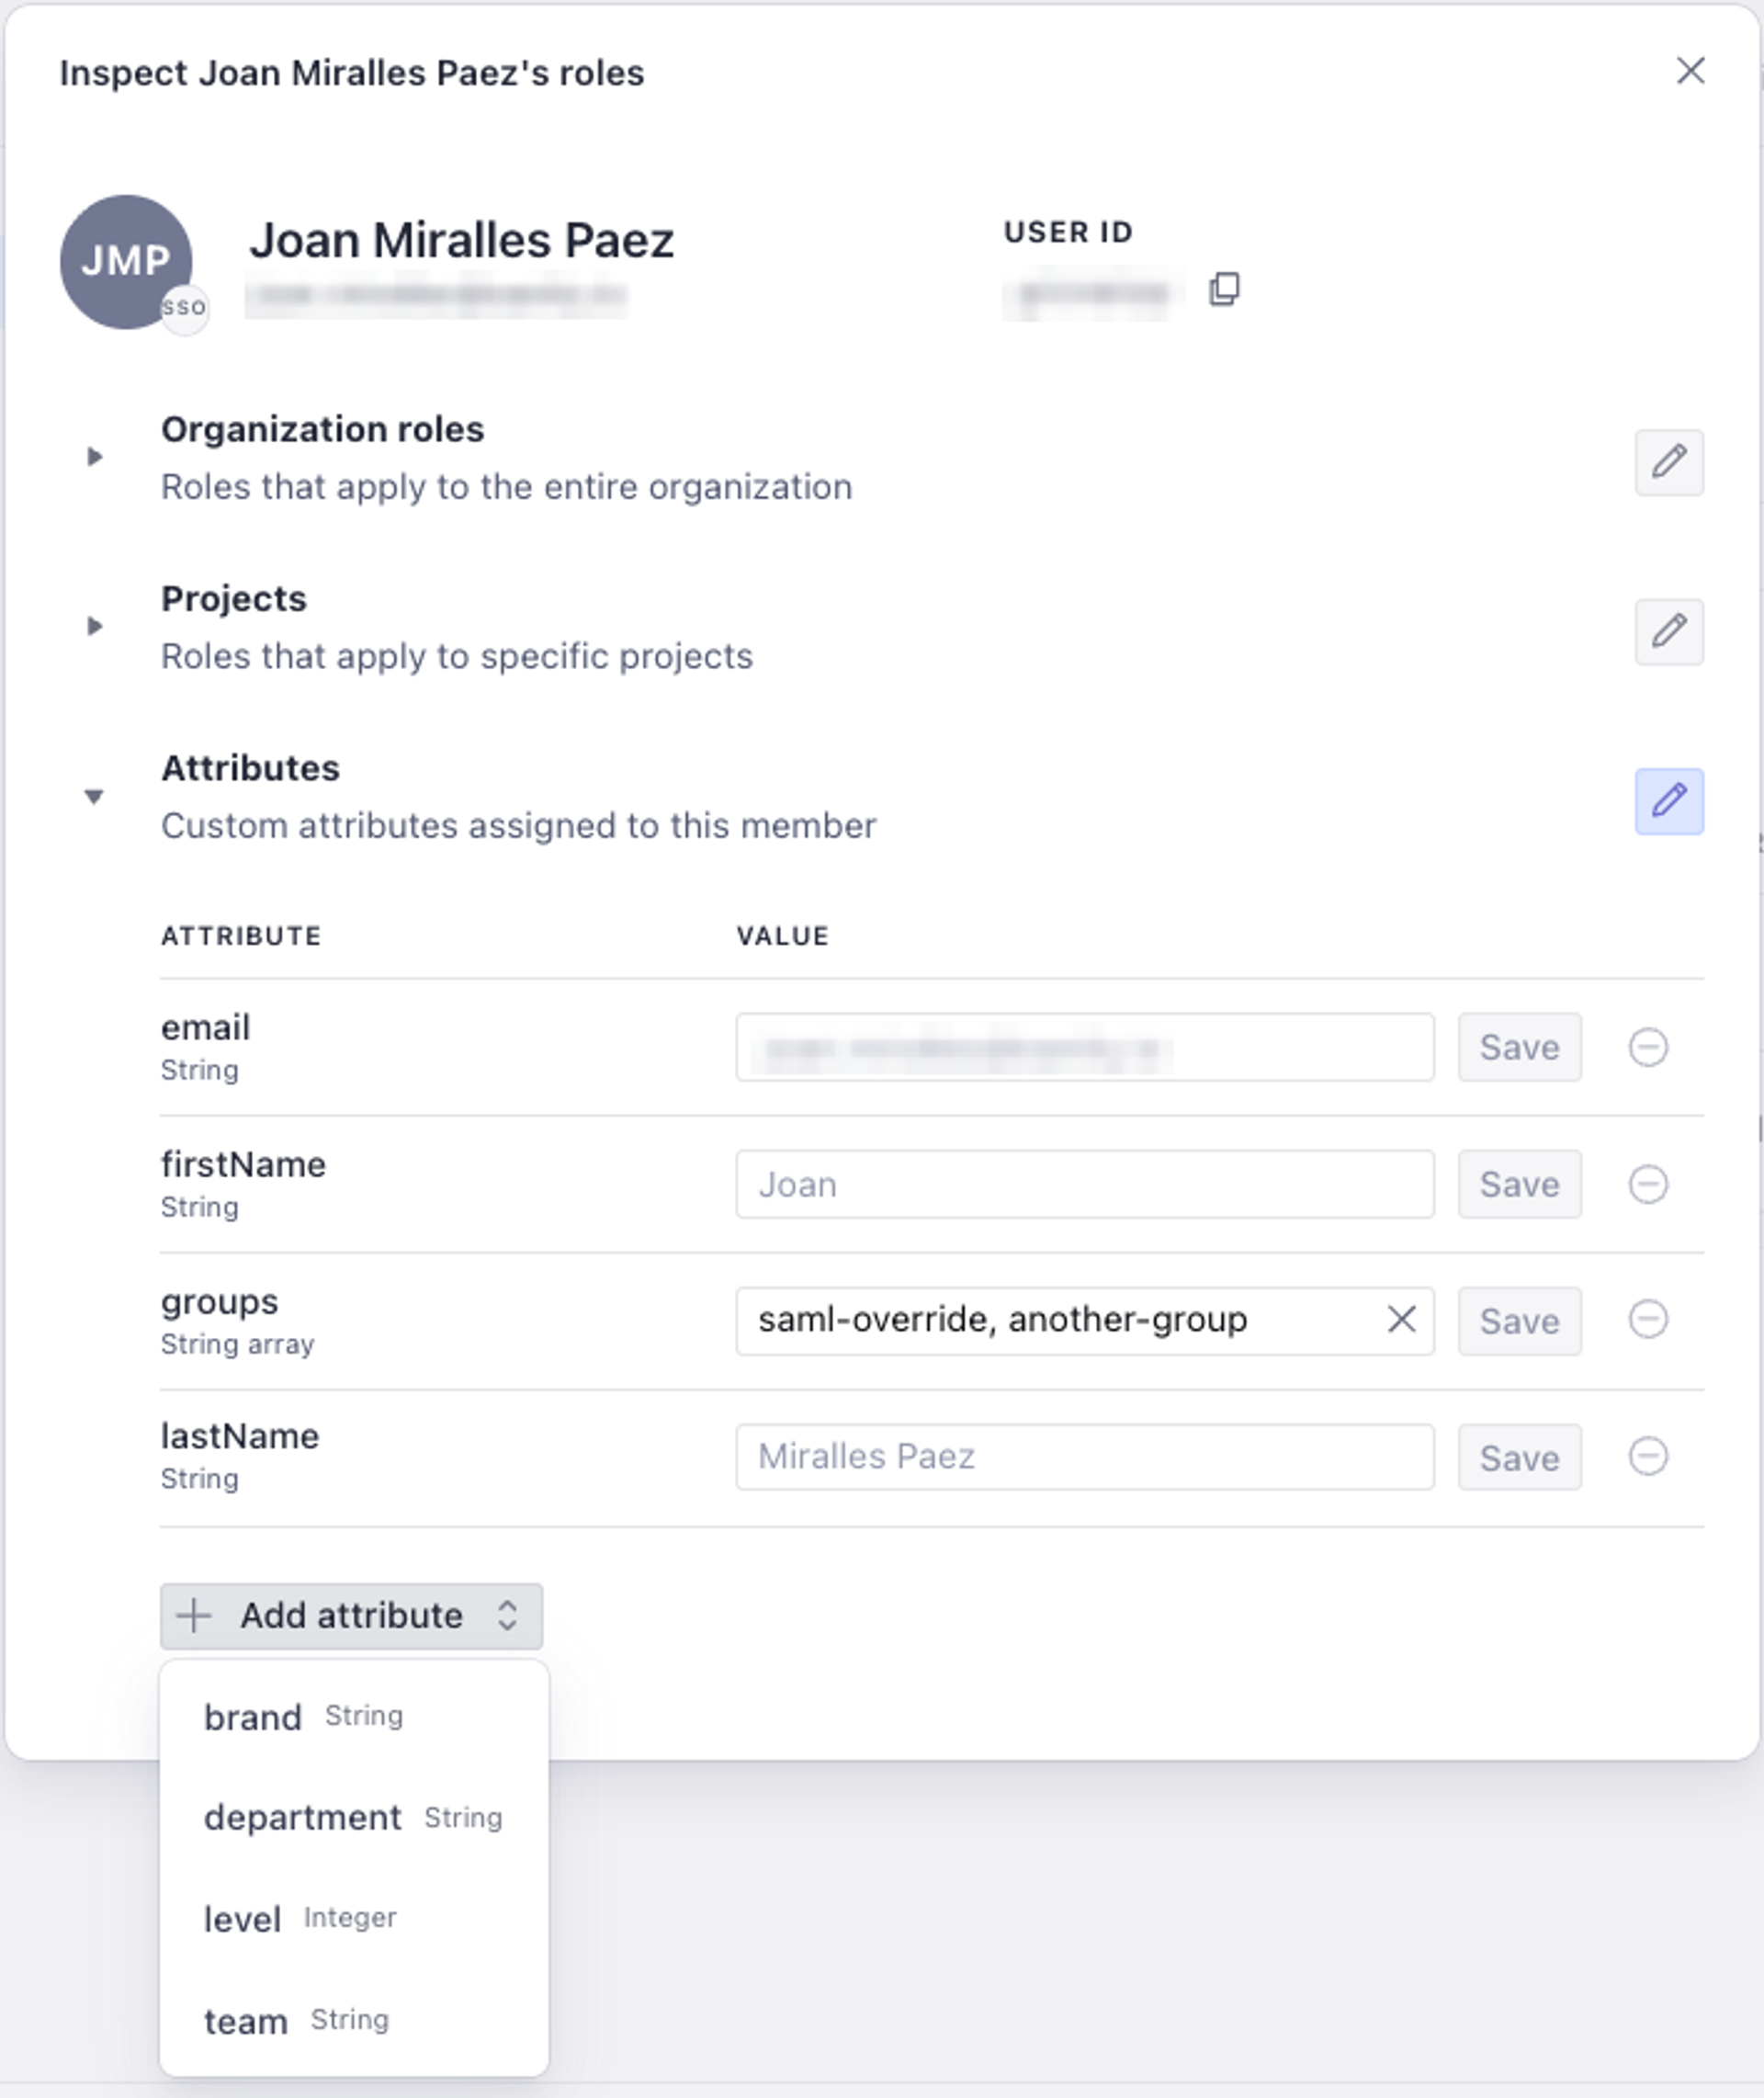
Setting attribute values on users
To view and manage a user's attributes, navigate to that user within the Members section. You'll see all of their current attribute values, including which source each value comes from (SAML or Sanity) and which value is currently active.
From here you can:
- Set a Sanity value to override a SAML-provided attribute for this user.
- Add a value for an attribute that the user doesn't have from SAML.
- Remove a Sanity override to revert to the SAML value.
Protip
Overriding attributes is useful for temporary changes, like reassigning a user to a different location for a project, without modifying your identity provider. When you're done, remove the override and the SAML value takes effect again on the user's next login.
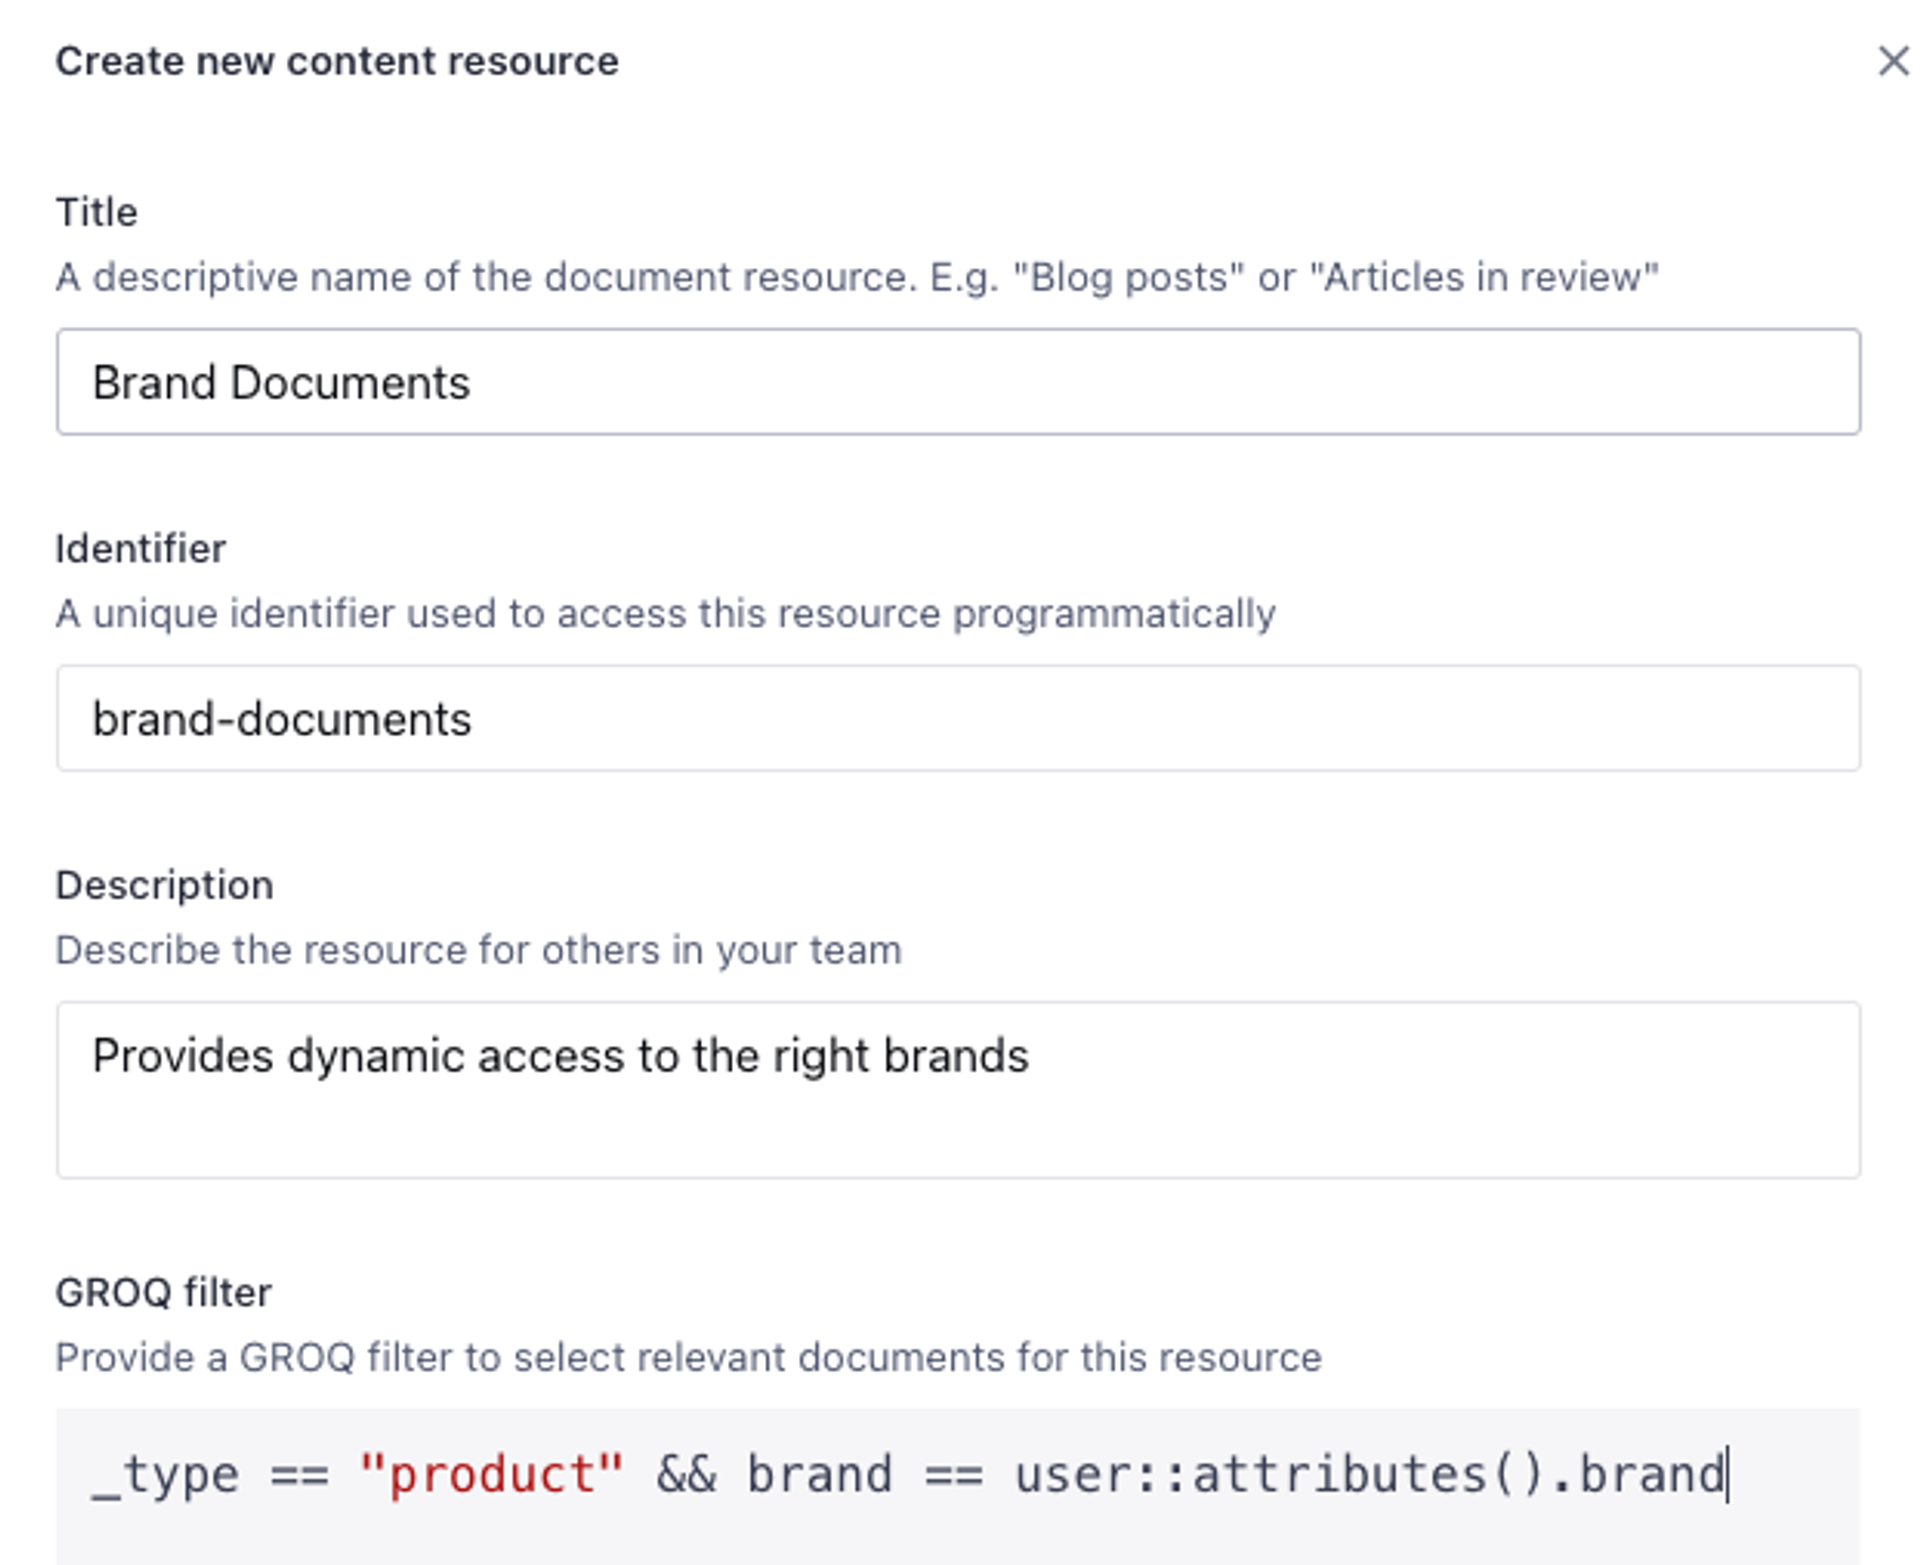
Using attributes in content resources
Attributes become powerful when referenced in GROQ filters for content resources. Instead of hardcoding a value like _type == "post" && branch == "london", you can use the user::attributes() function to make the filter dynamic:
_type == "post" && branch == user::attributes().branch
When a user with branch="london" accesses content through a role using this resource, the filter resolves to branch == "london". A user with branch="tokyo" sees only Tokyo content. One role covers both users.
To create a parameterized content resource, follow the same steps as creating any content resource, but reference user::attributes() in your GROQ filter.
Filter best practices
When you use user::attributes() in a content resource filter, be aware that if the referenced attribute is missing (due to a typo, a migration, or the user simply not having that attribute set), the expression evaluates to null. If the document field you're comparing against is also missing, the filter could simplify to null == null, which evaluates to true, granting access to all matching documents.
This means a misconfigured filter can silently escalate privileges rather than deny access.
To prevent this, either wrap user::attributes() in a coalesce() function or add an explicit != null check:
// Unsafe: fails open when both sides are null
_type == "hotel" && location == user::attributes().userLocation

// Safe with coalesce: fails closed when the attribute is missing
_type == "hotel" && coalesce(user::attributes().userLocation, "__no_value__") == location

// Safe with null check: fails closed when the attribute is missing
_type == "hotel" && user::attributes().userLocation != null && location == user::attributes().userLocation
Common scenarios where this matters:
- The attribute name in the filter has a typo. For example,
userLocatoninstead ofuserLocation. - An attribute migration removes or renames the attribute, but existing filters still reference the old name.
- A user has not been assigned the attribute referenced in the filter.
- The document field being compared against does not exist on some documents.
If any of these occur without a null guard, the filter will match all documents of the specified type, effectively disabling the access restriction.
Example: genre-based editing
Continuing with our Movie Project example, imagine your team has editors who specialize in different genres. One group handles horror films, another covers documentaries, and so on. Without user attributes, you'd need a separate role for each genre: "Editor - Horror", "Editor - Documentary", "Editor - Comedy", and so on.
With user attributes, you define a single content resource with the filter:
_type == "movie" && genre == user::attributes().genre
Then create one role, such as "Genre Editor", that uses this content resource with read, create, update, and publish permissions. Assign the role to all editors. Each editor sees only the movies matching their genre, based on the genre attribute from their identity provider or set in Manage.
If an editor needs to temporarily cover a different genre, an administrator can set a Sanity override for that user's genre attribute without changing anything in the identity provider.
Tags
Tags are a useful feature that lets you group datasets with similar characteristics together so that roles and permissions can be conveniently set on multiple datasets in a single operation. You might create tags for different environments, such as production and staging, or combine tags for different publications and locales, E.g. elle us or vogue jp.
This is a paid feature
This feature is available in the Growth plan.
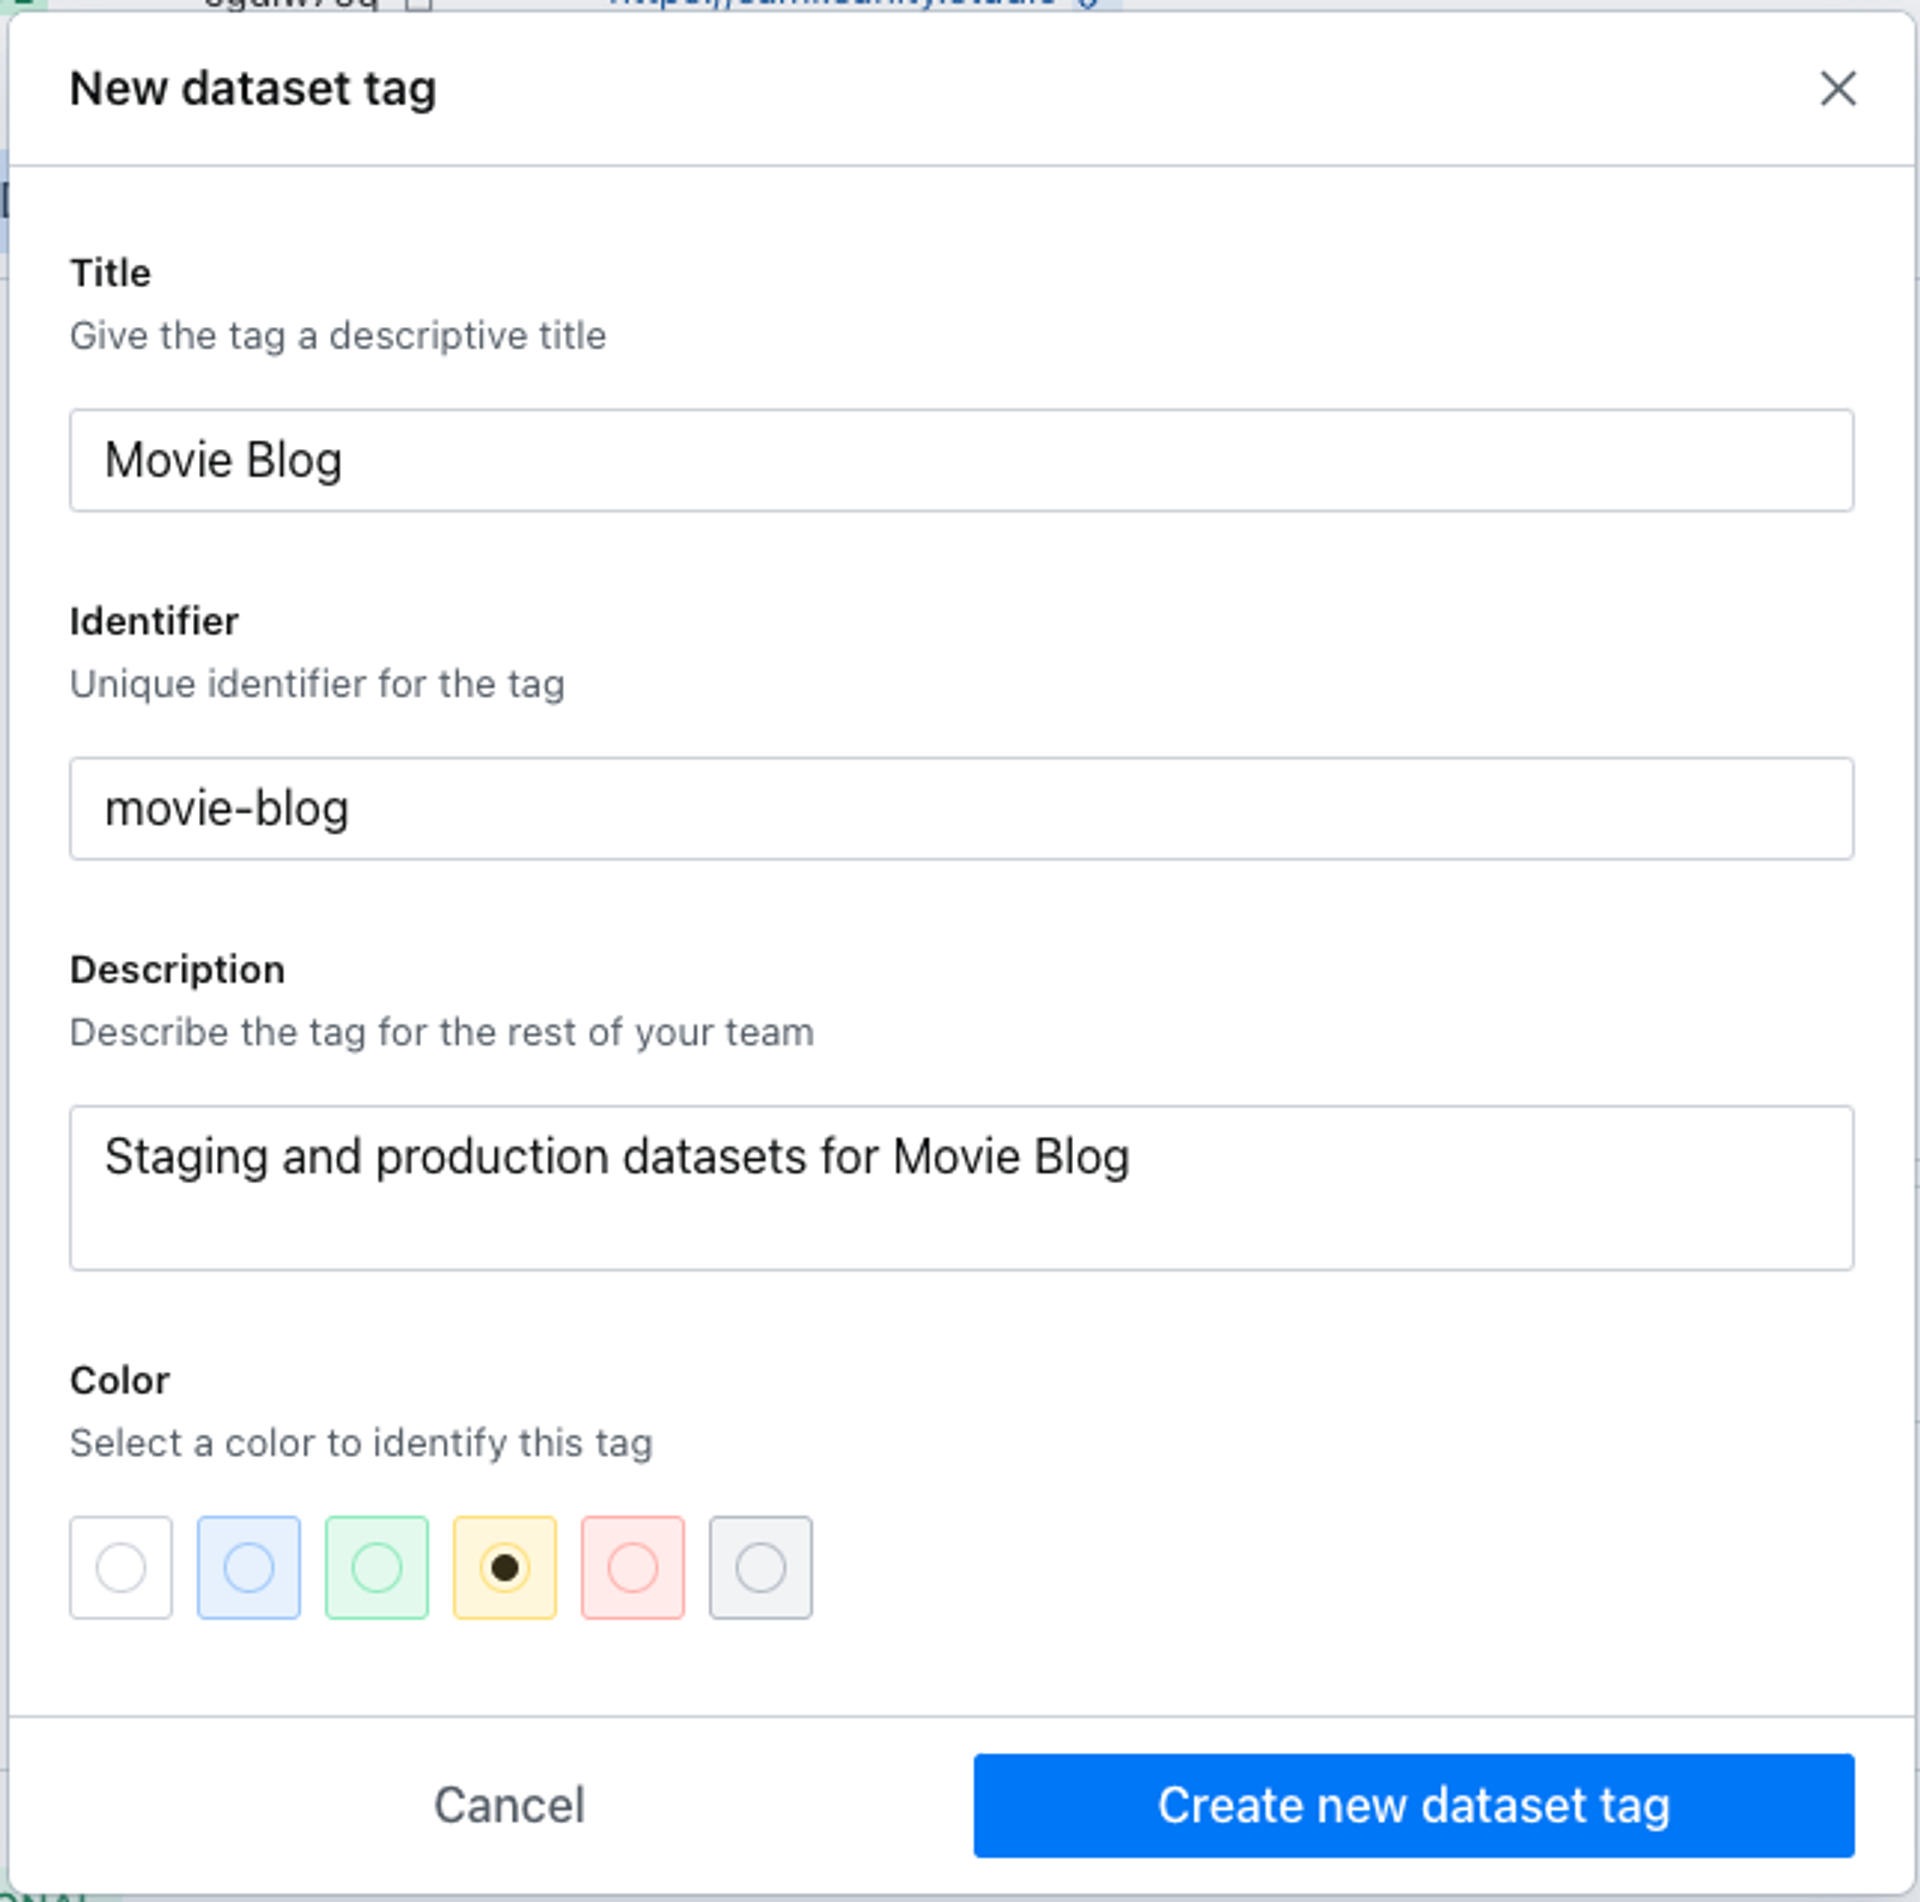
To create a new tag, navigate to the Datasets tab in your project settings and find the Tags section in the left column menu.
In the example shown below we'll be creating a tag for staging and production datasets for our movie blog, and then assigning editing privileges in both for our movie-critic role.
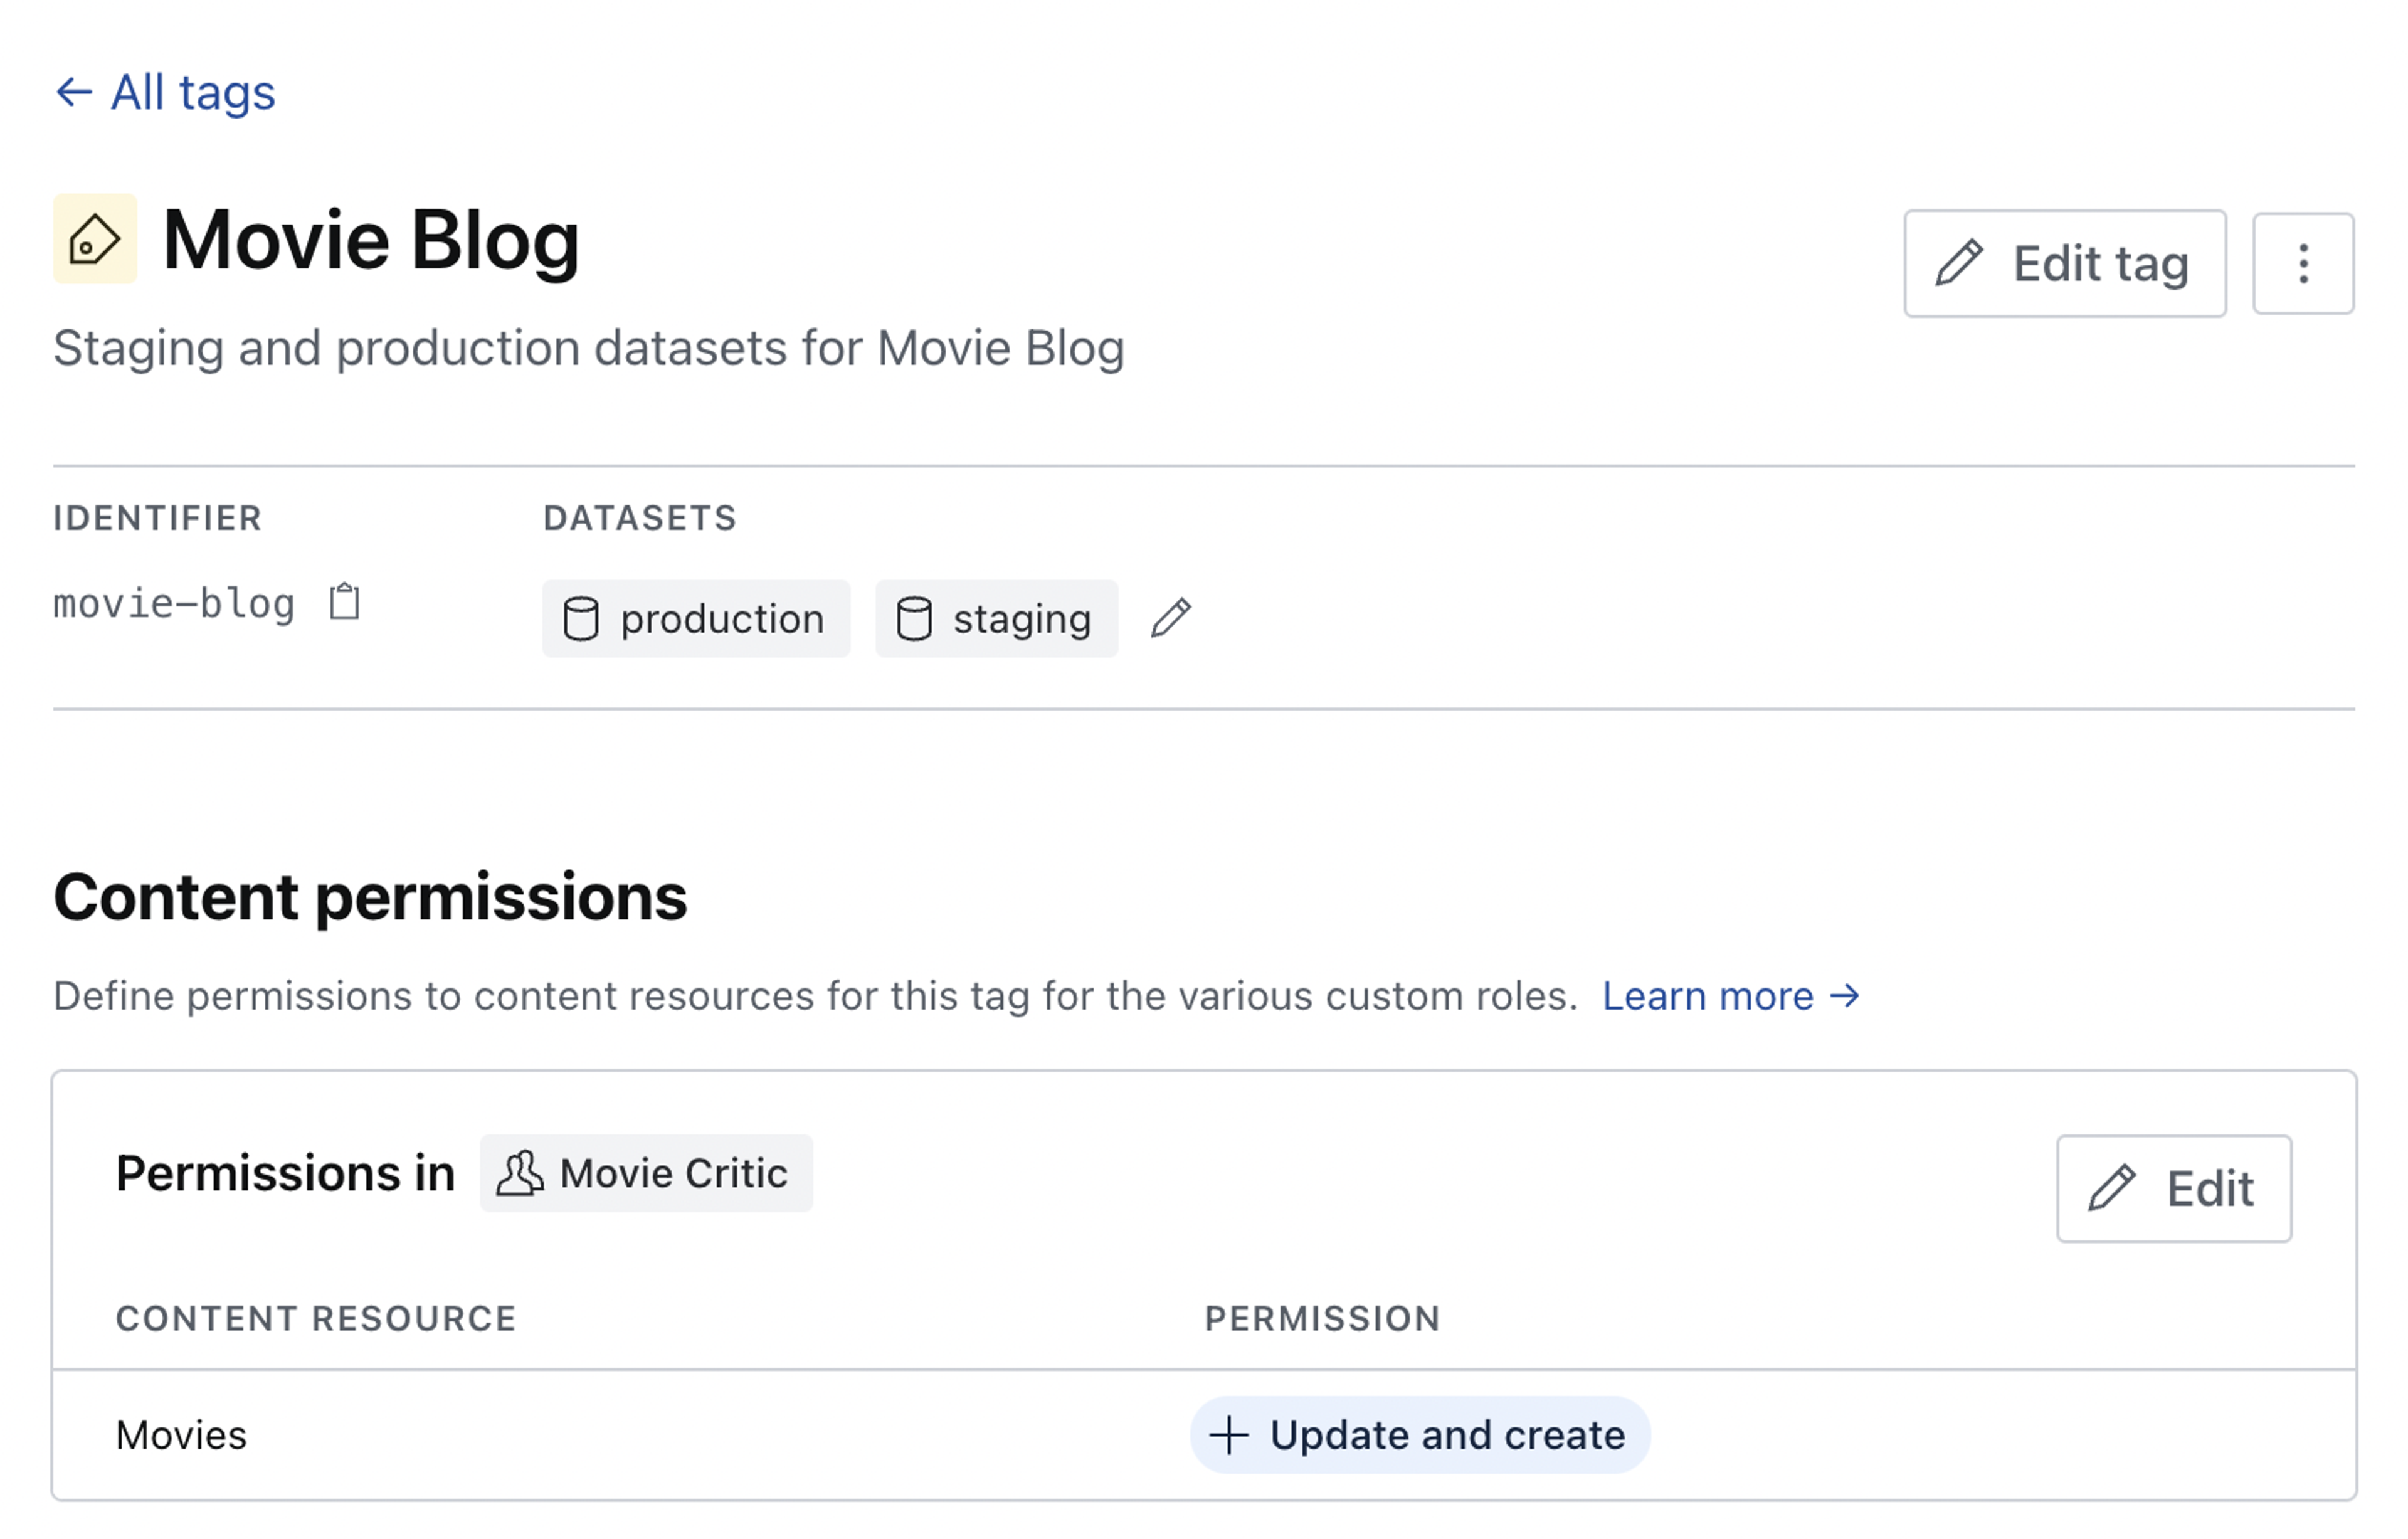
Once created, we can add datasets to the tag and define permissions to content resources for our custom roles.
The change is reflected and can be edited in the content permissions for the custom role.