Set up single sign-on with SAML
This article takes you through the process of setting up SAML (Security Assertion Markup Language) SSO (single sign-on) for your organization.
SAML (Security Assertion Markup Language) SSO (single sign-on) enables your organization to control access to Sanity projects by using a third-party identity provider, such as Okta, Google, or Microsoft Entra ID (formerly Azure AD). When you enable SAML SSO, users who log in to a project through Sanity Studio or Sanity Manage are authenticated through the organization’s identity provider. Sanity then assigns them roles based on their group membership in the identity provider.
This guide walks through creating a SAML SSO configuration for your organization, mapping identity provider groups to Sanity roles, and configuring your studio to use SAML login.
Prerequisites
- An organization with a project on the Enterprise plan.
- An external identity provider that supports SAML authentication (for example, Okta, Google, or Microsoft Entra ID).
- Organization administrator permissions.
Configuration steps
1. Create a new SAML SSO configuration for your organization
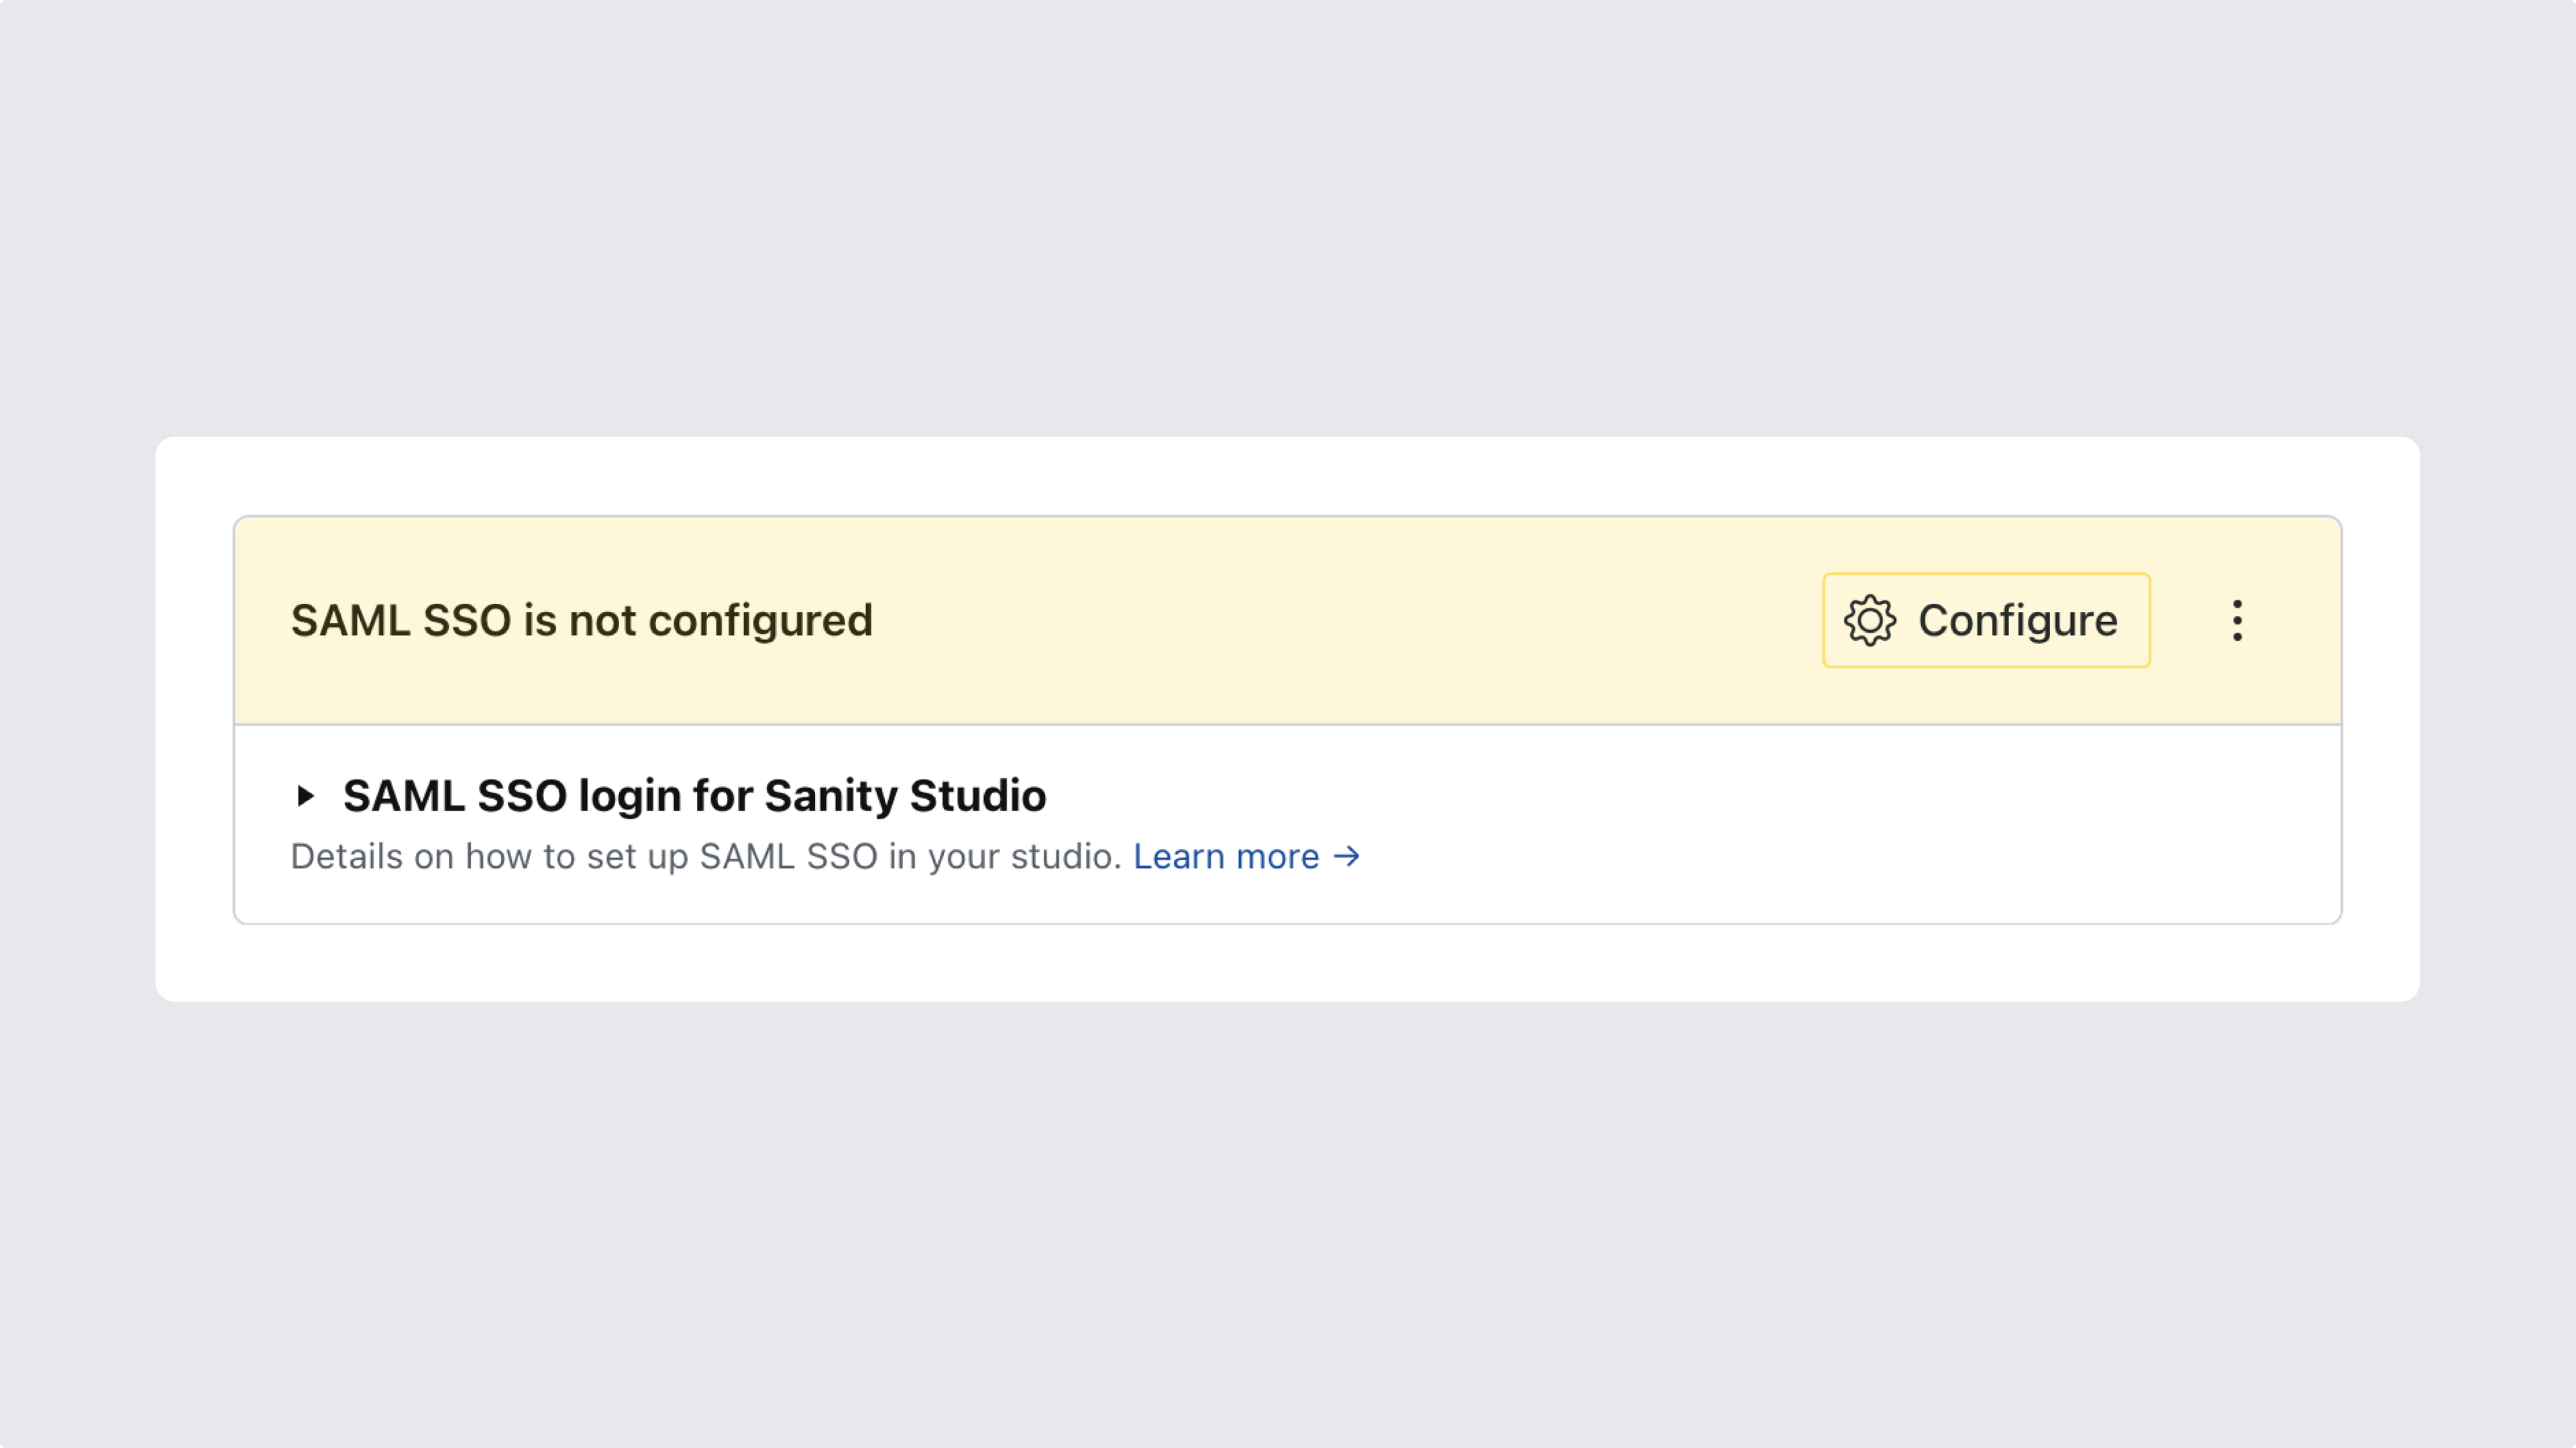
In Manage, select your organization from the menu at the top of the sidebar. Then select Settings > SAML SSO and click Configure.
This is a paid feature
This feature is available on certain Enterprise plans. Talk to sales to learn more.
A dialog appears, telling you that SAML SSO is not configured. Click Configure to start setting up your provider. Sanity then generates the details you need to connect your identity provider to your organization.
2. Use the details presented to configure the external identity provider
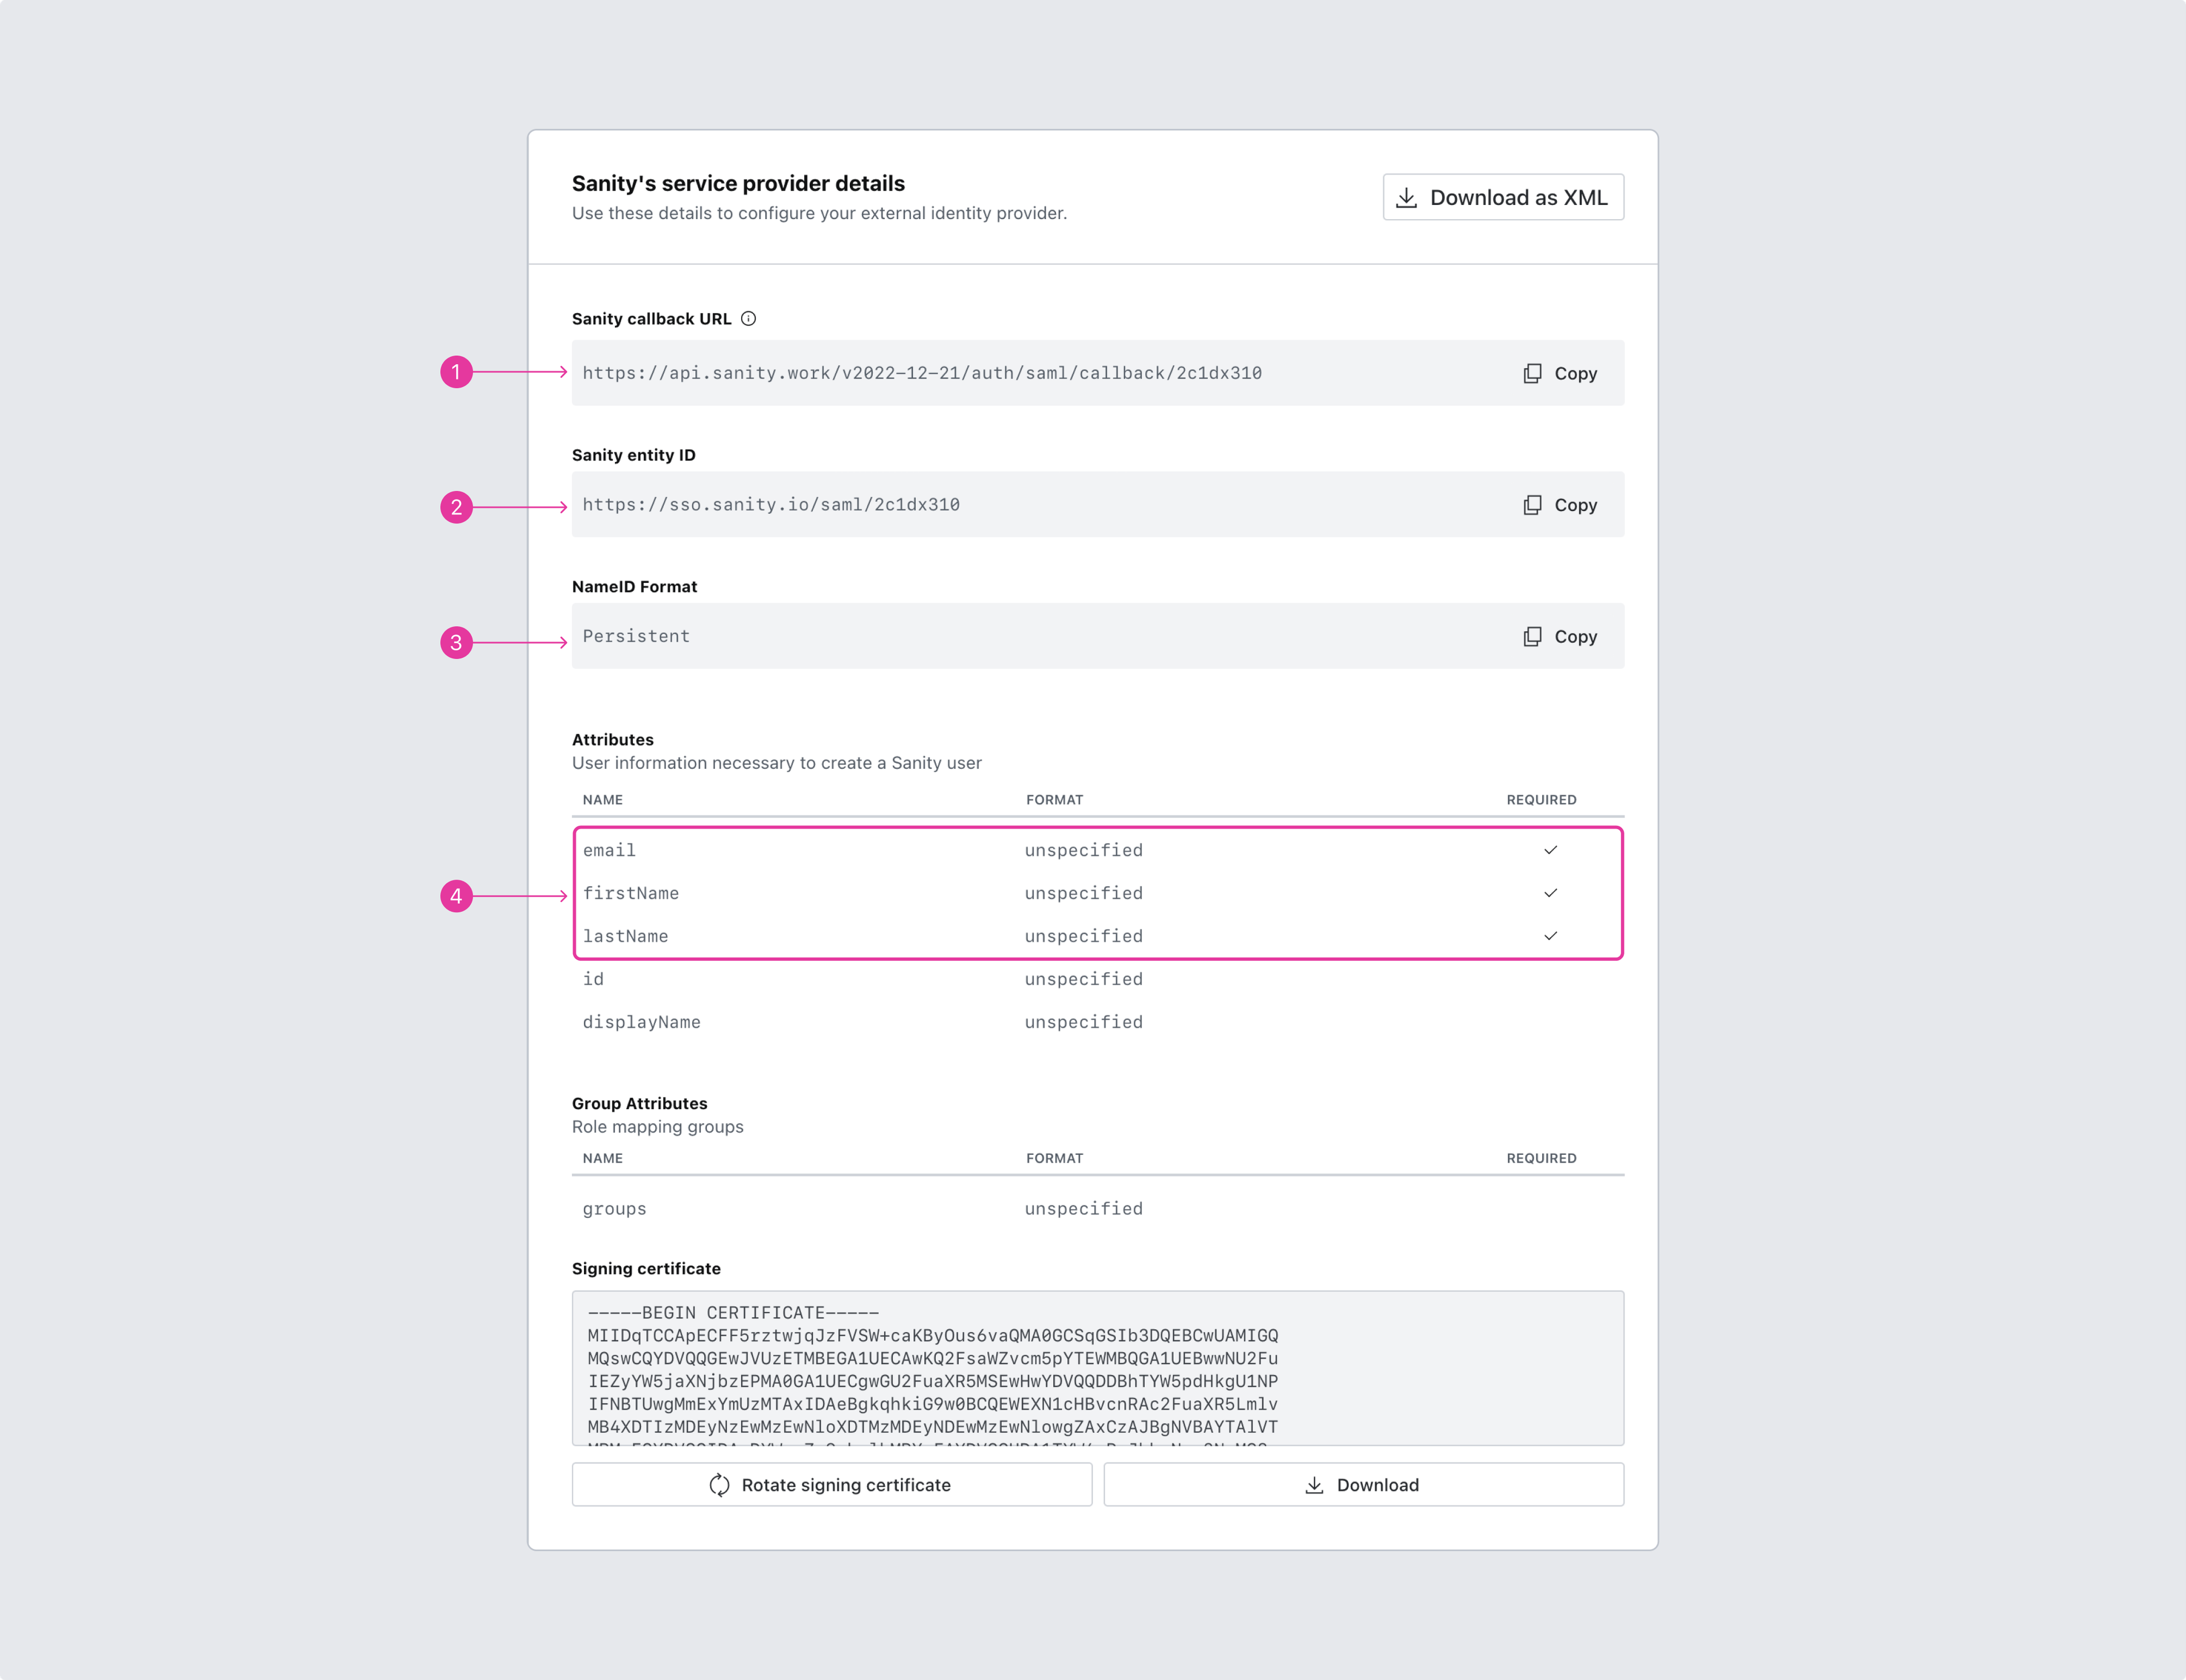
Sanity provides the details you need to set up your external identity provider. In the Sanity's service provider details section, use the Copy buttons to copy each string, or click Download as XML to download the settings as a SAML XML file.
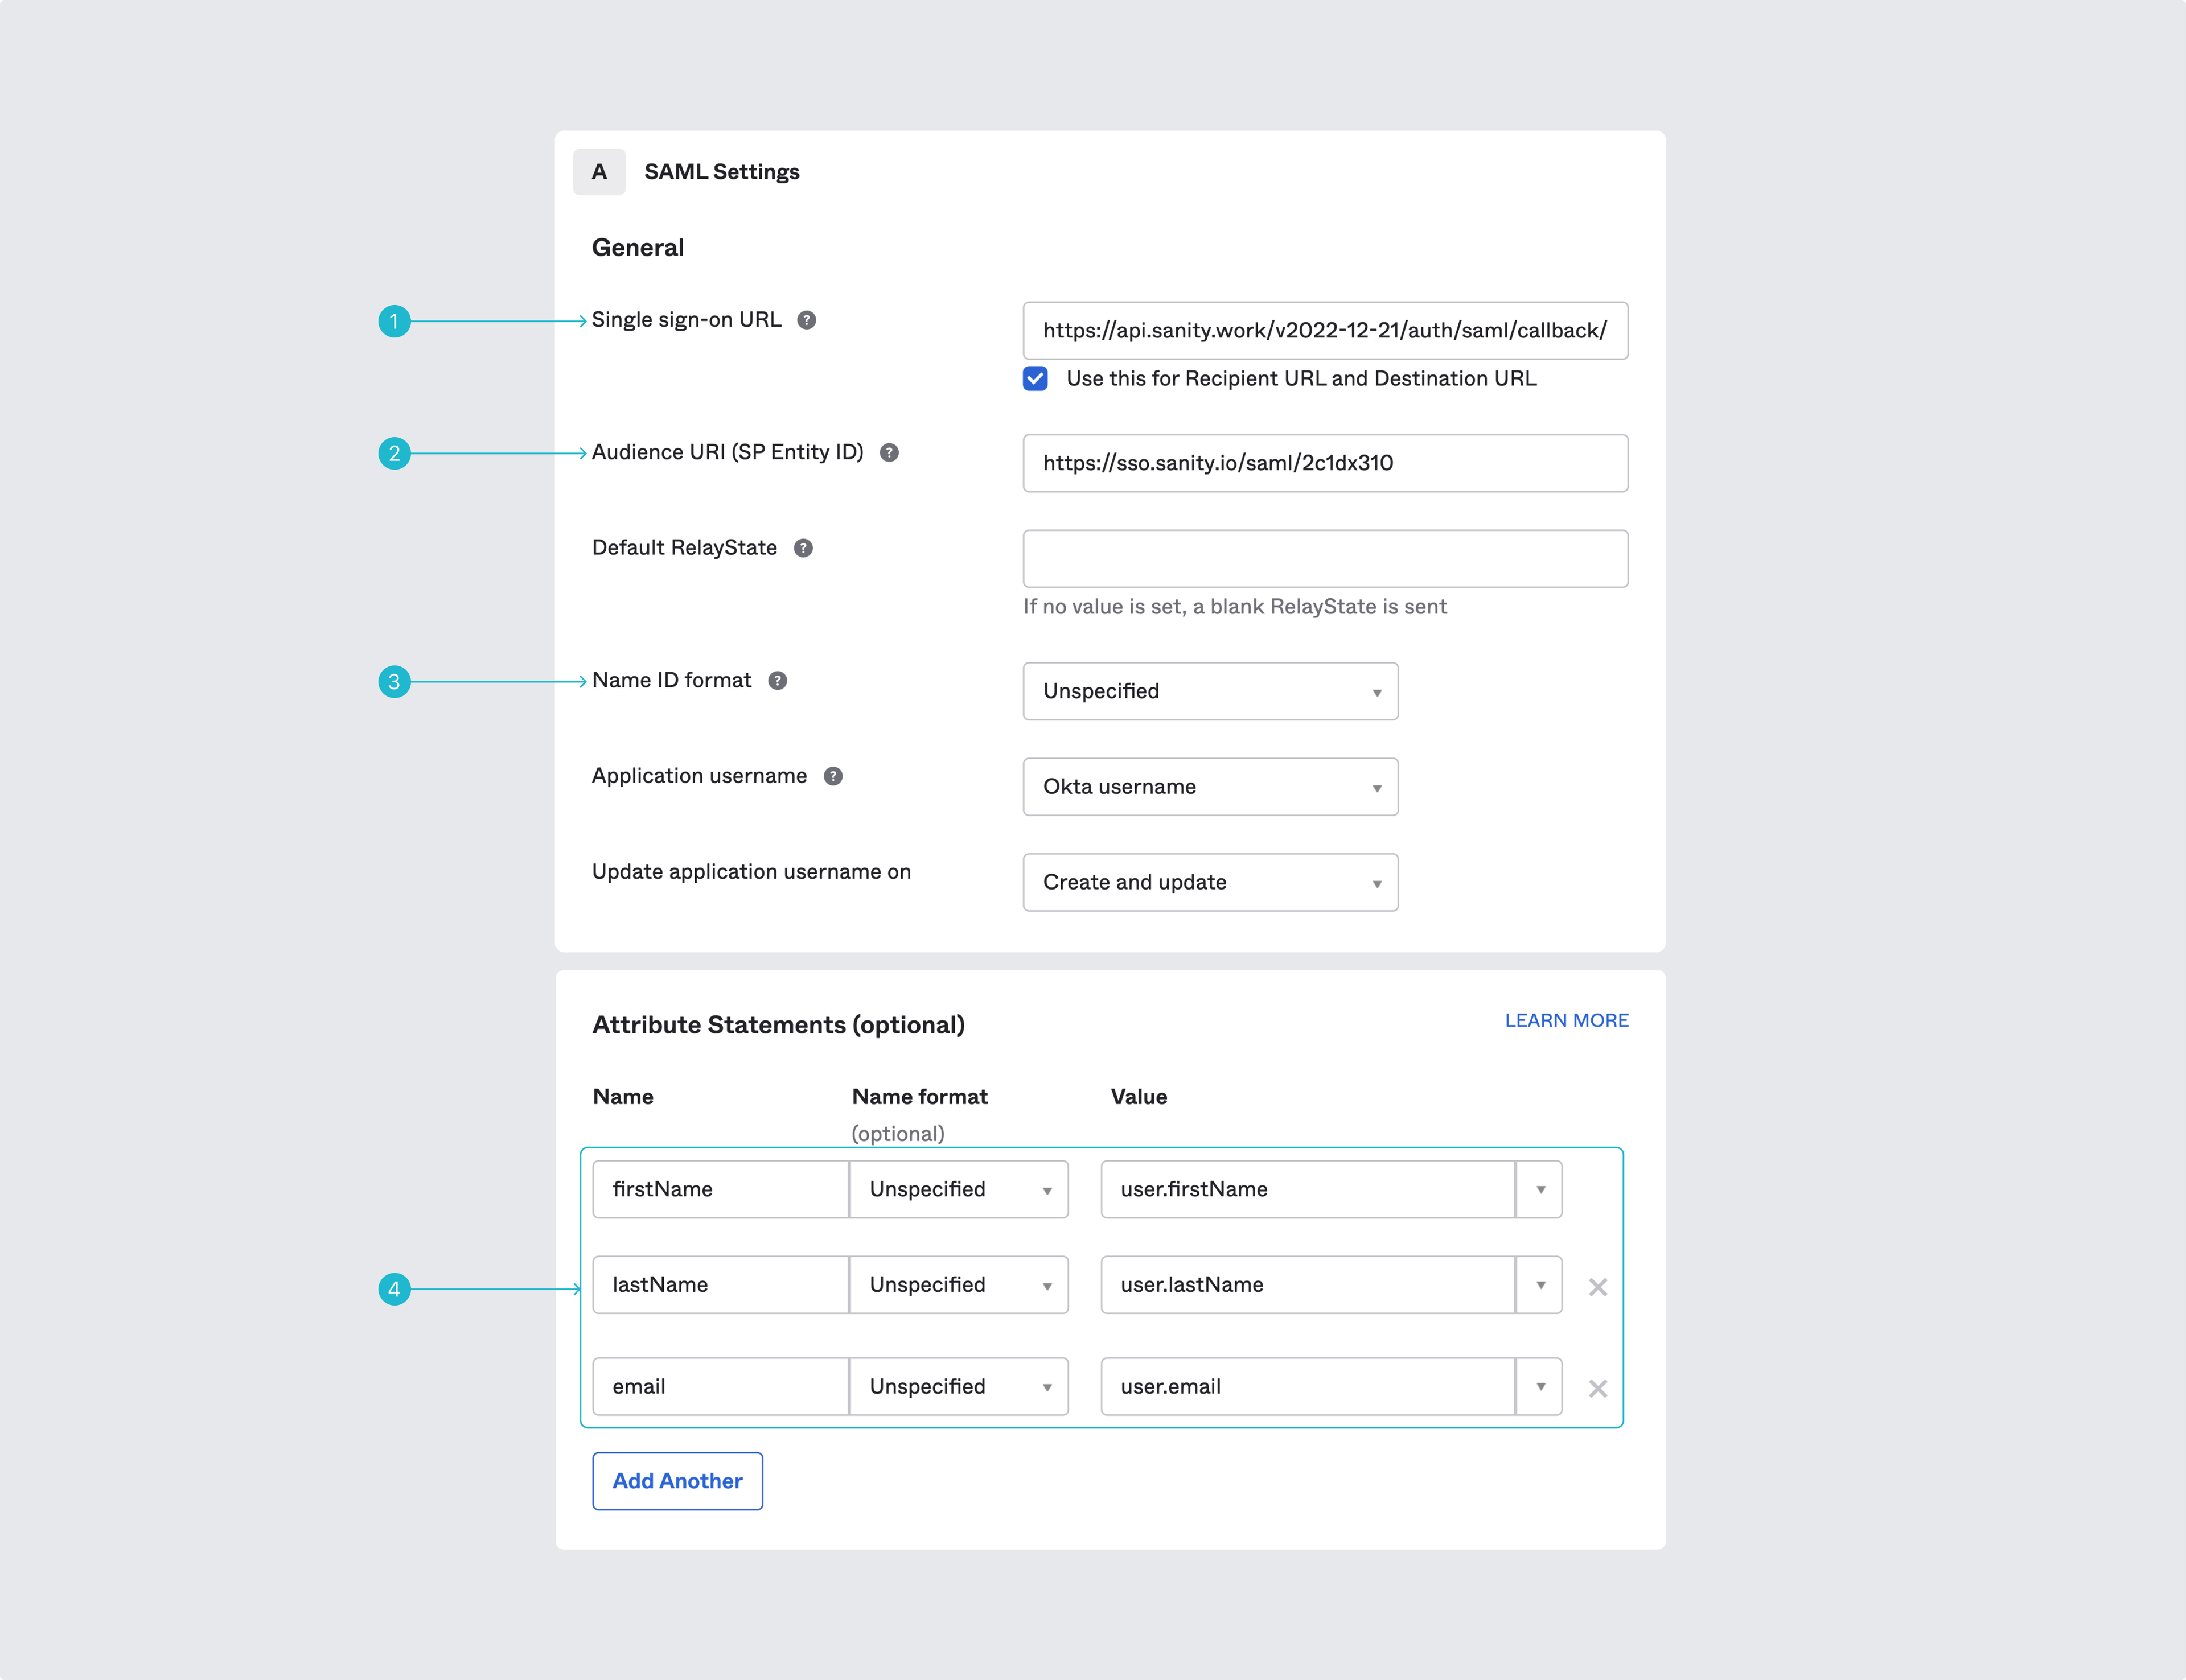
The following image shows where to enter these details in Okta. Provider-specific guides are available for Azure/Entra ID, JumpCloud, and PingIdentity.
Sanity's fields correspond to Okta's as follows:
- Sanity callback URL: Okta's Single sign-on URL.
- Sanity entity ID: Okta's Audience URI (SP Entity ID).
- NameID Format: Okta's Name ID Format. Sanity uses Persistent.
- Attributes: Okta's Attribute statements.
Map the attributes for user accounts carefully. Sanity requires email, firstName, and lastName to be mapped to corresponding values from the identity provider. The id and displayName attributes are optional. Each of the three required attributes accepts either camelCase or PascalCase (email or Email), but don't send both casings of the same attribute. The assertion must also include either a nameID or an id attribute. If user attribute management is enabled for your organization, attributes from the assertion are also stored as user attributes.
Gotcha
Set the groups in the external identity provider that should have access to the integration. Sanity reads group membership from the groups attribute in the assertion. This attribute name must be lowercase: Groups isn't recognized.
Sanity validates InResponseTo by default, which requires your identity provider to return it. Microsoft Entra ID doesn't, and identity-provider-initiated logins never do. In either case, clear Enable InResponseTo in Your Identity Provider details.
3. Configure the SAML service provider with the settings of the external identity provider
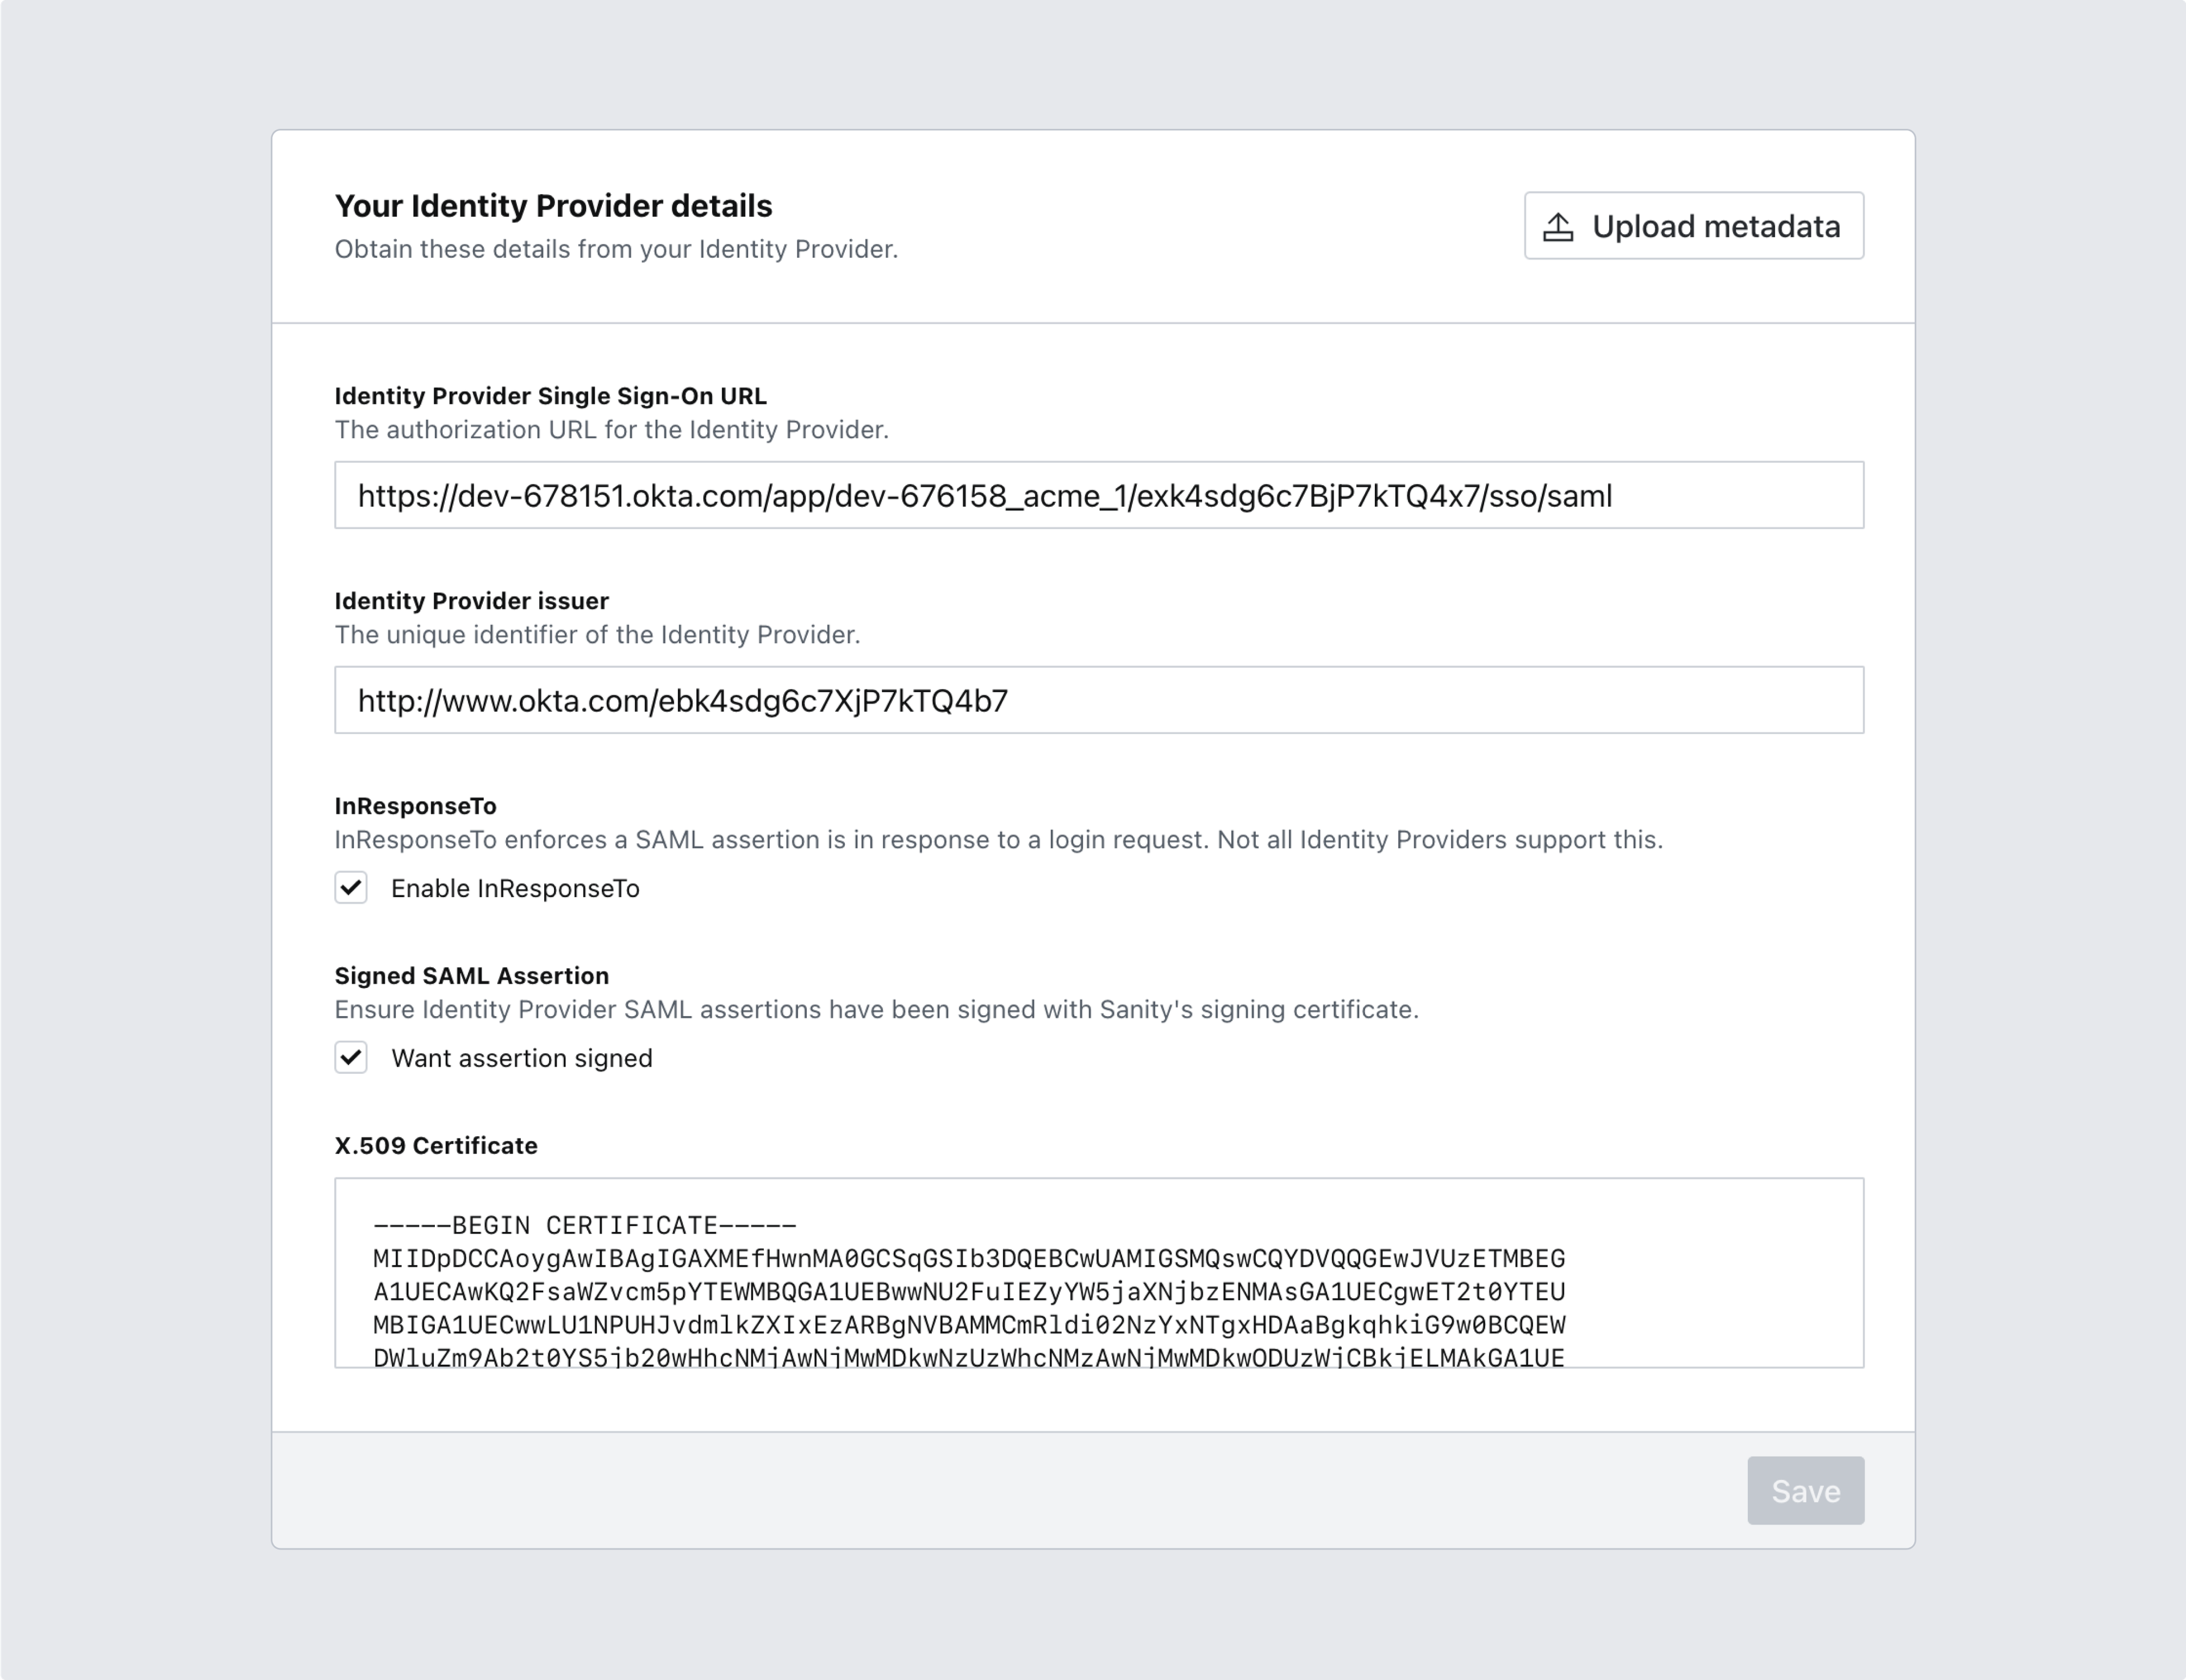
With the external identity provider configured, do the reverse. In the Your Identity Provider details section, fill in the values from your identity provider and click Save.
Protip
Many providers let you download the required settings as an XML file. If you have that file, click Upload metadata instead of copying each value by hand.
4. Name your configuration and set options for role mapping
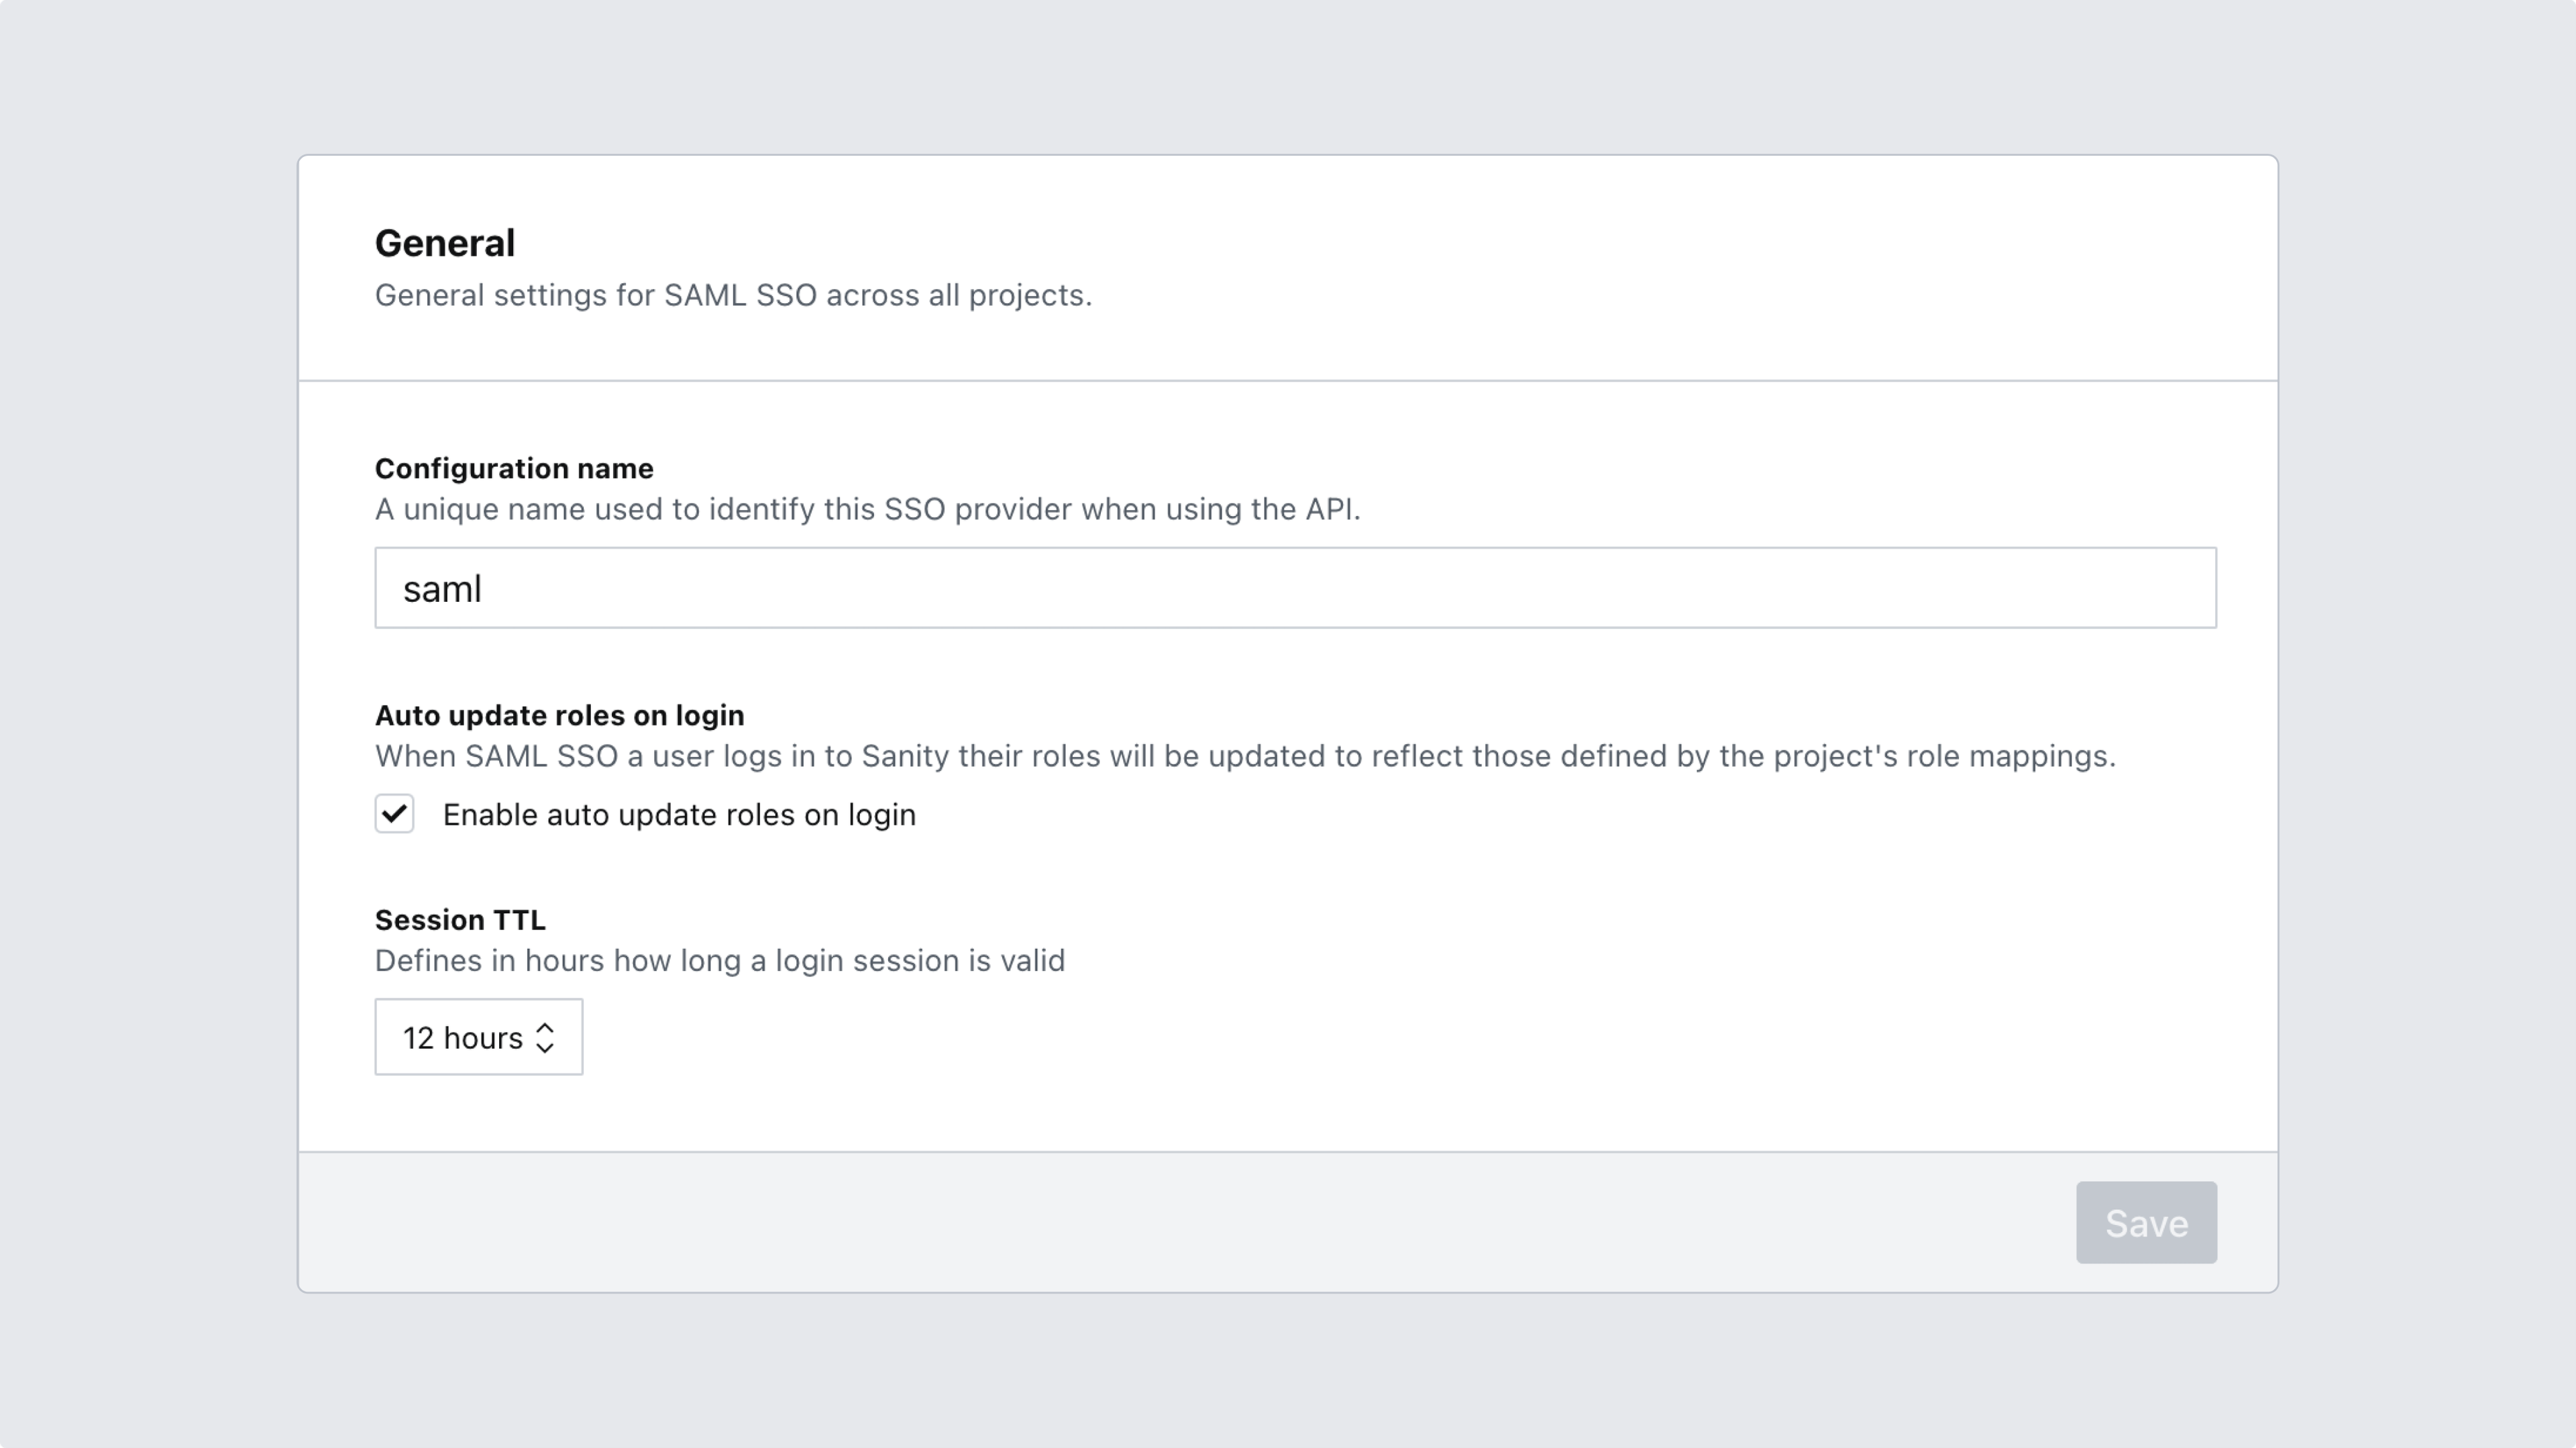
In the General section, name your configuration in Configuration name and choose whether to Enable auto update roles on login. Session TTL defines in hours how long a login session stays valid. It defaults to 12 hours, and you can choose 12 hours, 16 hours, 1 day, 2 days, 3 days, or 1 week. Save the configuration when you're done.
Auto update roles on login
Role mapping always applies once, even when Enable auto update roles on login is cleared. At a user's first SAML SSO login, Sanity assigns the roles their groups map to, or the fallback role. Logging in through a project-specific login URL does the same for a user who isn't a member of that project yet. After that, Sanity changes their roles only when you do, or when a user who isn't a member of a project logs in through that project's login URL.
When the setting is enabled, Sanity re-evaluates your role mapping rules every time a user logs in with SAML SSO. This applies to the project-specific login URL and to organization-level logins, and the result replaces the user's roles. You can't change a SAML SSO user's roles manually in a project that has role mapping: Sanity rejects the change with Roles are managed via SAML for this project. To change those roles, change the user's groups in your identity provider or edit your role mapping rules. To manage roles manually instead, clear the setting.
5. Set a slug for your organization
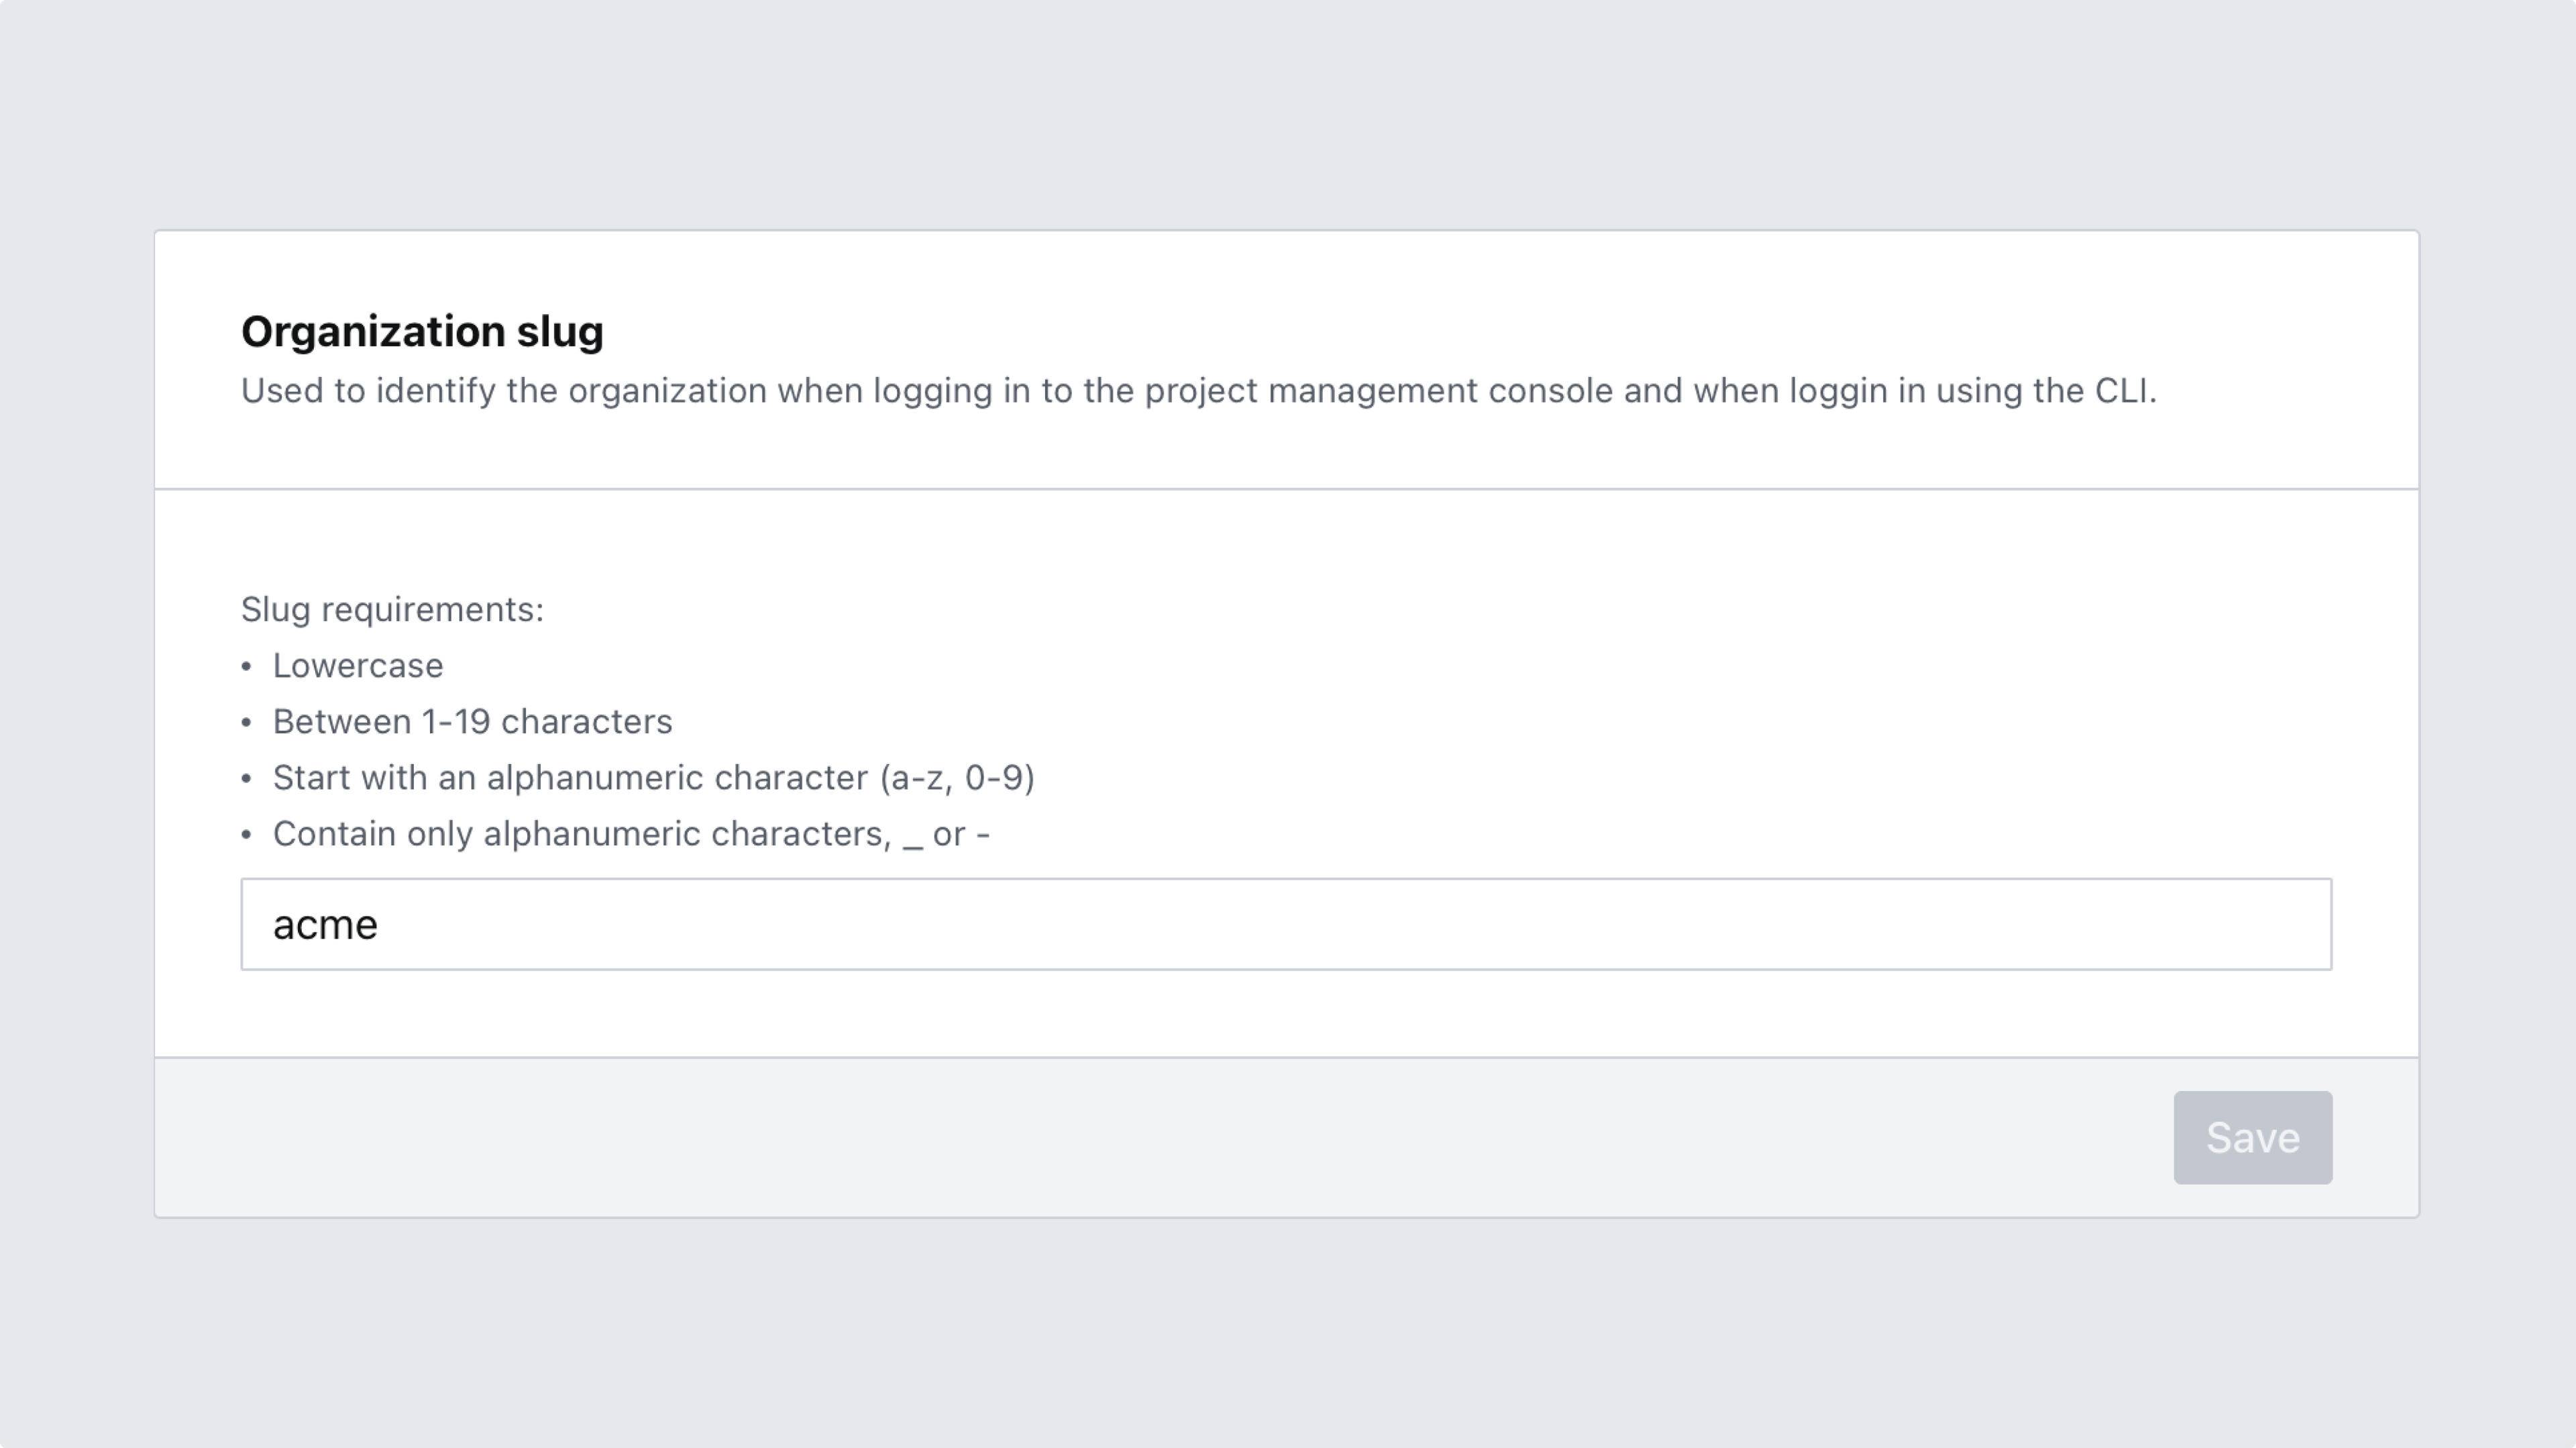
On the SAML SSO configuration page, the Organization slug section defines a unique slug that identifies your organization in certain SSO workflows, such as logging in with the Sanity command-line interface (CLI) or logging in to Sanity Manage. The same setting appears in Settings > Organization details, so it might already have a value.
Your organization slug must:
- Be globally unique.
- Be between 2 and 20 characters long.
- Start with a lowercase letter or a number.
- Contain no characters other than
a-z,0-9,-, and_.
Once the slug is set, you can use it to log in with the Sanity CLI:
# Log in with the organization slug 'saml-docs'
npx sanity login --sso saml-docs

# Name the provider to skip the selection prompt. This is required in
# unattended mode when the organization has more than one provider.
npx sanity login --sso saml-docs --sso-provider "Okta SSO"
# Log in with the organization slug 'saml-docs'
pnpm dlx sanity login --sso saml-docs

# Name the provider to skip the selection prompt. This is required in
# unattended mode when the organization has more than one provider.
pnpm dlx sanity login --sso saml-docs --sso-provider "Okta SSO"
# Log in with the organization slug 'saml-docs'
yarn dlx sanity login --sso saml-docs

# Name the provider to skip the selection prompt. This is required in
# unattended mode when the organization has more than one provider.
yarn dlx sanity login --sso saml-docs --sso-provider "Okta SSO"
# Log in with the organization slug 'saml-docs'
bunx sanity login --sso saml-docs

# Name the provider to skip the selection prompt. This is required in
# unattended mode when the organization has more than one provider.
bunx sanity login --sso saml-docs --sso-provider "Okta SSO"
6. Enable SSO and configure role mapping for the desired projects
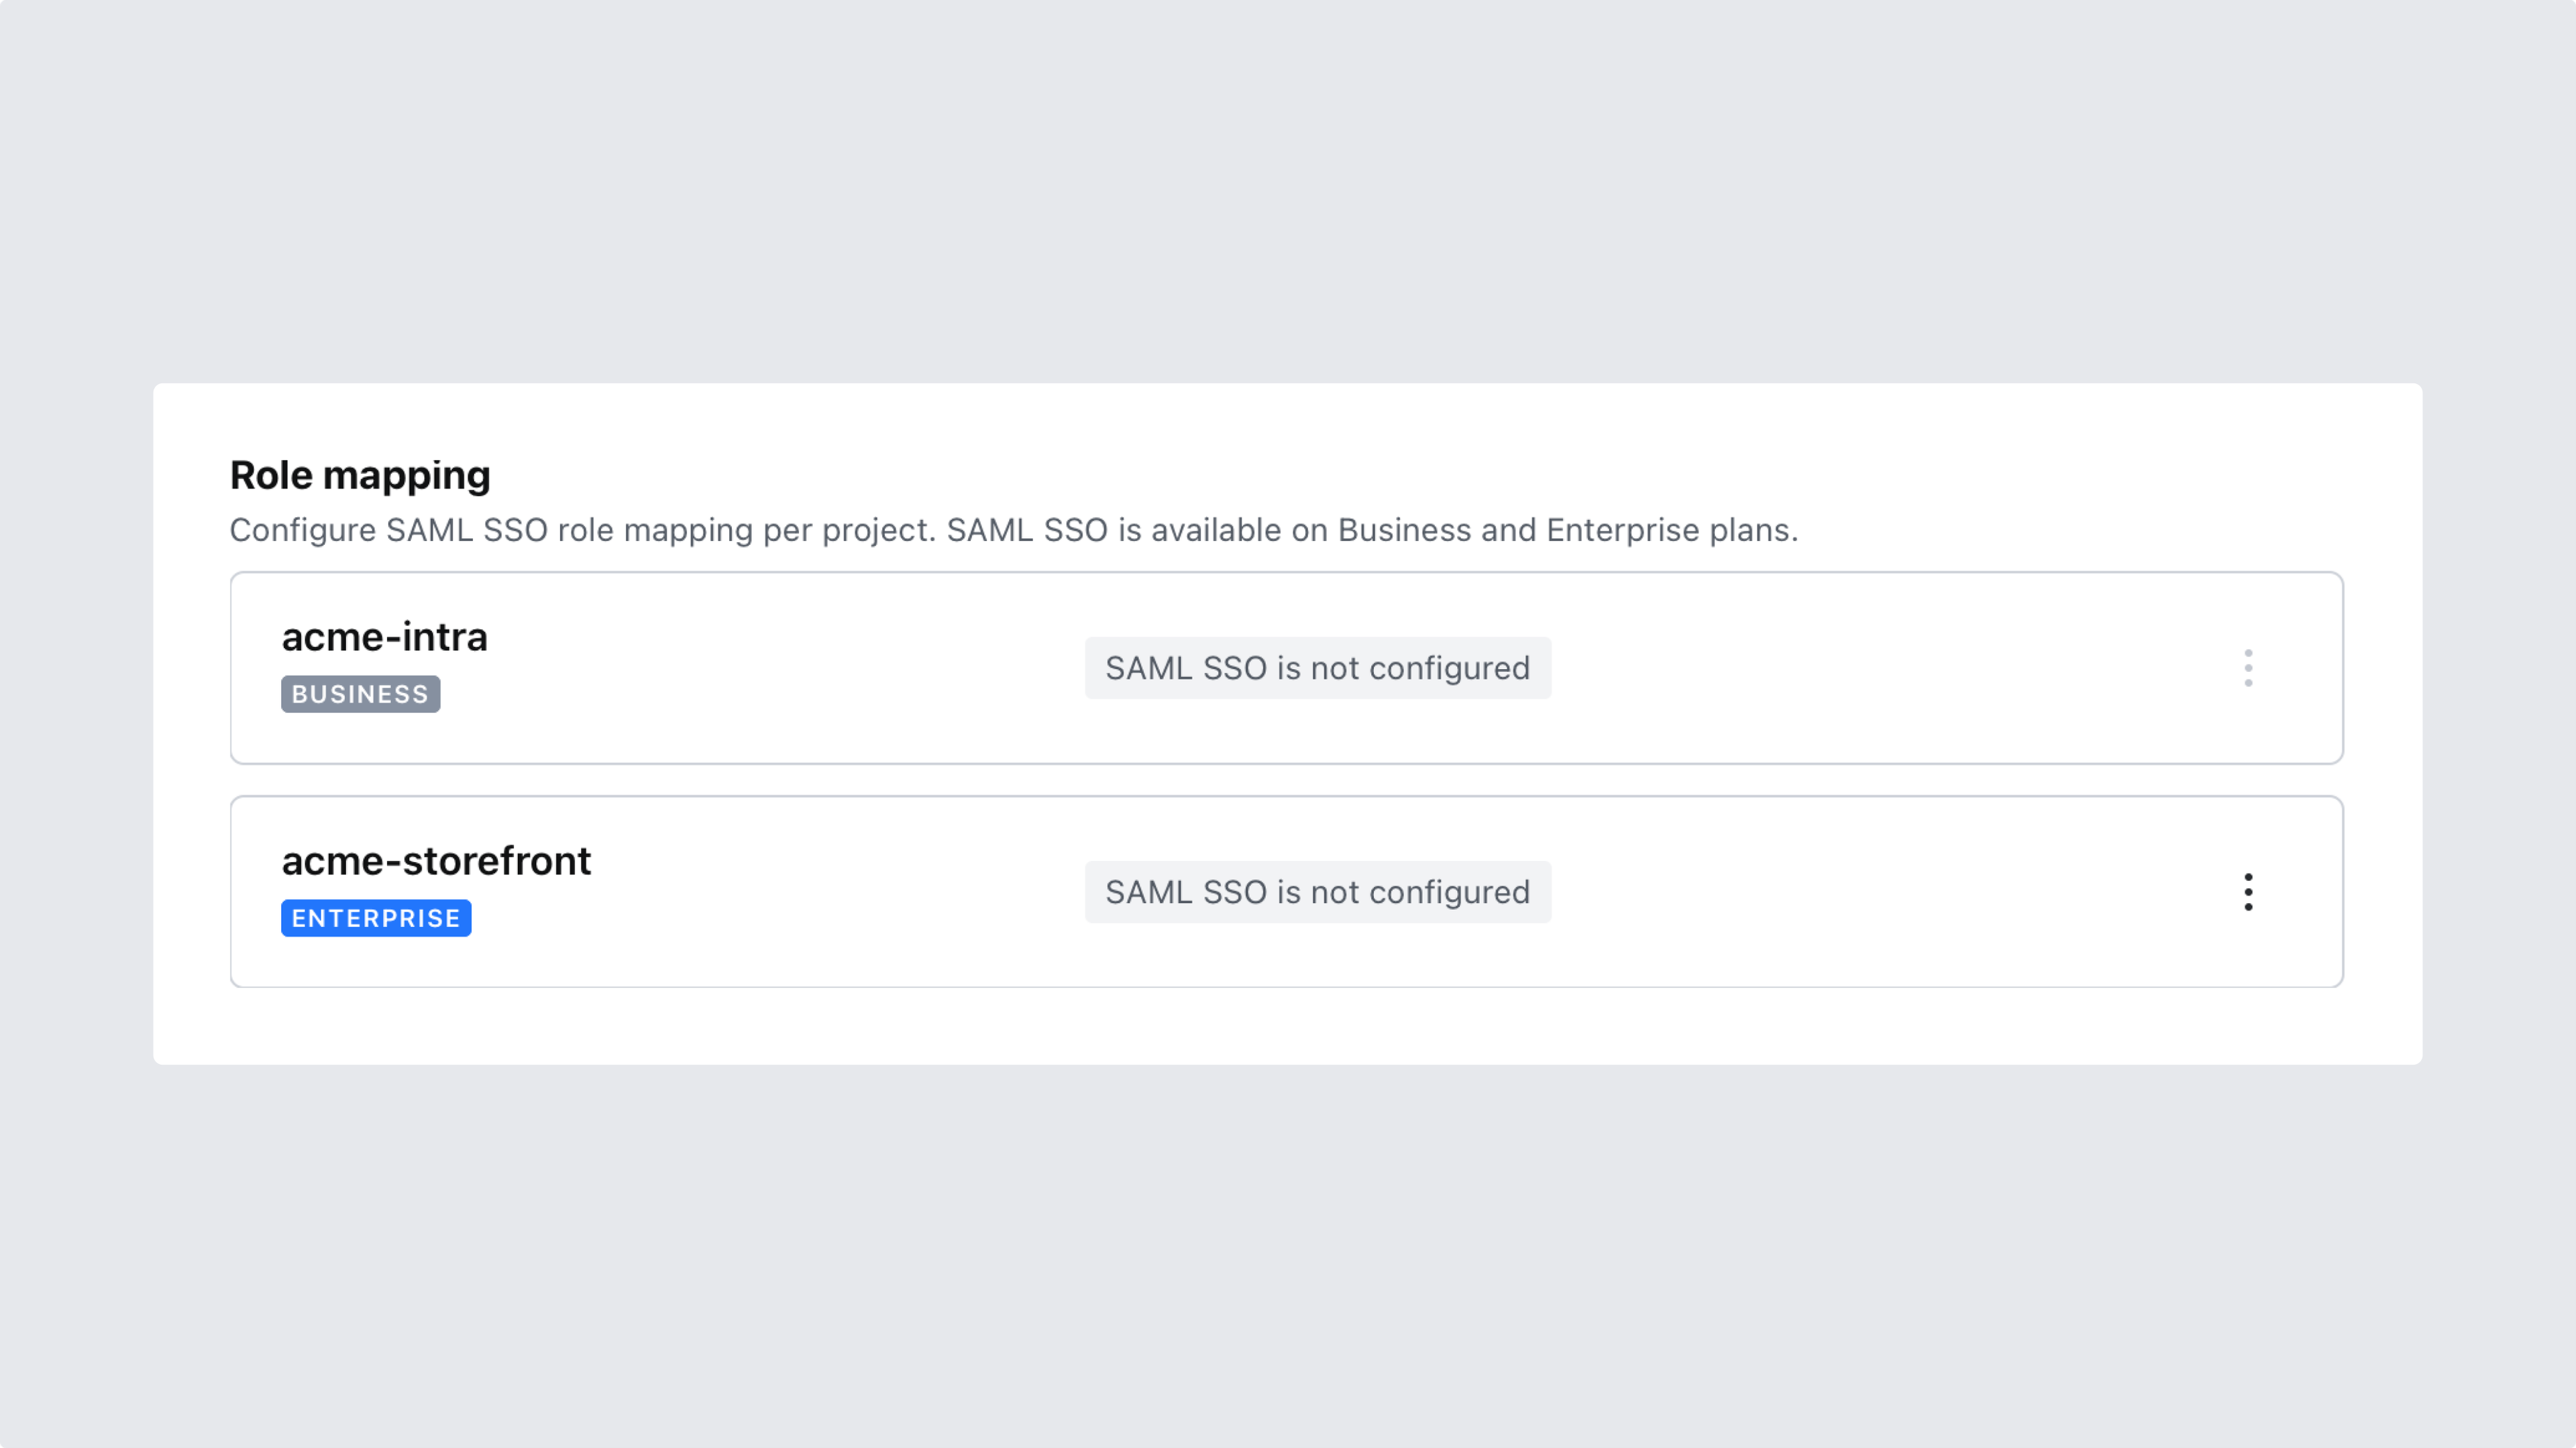
After saving your settings, enable SSO for one or more of your projects. In the same flow, you configure role mapping for each project.
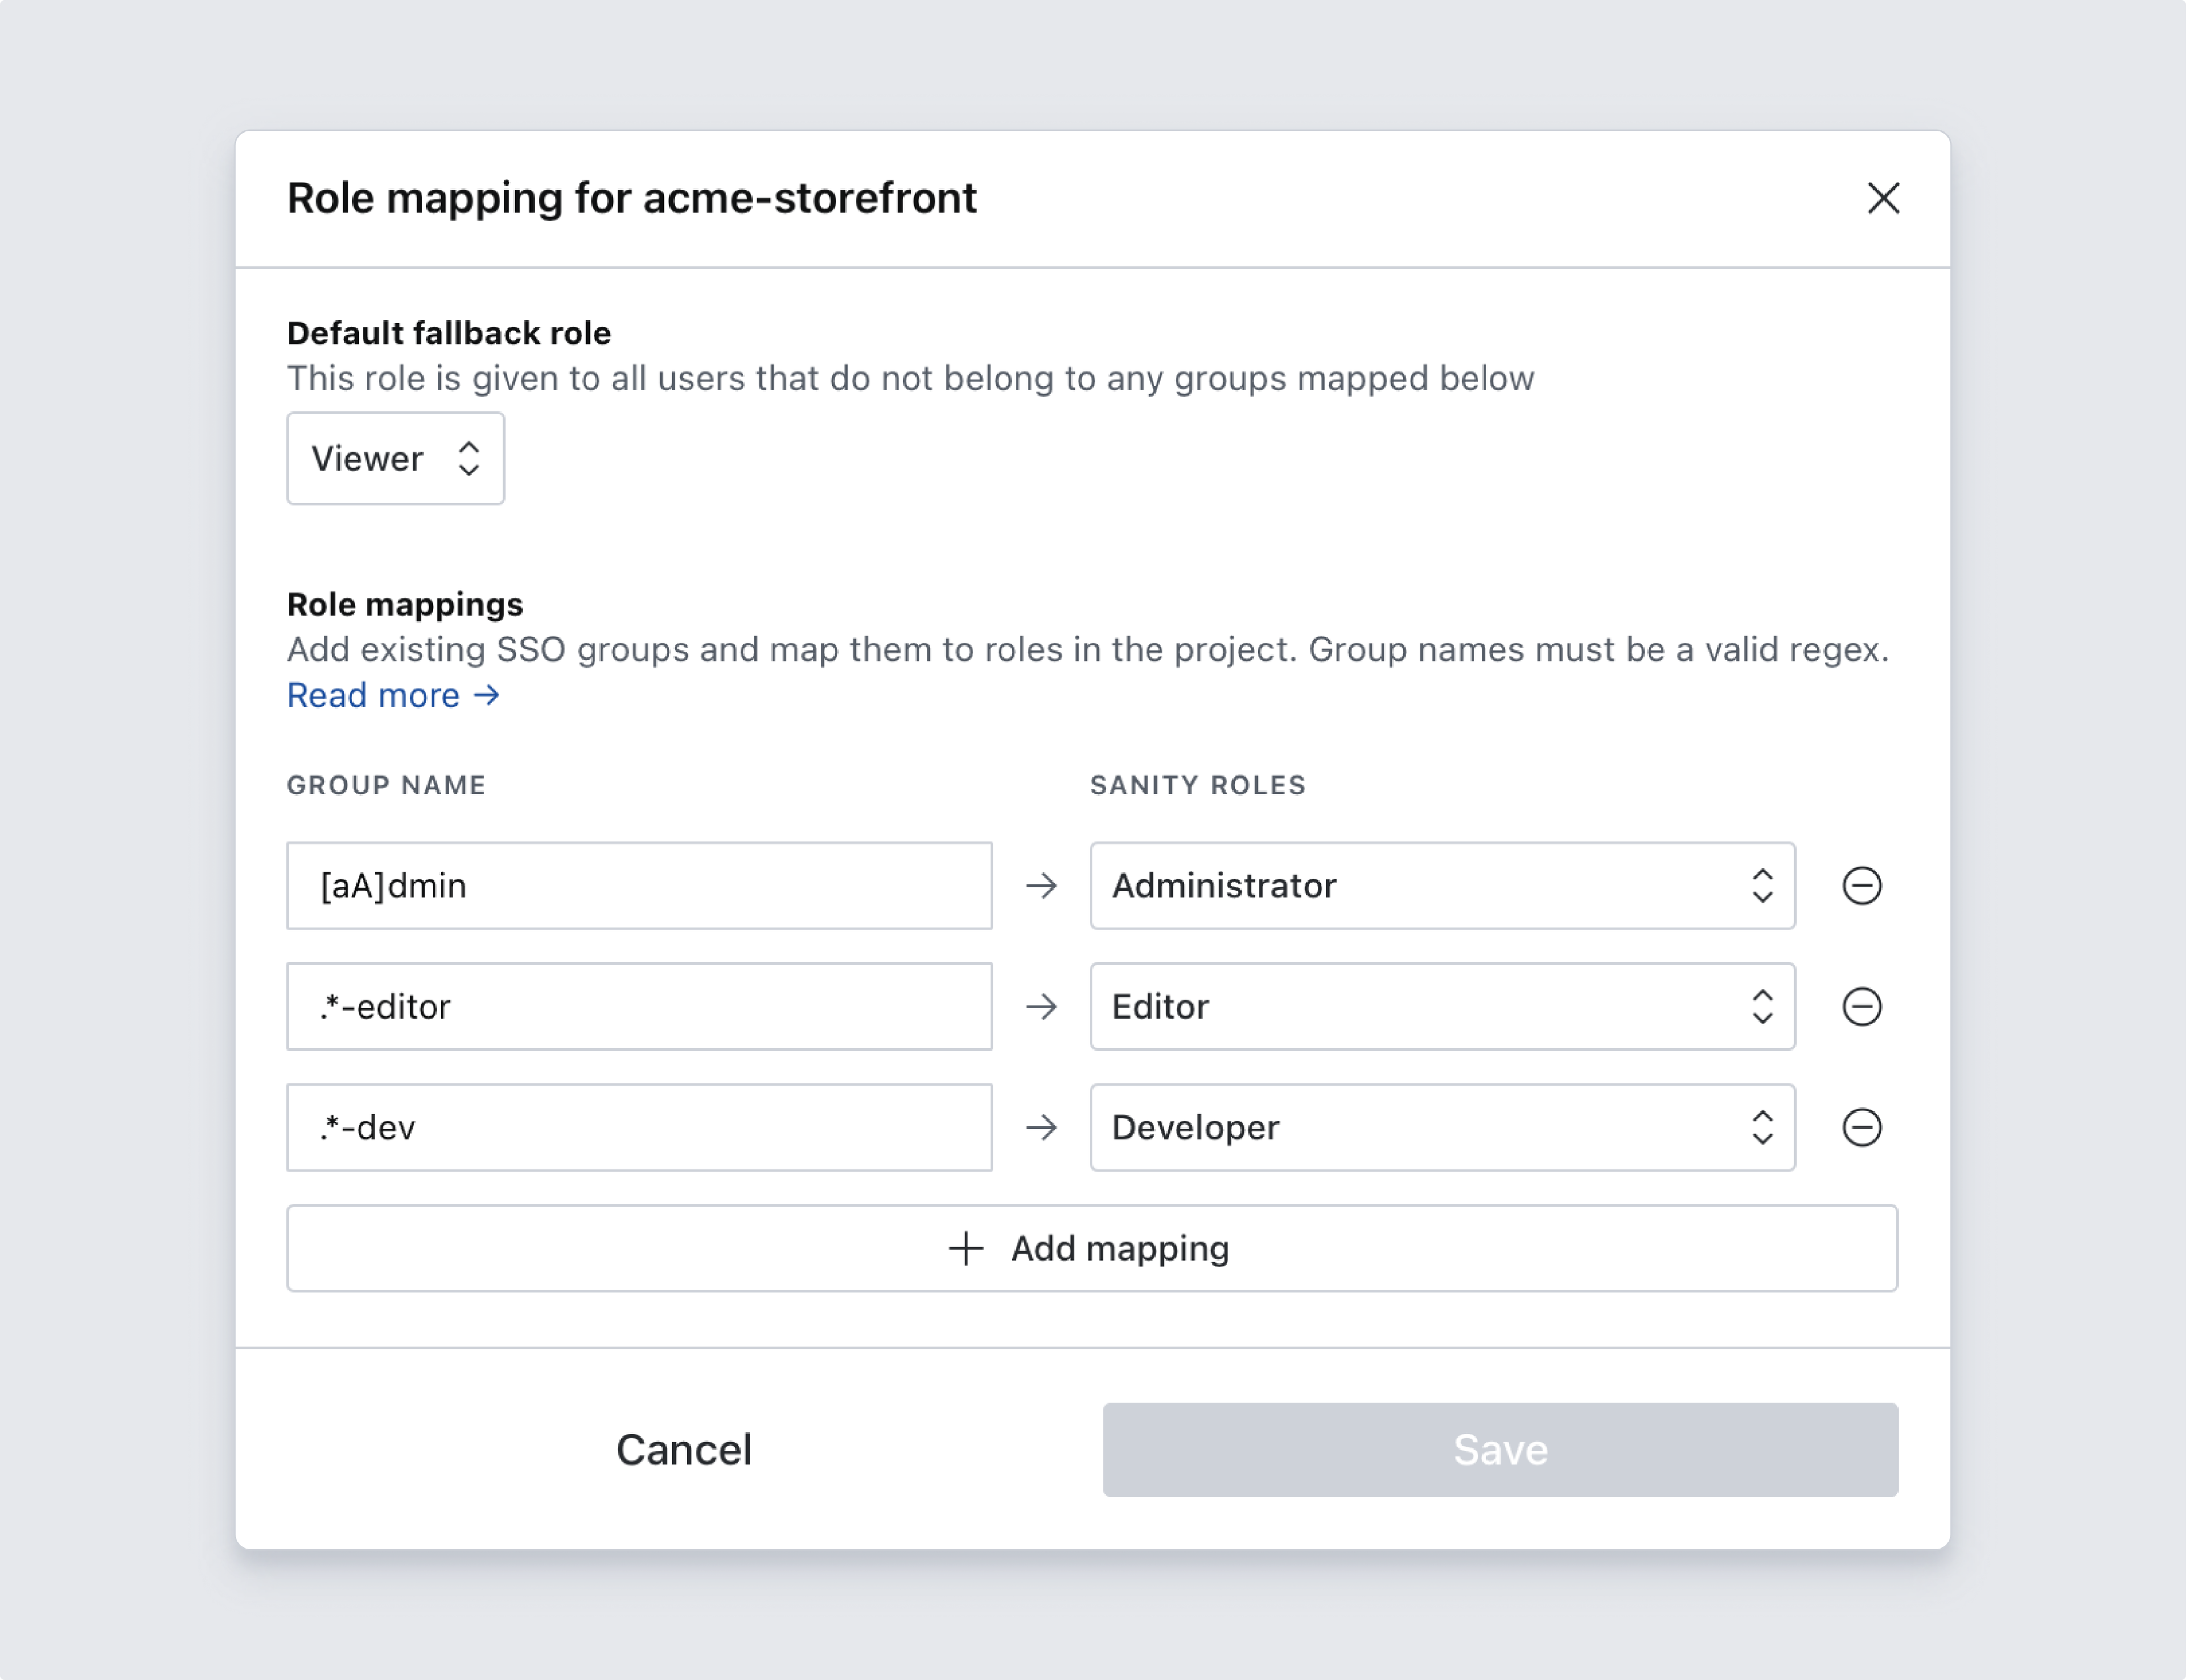
In the role mapping dialog, set a default fallback role for users who don't belong to any group matching your rules. Then add rules that map groups from your identity provider to roles in this project. Rules are evaluated against the groups attribute of the user identity and support RE2 regular expression syntax. Each rule is anchored to the full group name, so editors doesn't match editors-eu. The anchors wrap the whole pattern, so group any alternation: write (editors|admins) rather than editors|admins. Backreferences, lookahead assertions, and lookbehind assertions are not supported. Microsoft Entra ID sends group IDs rather than group names, so write those rules against the group ID. These examples show how rules match:
editorsmatches exactlyeditors.*-adminmatchesnews-admin,sales-admin, and-admin[aA]dminmatchesadminandAdmin
Each rule is evaluated on its own, and a user gets every role whose rule matches one of their groups. A user in two groups that each match a rule gets both roles. Sanity assigns the fallback role only when no rule matches. Sanity can match only the groups your identity provider sends in the groups attribute. If it sends a filtered set, such as only the groups assigned to the application in Microsoft Entra ID, make sure that set includes every group your rules reference.
7. Test your configuration by attempting to log in
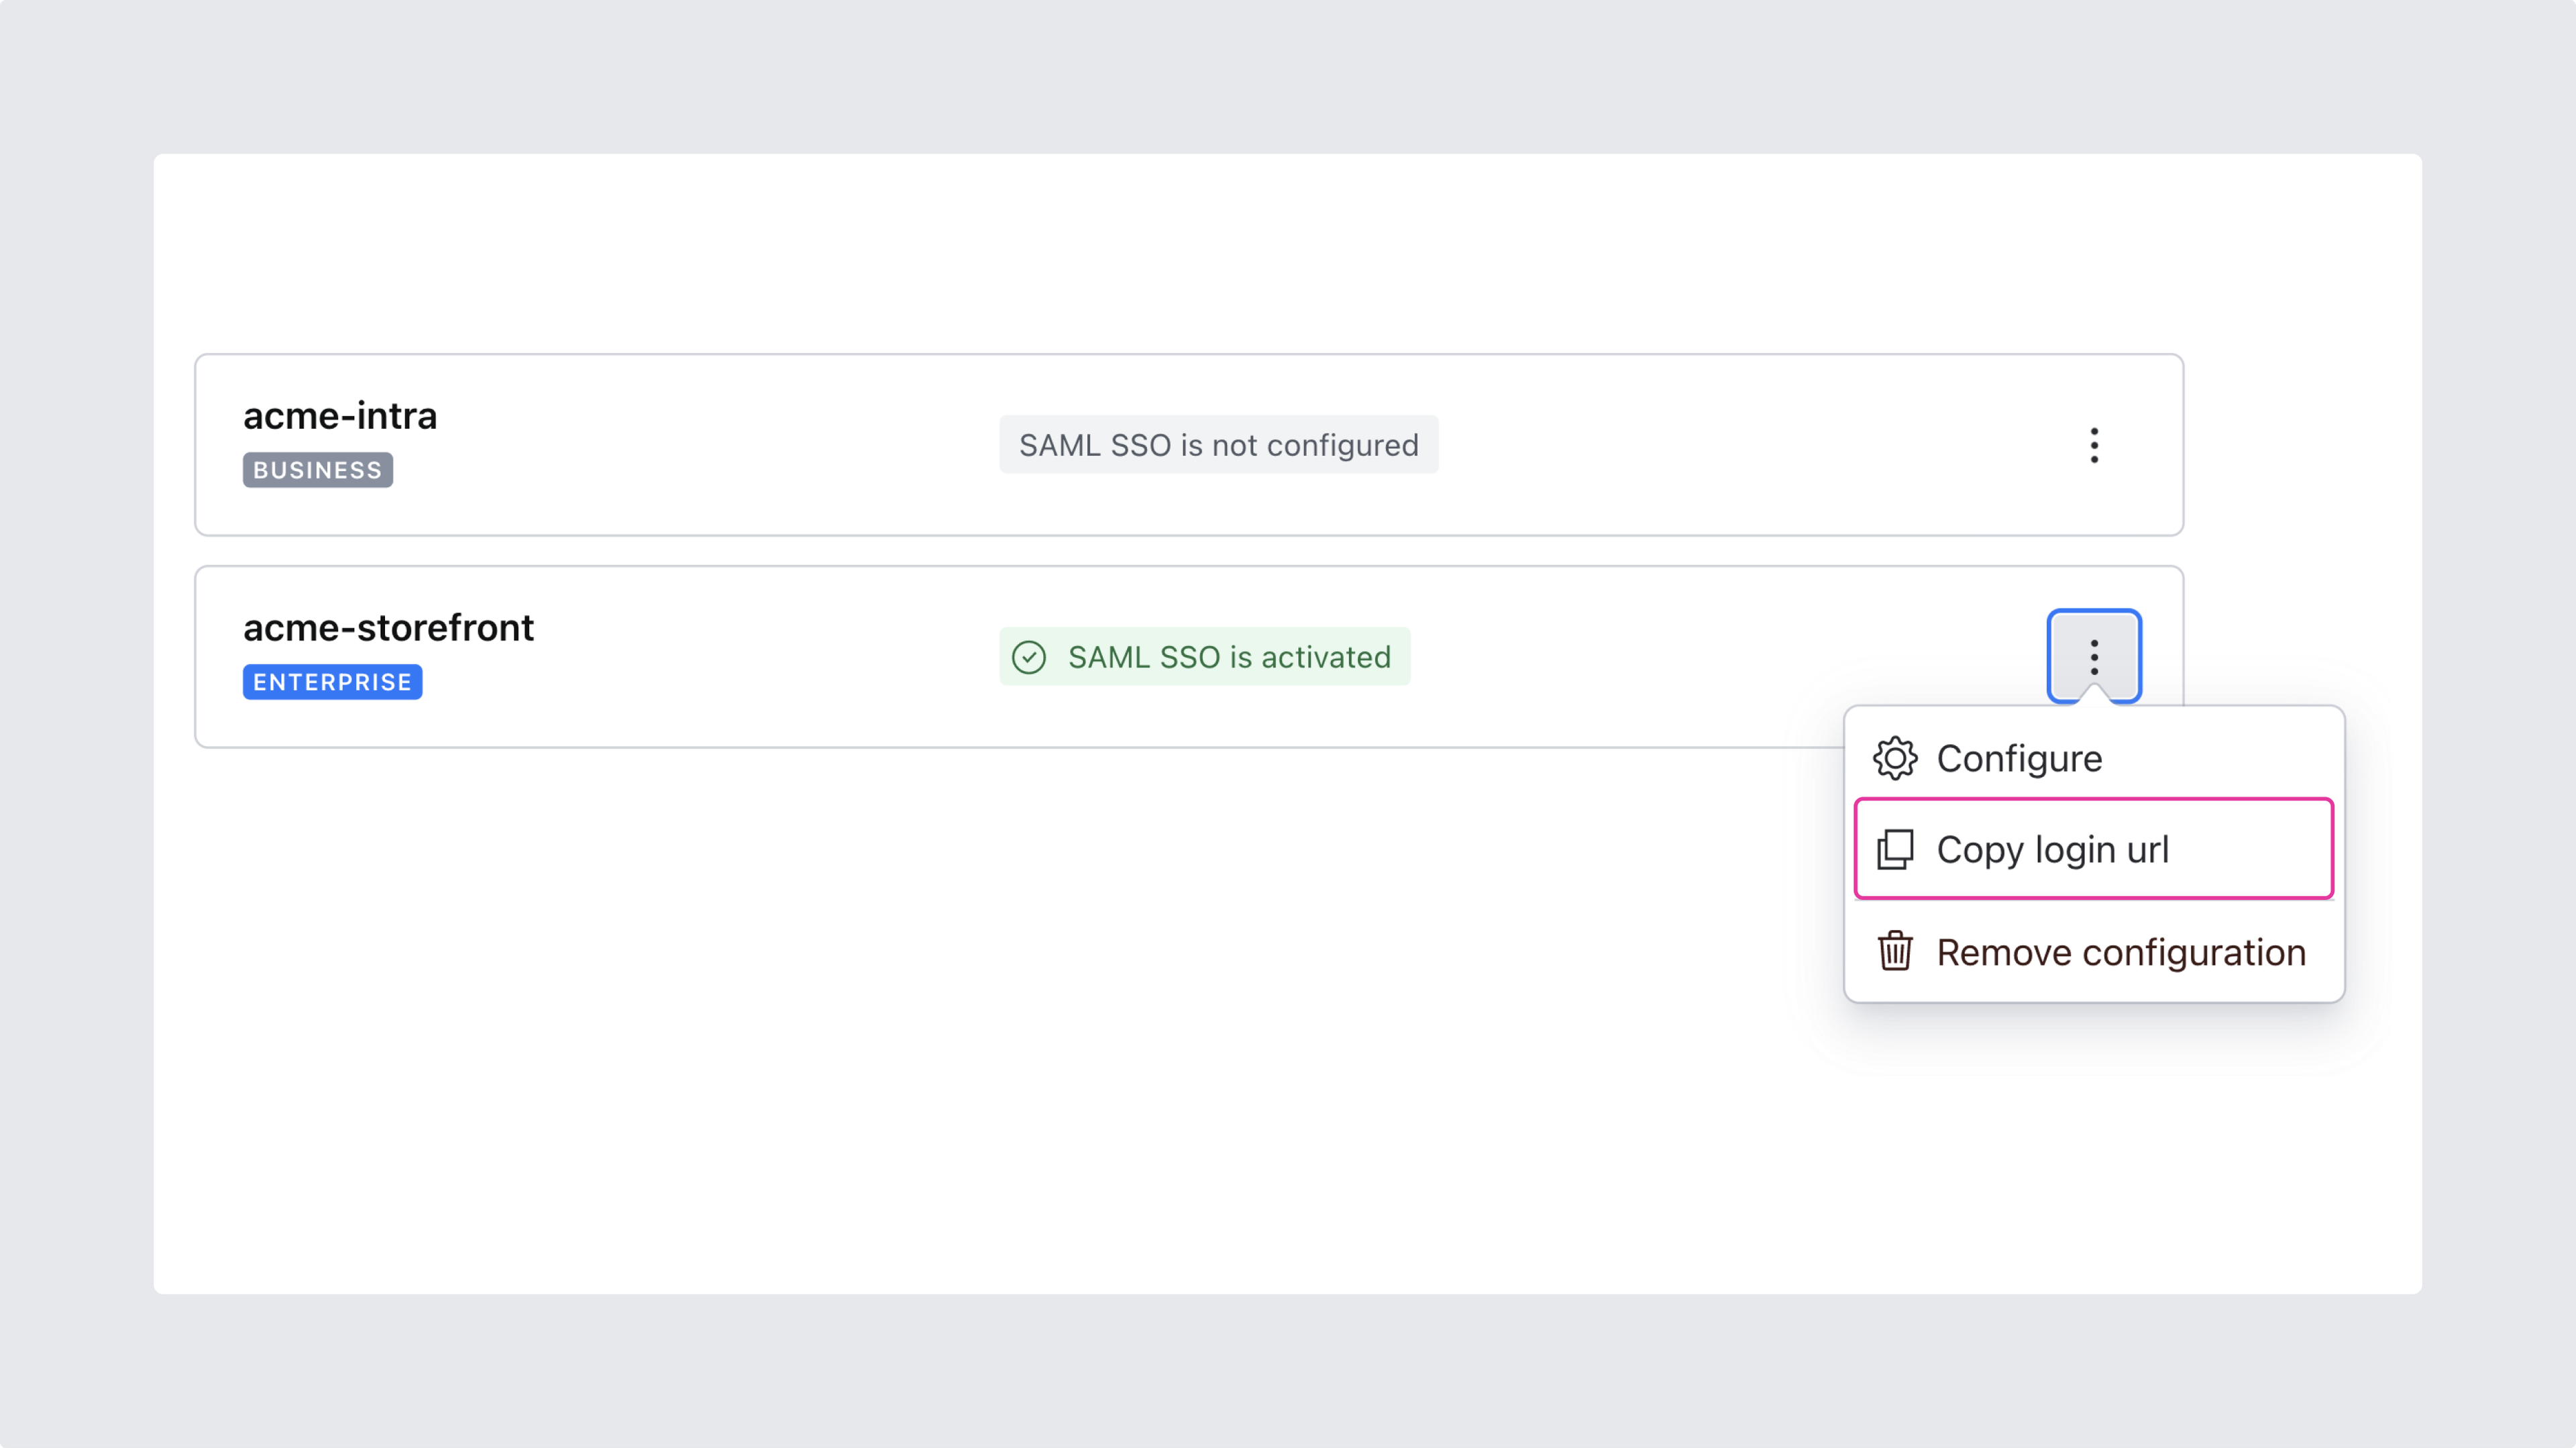
Before configuring your studio to use the new SSO setting, test the project-specific login URL. Copy that URL from Sanity Manage and paste it into your browser's address bar. If the configuration is correct, Sanity logs you out of your current account and into the user account from your SSO identity provider. Testing in a separate browser or a private window keeps your existing session intact.
8. Configure your studio to use the new SSO provider
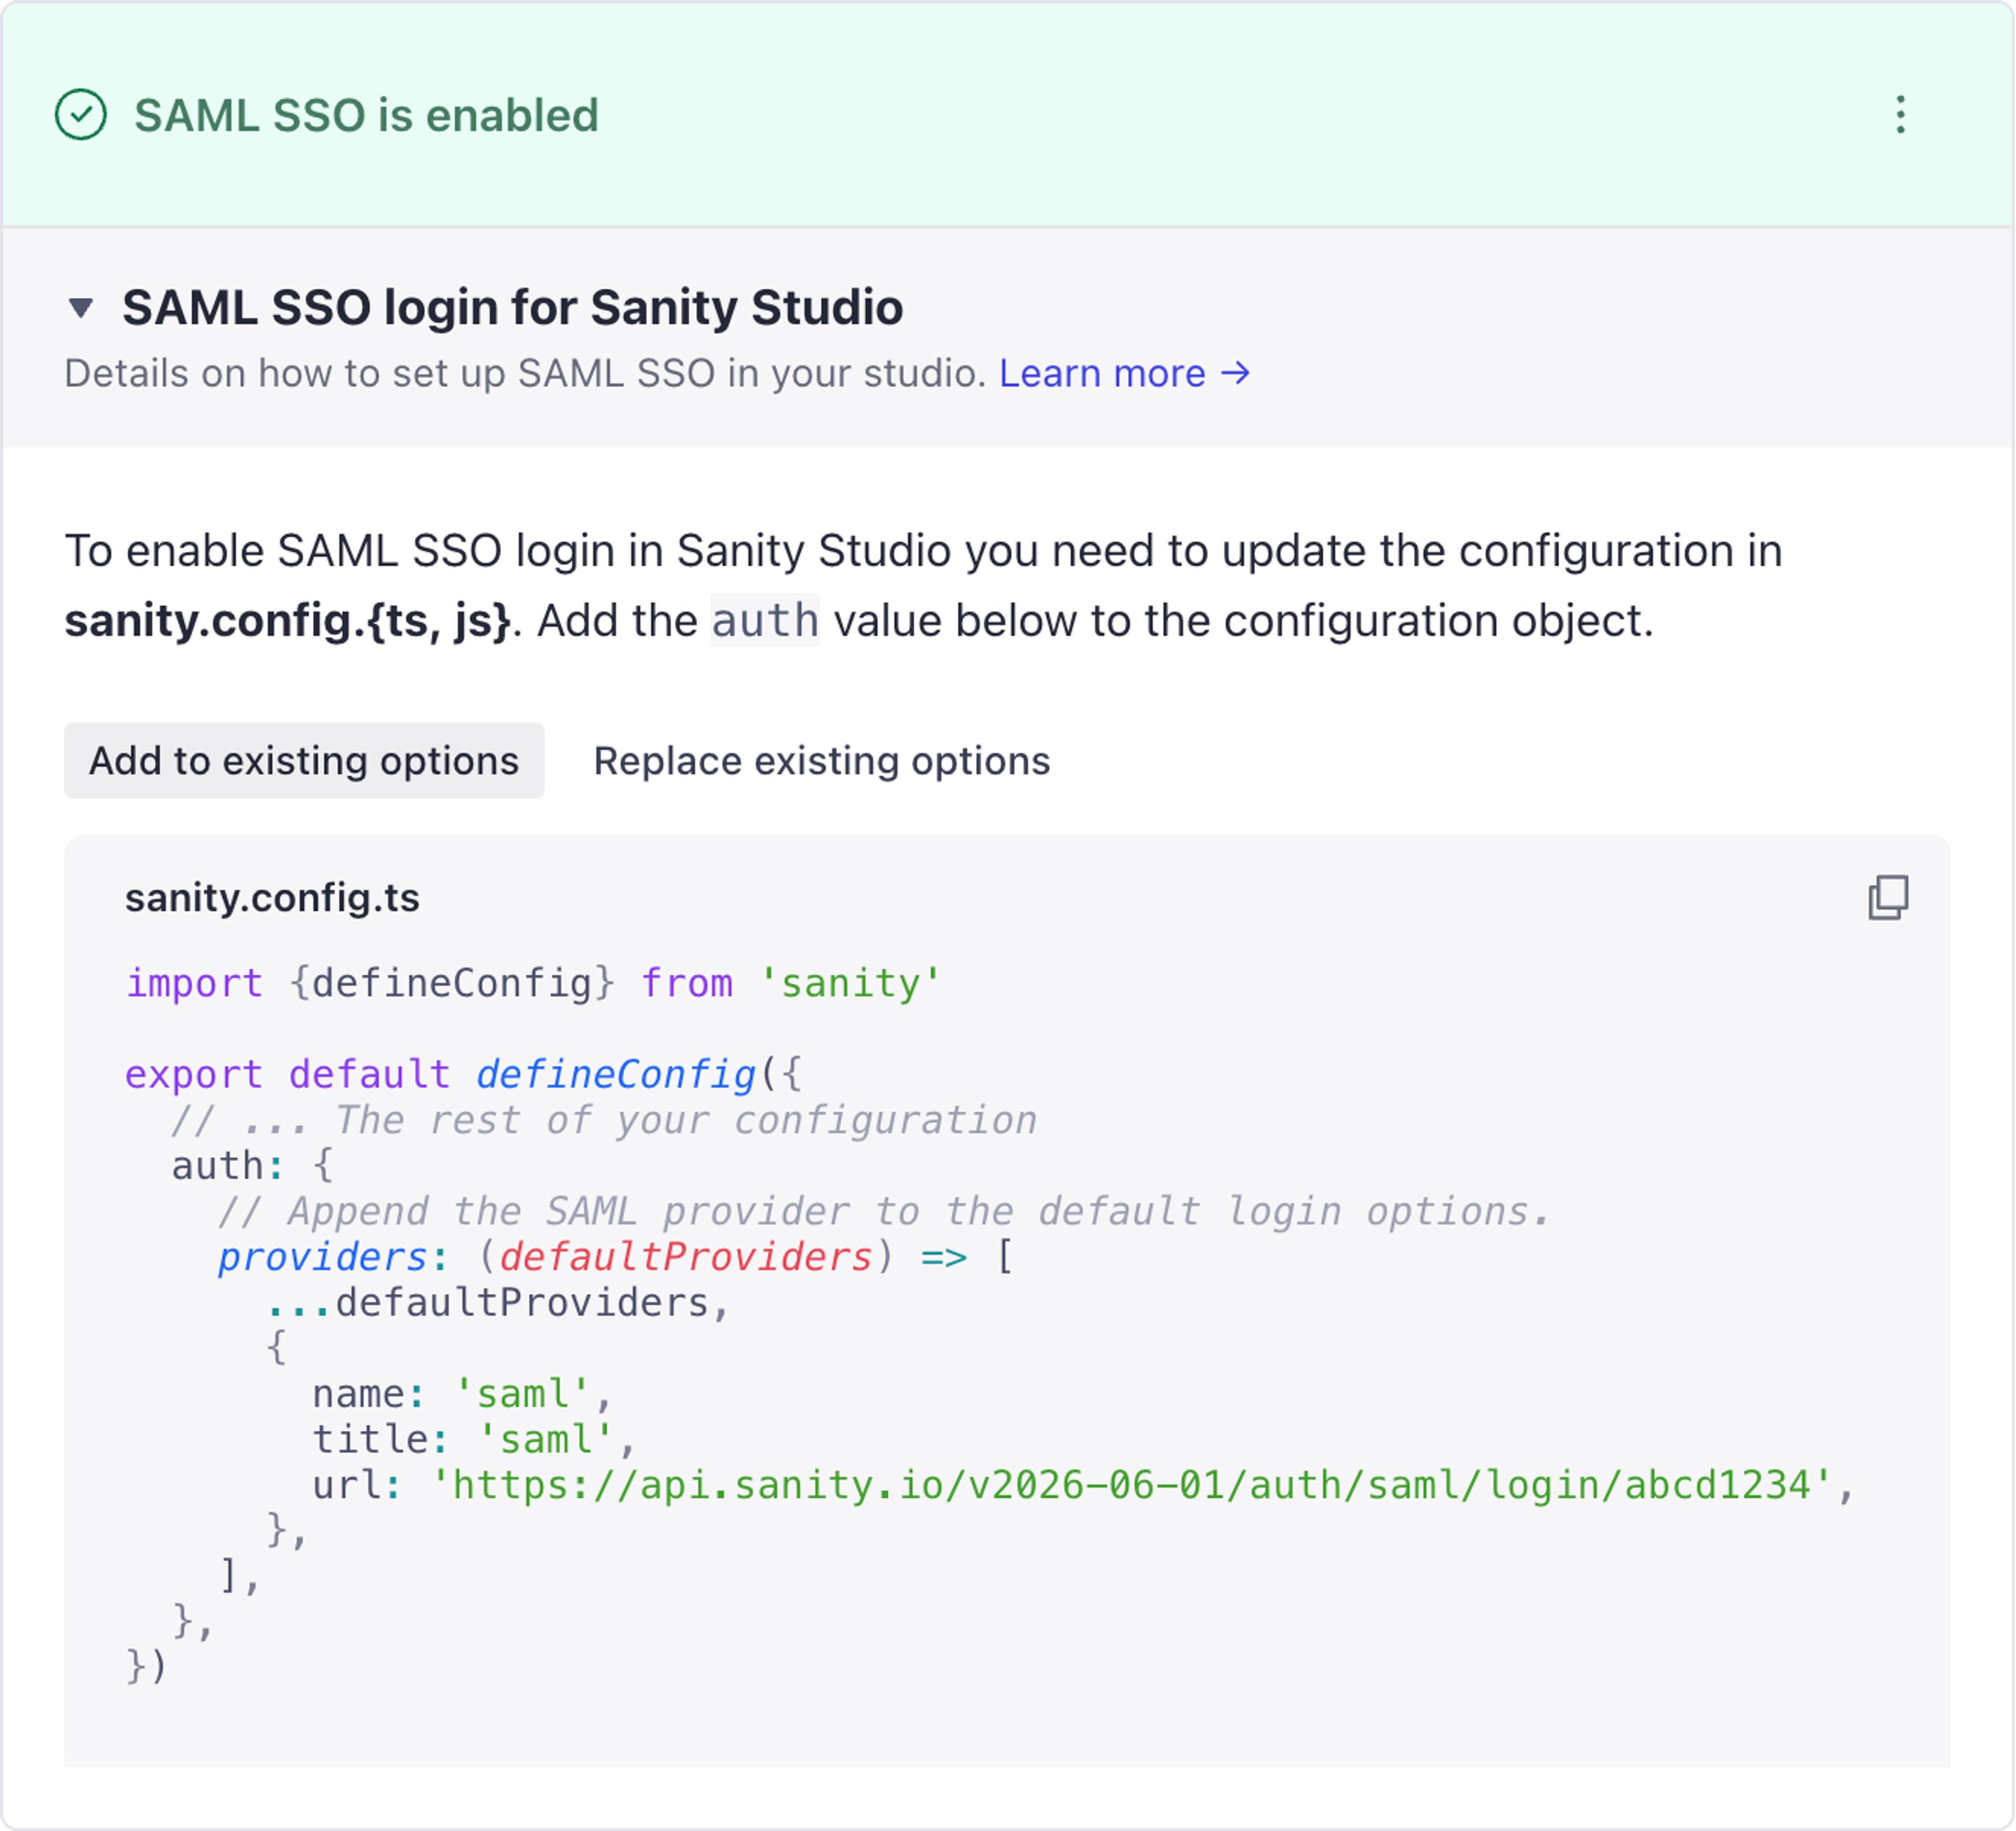
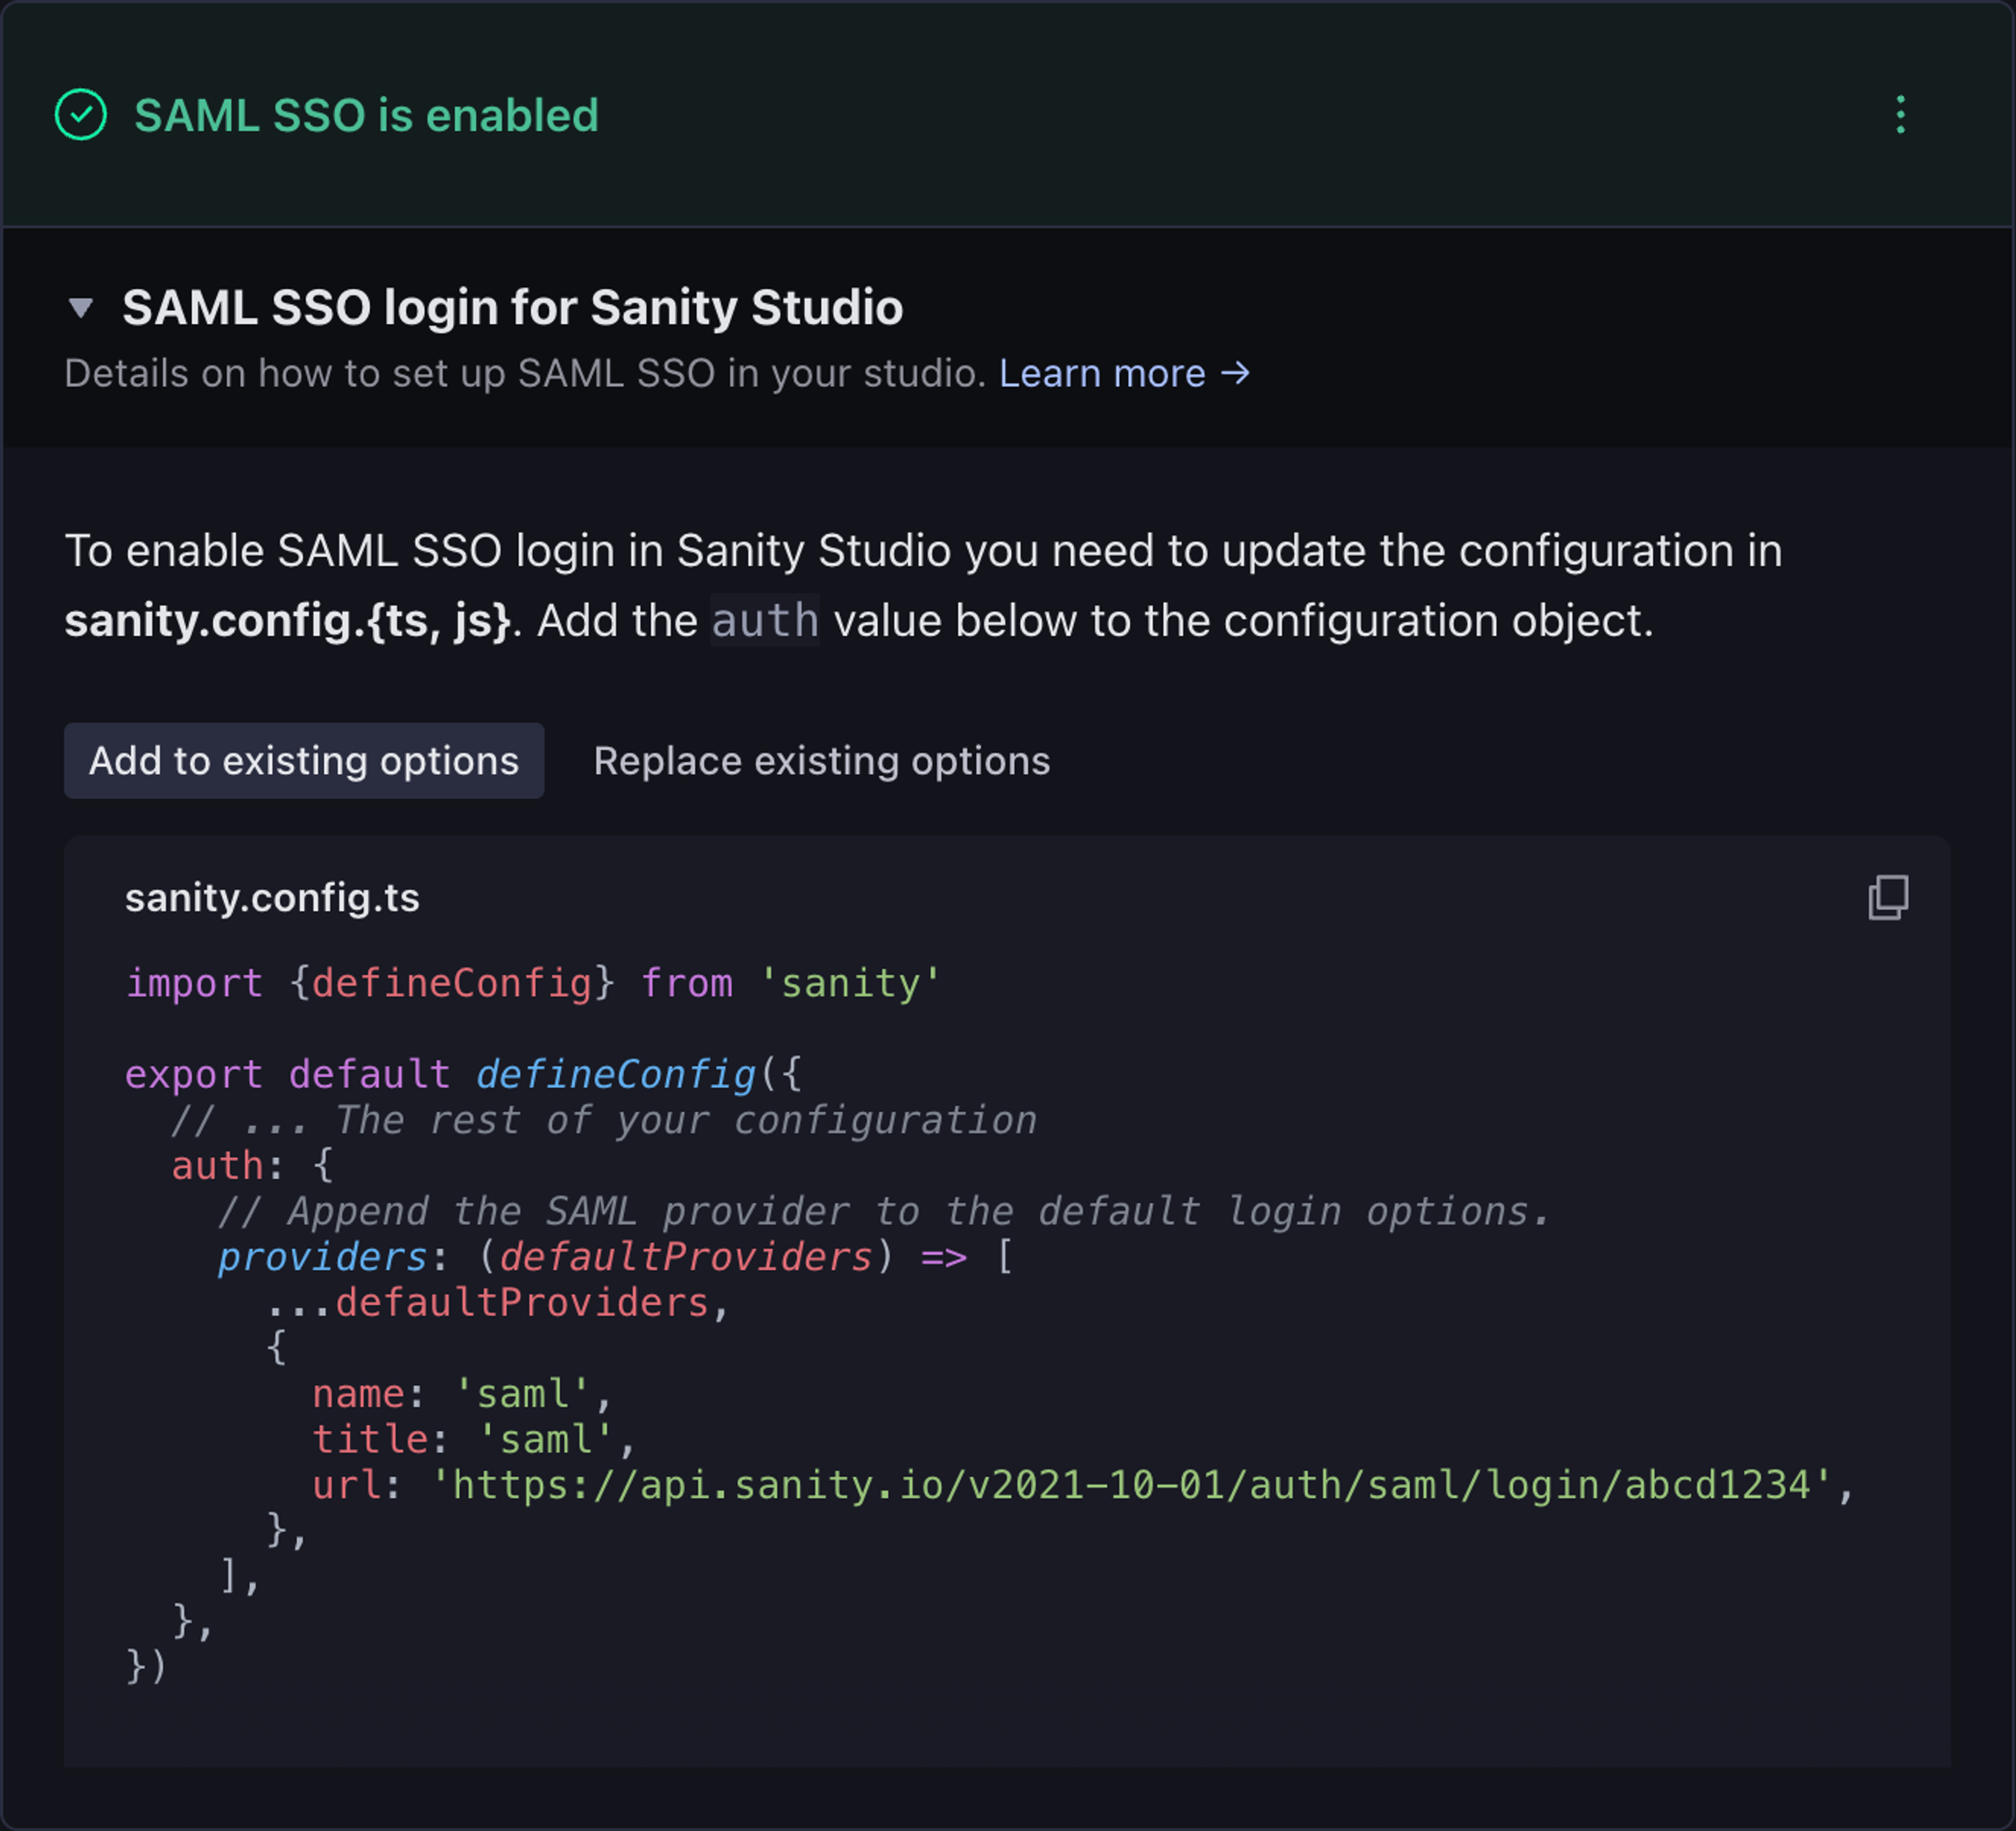
Next, update your studio to show the login screen from your SSO identity provider by using the custom authentication configuration. Expand SAML SSO login for Sanity Studio to get a code snippet for your sanity.config.ts file. Choose Add to existing options to offer SAML alongside the default login providers, or Replace existing options to make SAML the only login option in that studio. Token-based authentication is recommended for full Media Library functionality: private asset previews, downloads, and signing key management are unsupported under cookie-based authentication. Either set auth.loginMethod: 'token' in your studio config, or log in to the Sanity Dashboard before opening Media Library. See Custom authentication for details.
Studio login options apply only to that studio. The login screen at sanity.io, which covers Sanity Manage, the Sanity Dashboard, and Media Library, still offers email and password, Google, and GitHub, and no setting hides those options there. To limit who can reach those surfaces, manage your organization's members.
9. Verify by logging in with SSO
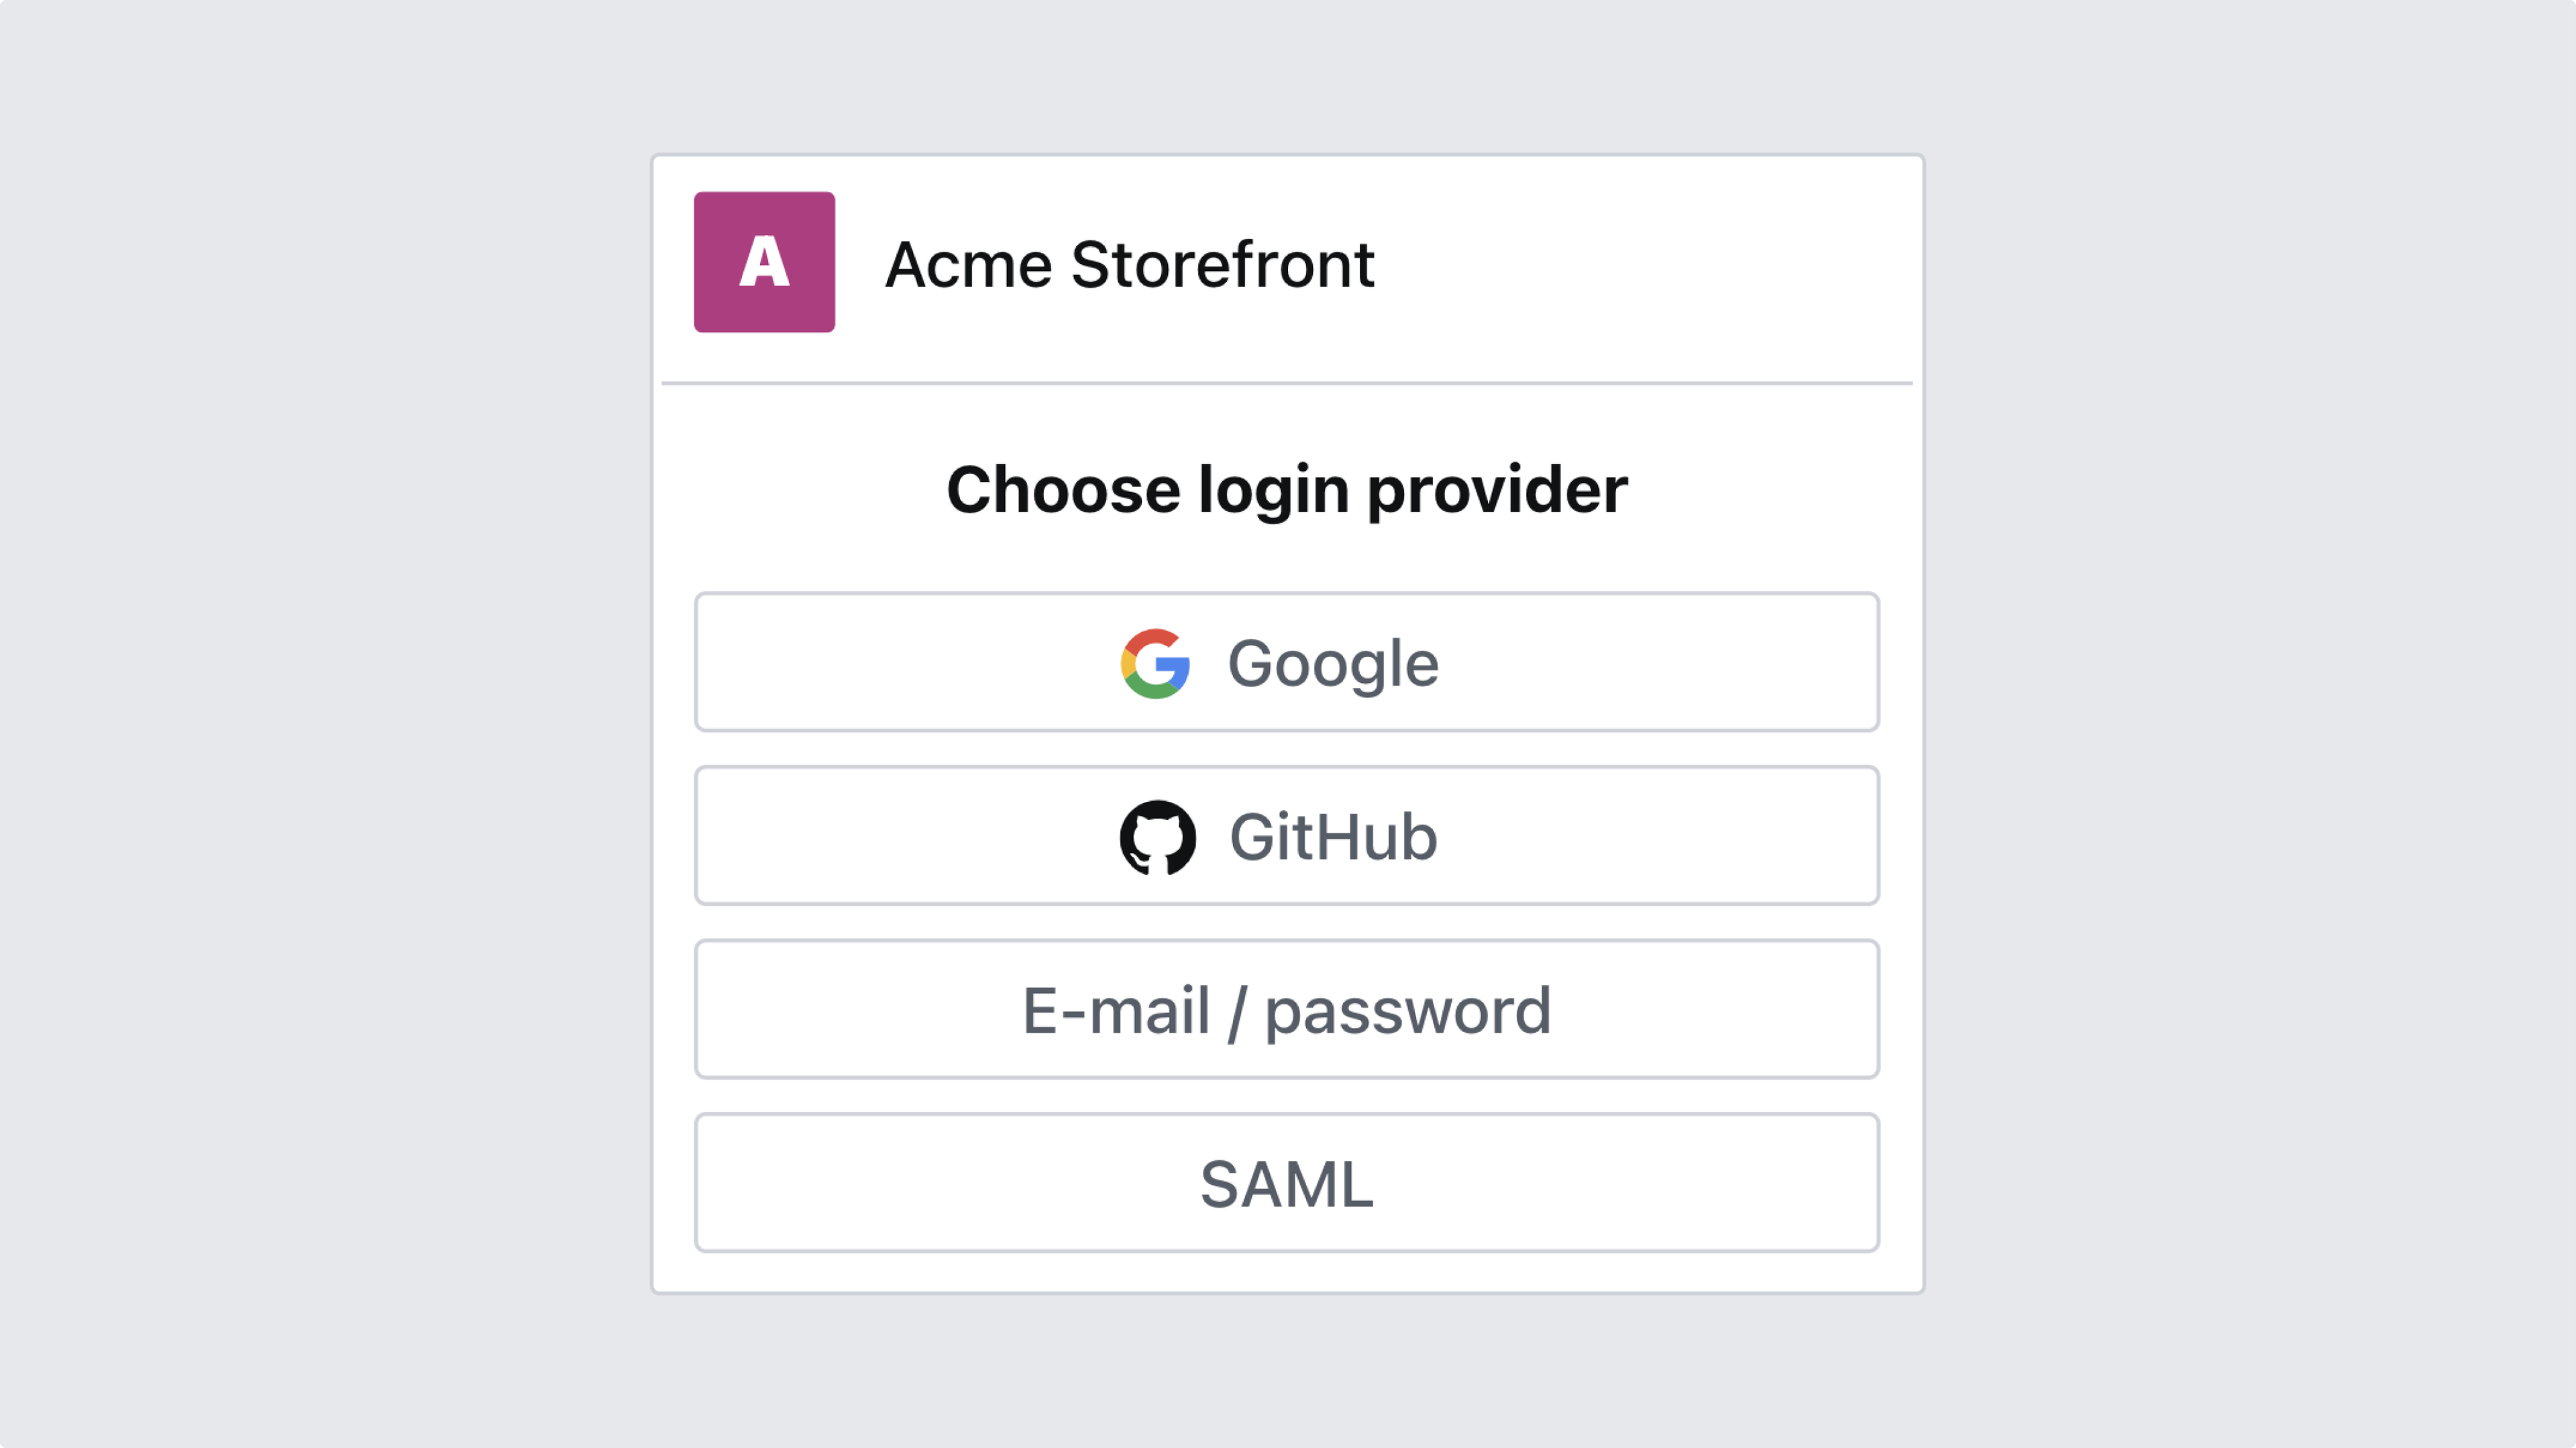
Finally, verify the configuration by logging in as a user from your identity provider. Your login screen lists only the options you configured.
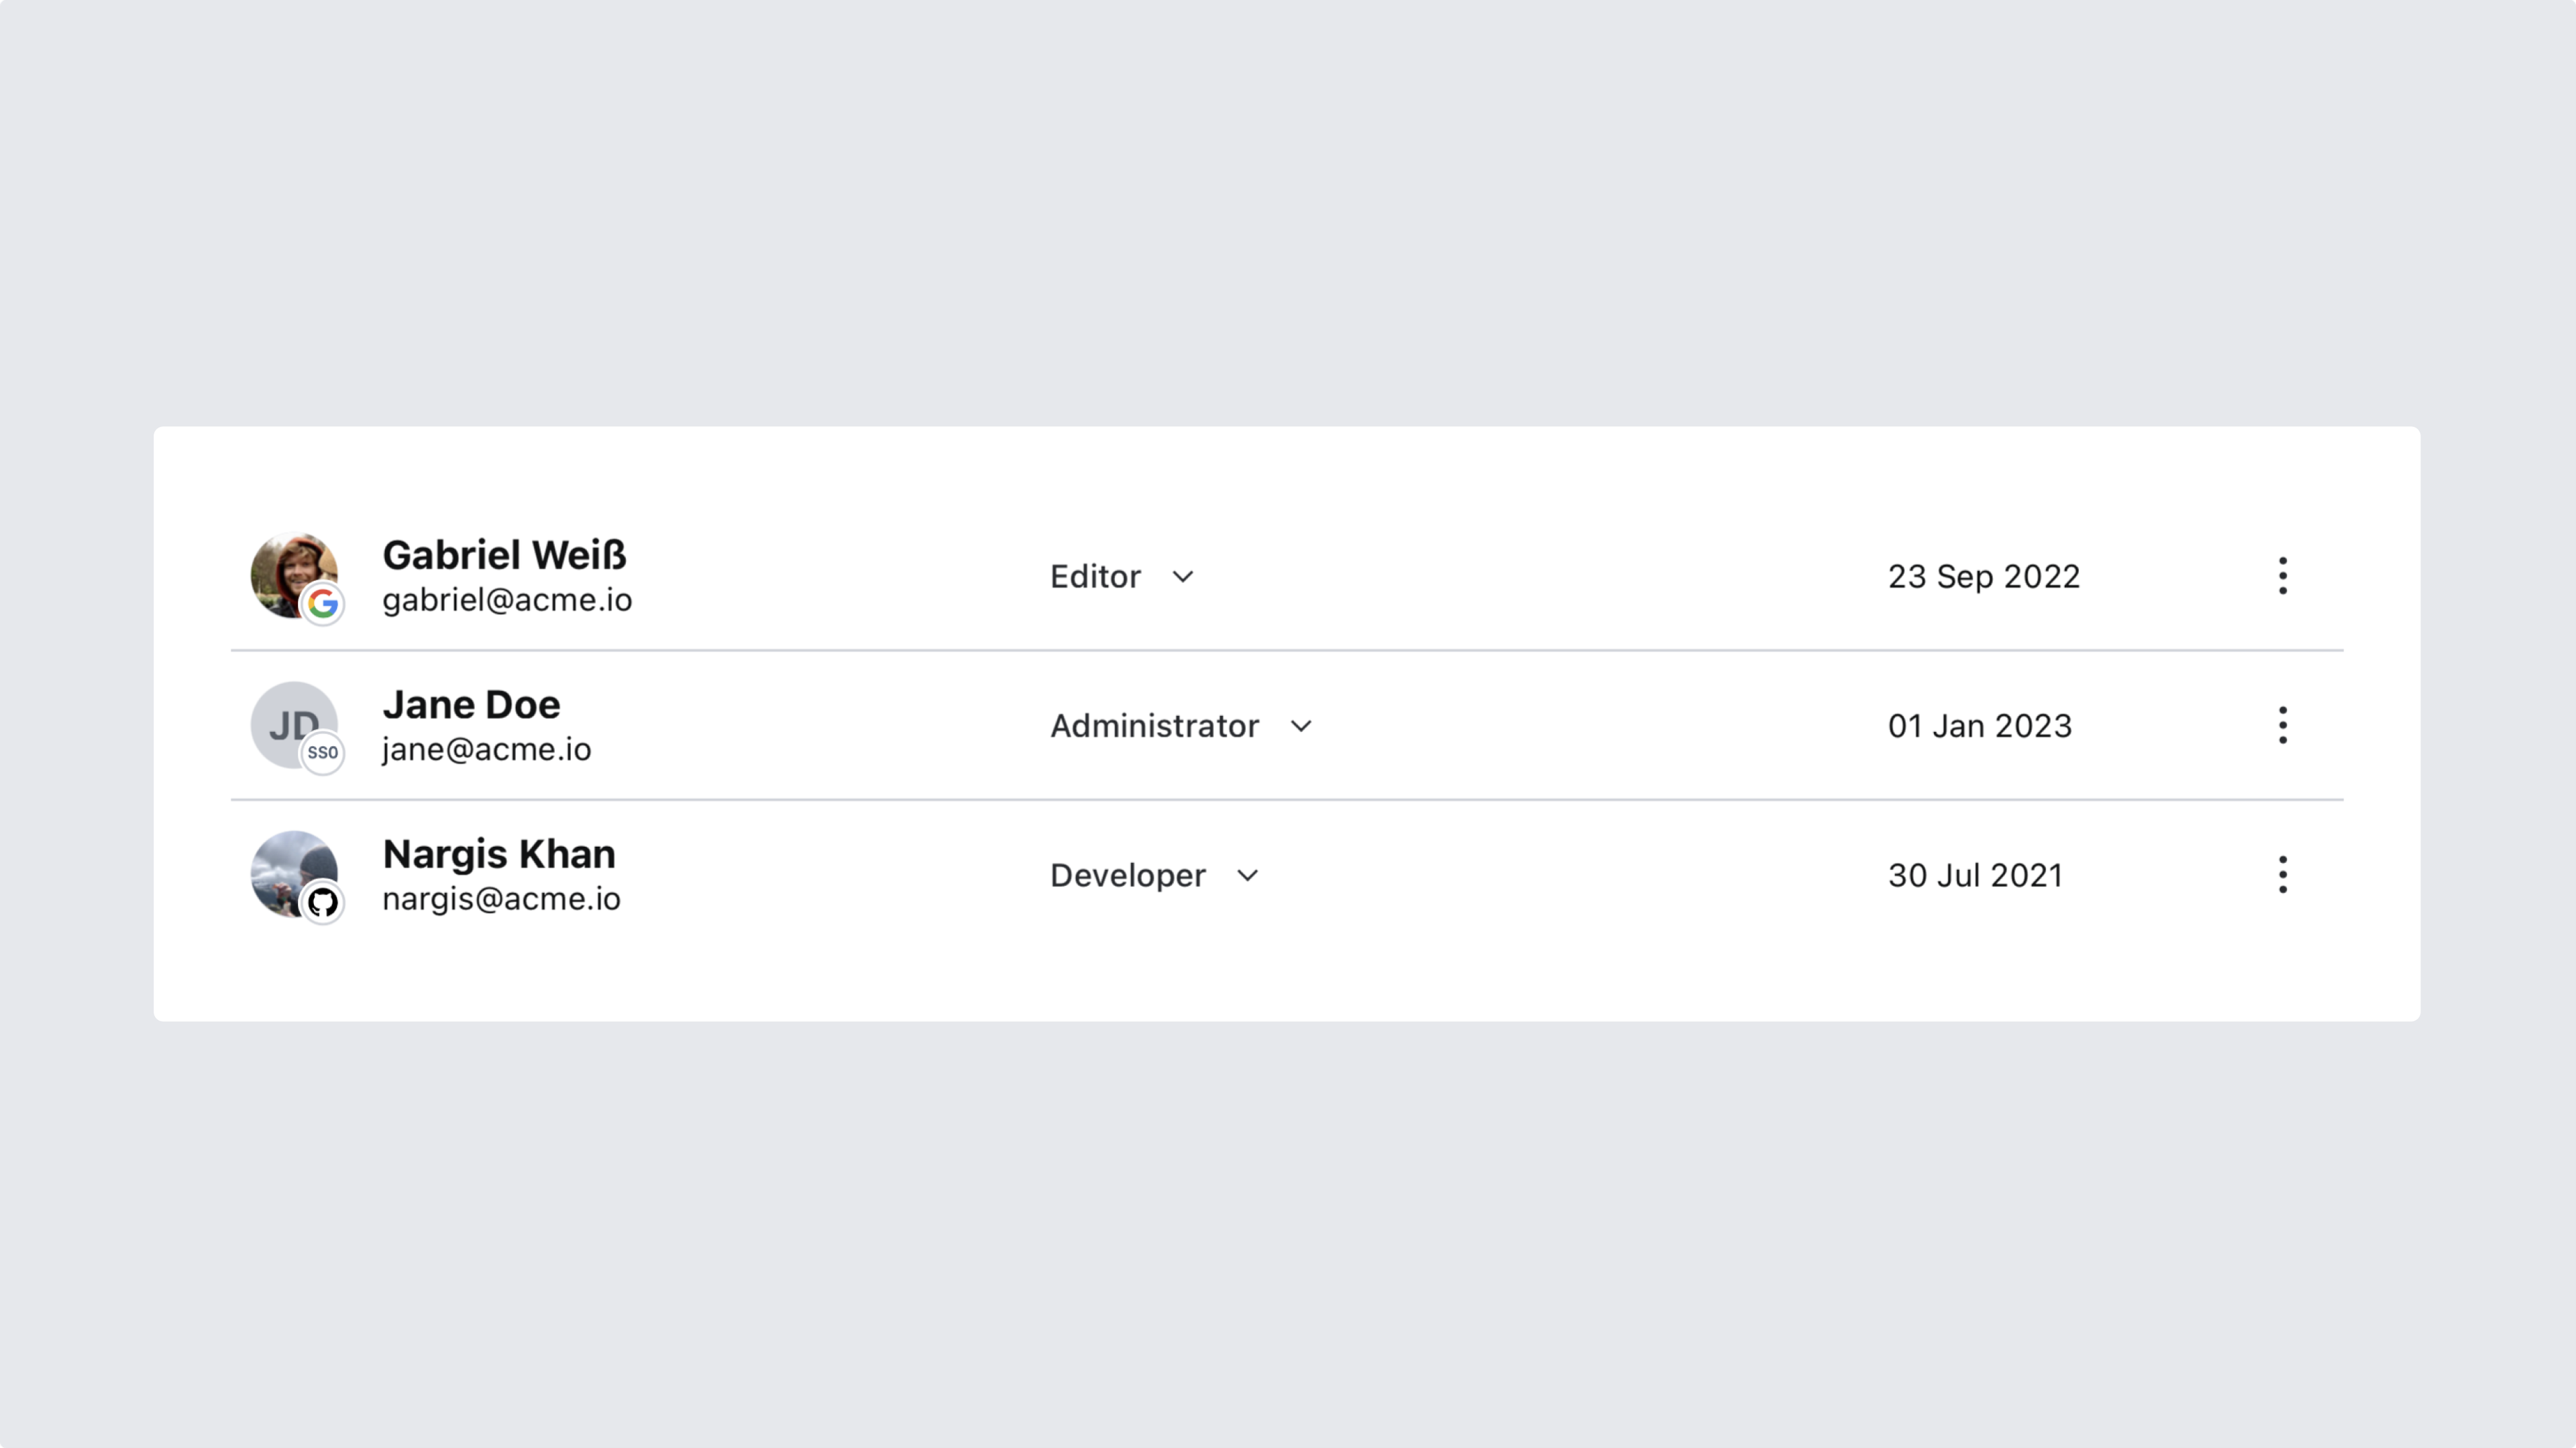
Enabling SAML SSO doesn't remove or block accounts that already exist: members who signed in with an email and password, Google, or GitHub keep their access. After logging in at least once with SAML SSO, check your organization's members in Sanity Manage. An indicator on each member's avatar shows which sign-in method they use, so you can delete or demote accounts outside your identity provider's domain.
Removing a user from your identity provider doesn't remove them from your Sanity organization or projects. Sanity doesn't support SCIM provisioning, and role mapping changes roles only when a user logs in with SAML SSO, so former users stay listed as members until you remove them. To find and remove them in bulk, see Reconcile users against internal systems.
Gotcha
A SAML identity is a separate account from a user’s previous Google, GitHub, or email login. Anyone who switches to SAML SSO occupies two seats until you remove their old account. Check your member list for duplicates after enabling SSO or changing identity providers.
Change your identity provider
Sanity matches a returning user to an existing account by the identifier in the SAML assertion (the nameID or the id attribute), combined with the SAML SSO configuration that sent it. If either changes, the next login creates a new user instead of matching the existing one.
To keep existing users when you move to a new identity provider:
- Edit your existing SAML SSO configuration instead of deleting it and creating a new one. A new configuration produces new identities even when the identifier stays the same.
- Confirm that the new identity provider sends the same identifier value for each user. Providers name their NameID formats differently, so compare the values rather than the format names.
- Check that group claims still reach Sanity and that your role mapping rules still match them. Microsoft Entra ID sends group IDs rather than group names.
- Test the project-specific login URL from Sanity Manage in a private window before you move everyone to the new provider.
Troubleshooting
If SSO login doesn’t behave as expected, check these causes first.
- SAML SSO isn't listed in your organization's settings: your account doesn't have permission to manage SSO. Configuring SAML SSO requires the Administrator role on the organization. Ask an organization administrator to grant it, then reload Sanity Manage.
- Login fails right after the identity provider redirects back: the assertion is missing a required attribute, and Sanity rejects it with a
422response. Confirm thatemail,firstName, andlastNameare all mapped, that only one casing of each is sent, and that the assertion includes either anameIDor anidattribute. - Every user lands on the fallback role: group membership isn't reaching Sanity, or no rule matches. Confirm that the identity provider sends a lowercase
groupsattribute, and that each rule matches the full group name rather than a substring. Microsoft Entra ID sends group IDs, so map against the ID. - A role change for a SAML SSO user fails: the user's roles in this project come from role mapping, and Enable auto update roles on login is enabled. Sanity reports
Roles are managed via SAML for this project. Change the user's groups in your identity provider, or clear the setting to manage roles manually. - Login fails with an InResponseTo error: your identity provider doesn't return
InResponseTo, or the login was identity-provider-initiated. Sanity reportsInResponseTo is missing from responseorInResponseTo is not valid. Clear Enable InResponseTo in Your Identity Provider details. - A role mapping rule is rejected as invalid: the pattern uses a feature RE2 doesn't support, or it's complex enough to be rejected as unsafe. Sanity reports
Unsupported regex "...". Verify the regex is valid and does not contain any backreferences or lookahead assertions.Remove backreferences, lookahead assertions, and lookbehind assertions, and simplify nested repetition. - The organization slug is rejected: another organization already uses it. Sanity reports
An organization with the slug "..." already exists. Slugs are globally unique, so choose a different one. - Users appear twice in your member list: they signed in with SAML after previously using another login method. Remove the old account to free the seat.
- SSO isn't offered as a login option in the studio: the studio configuration is missing the provider, CORS blocks the request, or the studio version is affected by a login loop. Confirm that
sanity.config.tsincludes the SAML provider from Sanity Manage, following Custom authentication, and that your studio URL is an allowed CORS origin with credentials enabled. Studio v5.30.0 fixes an authentication loop that could trap users on the login screen. On earlier versions, clear the studio's site data in your browser and reload. - Login succeeds but lands on an API response instead of Sanity Manage or your studio: the identity provider has no default Relay State, so an identity-provider-initiated login stops at
api.sanity.io/v1/users/USER_IDand returns the user object as JSON. Set the default Relay State in your identity provider to the login URL from Sanity Manage. To send users straight to a studio, replace theoriginparameter with your encoded studio URL. For the full walkthrough, see Setting up a default Relay State for IdP-initiated SAML logins.
Next steps
Now that SAML SSO is set up for your organization, learn more about managing access and authentication in Sanity.