Set up SSO authentication with SAML and JumpCloud
Implement single-sign on for Sanity with JumpCloud
This developer guide was contributed by Tim Naughton (Sanity Support Engineer).
Expand upon our general SAML setup guide to configure and enable SSO authentication in your Sanity instance using the SAML protocol and JumpCloud as an identity provider (IdP).
During the setup and configuration process, it's a good idea to keep two windows or tabs open side by side:
- One with Sanity Manage.
- The other with the configuration settings of the IdP; JumpCloud.
Set up SSO
Go to the service configuration (Sanity)
Go to Sanity Manage and select the organization where you want to enable SSO.
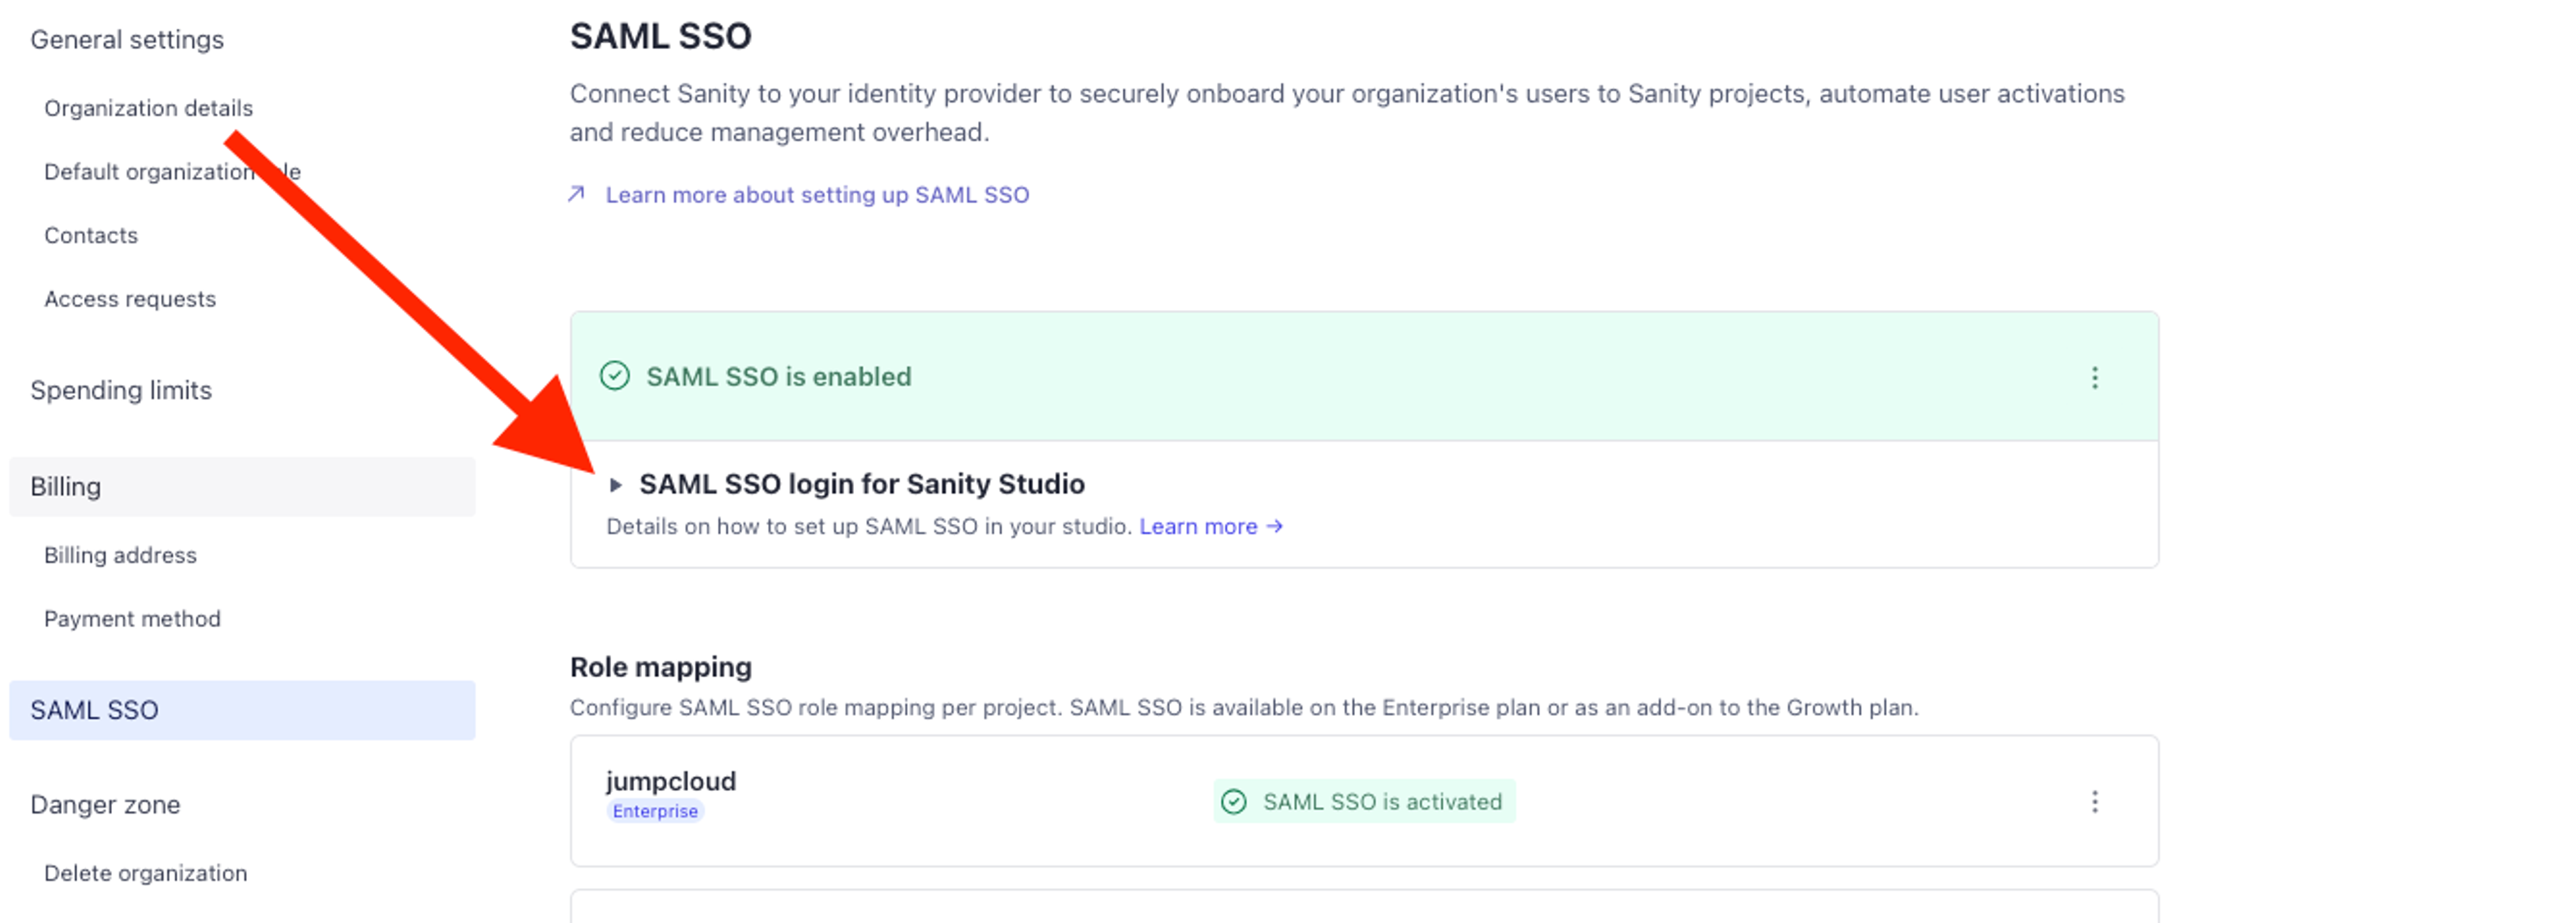
To navigate to the service provider configuration inside Sanity Manage:
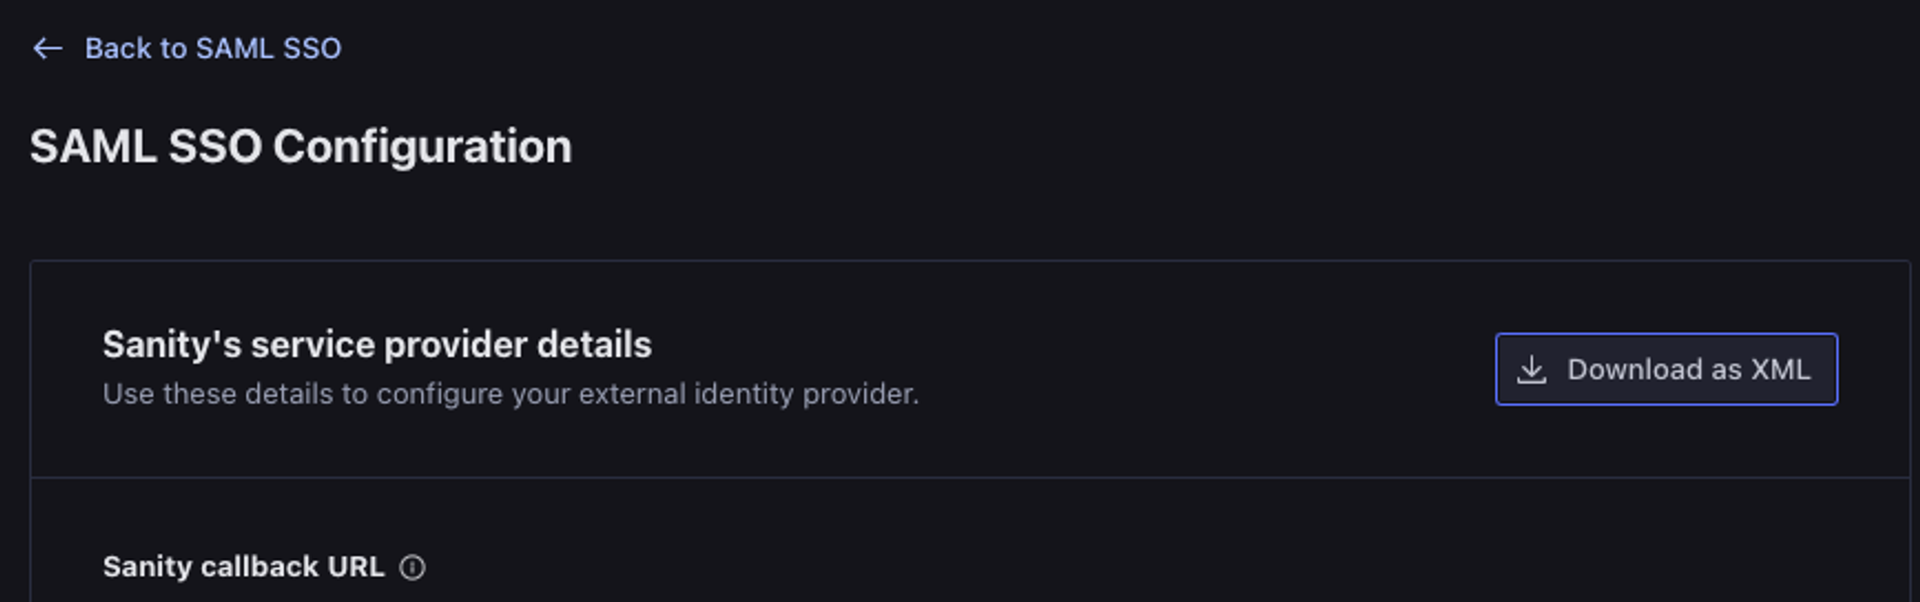
- In the organization you intend to add SSO to, go to Settings → SAML SSO.
- If no SAML SSO provider exists, click Open SAML SSO configuration and proceed to create and configure a SAML SSO provider.
- Optional: Download Sanity's SSO details as XML (This will make configuring JumpCloud easier).
- Disable InResponseTo setting in Sanity
- Optional: Enable auto update roles on login - This will update the users role when they sign in with SAML. Note, if you update a user's role within Sanity, this role will be removed and updated with the role from the Idp groups array when the user logs back in.
Create an app in JumpCloud
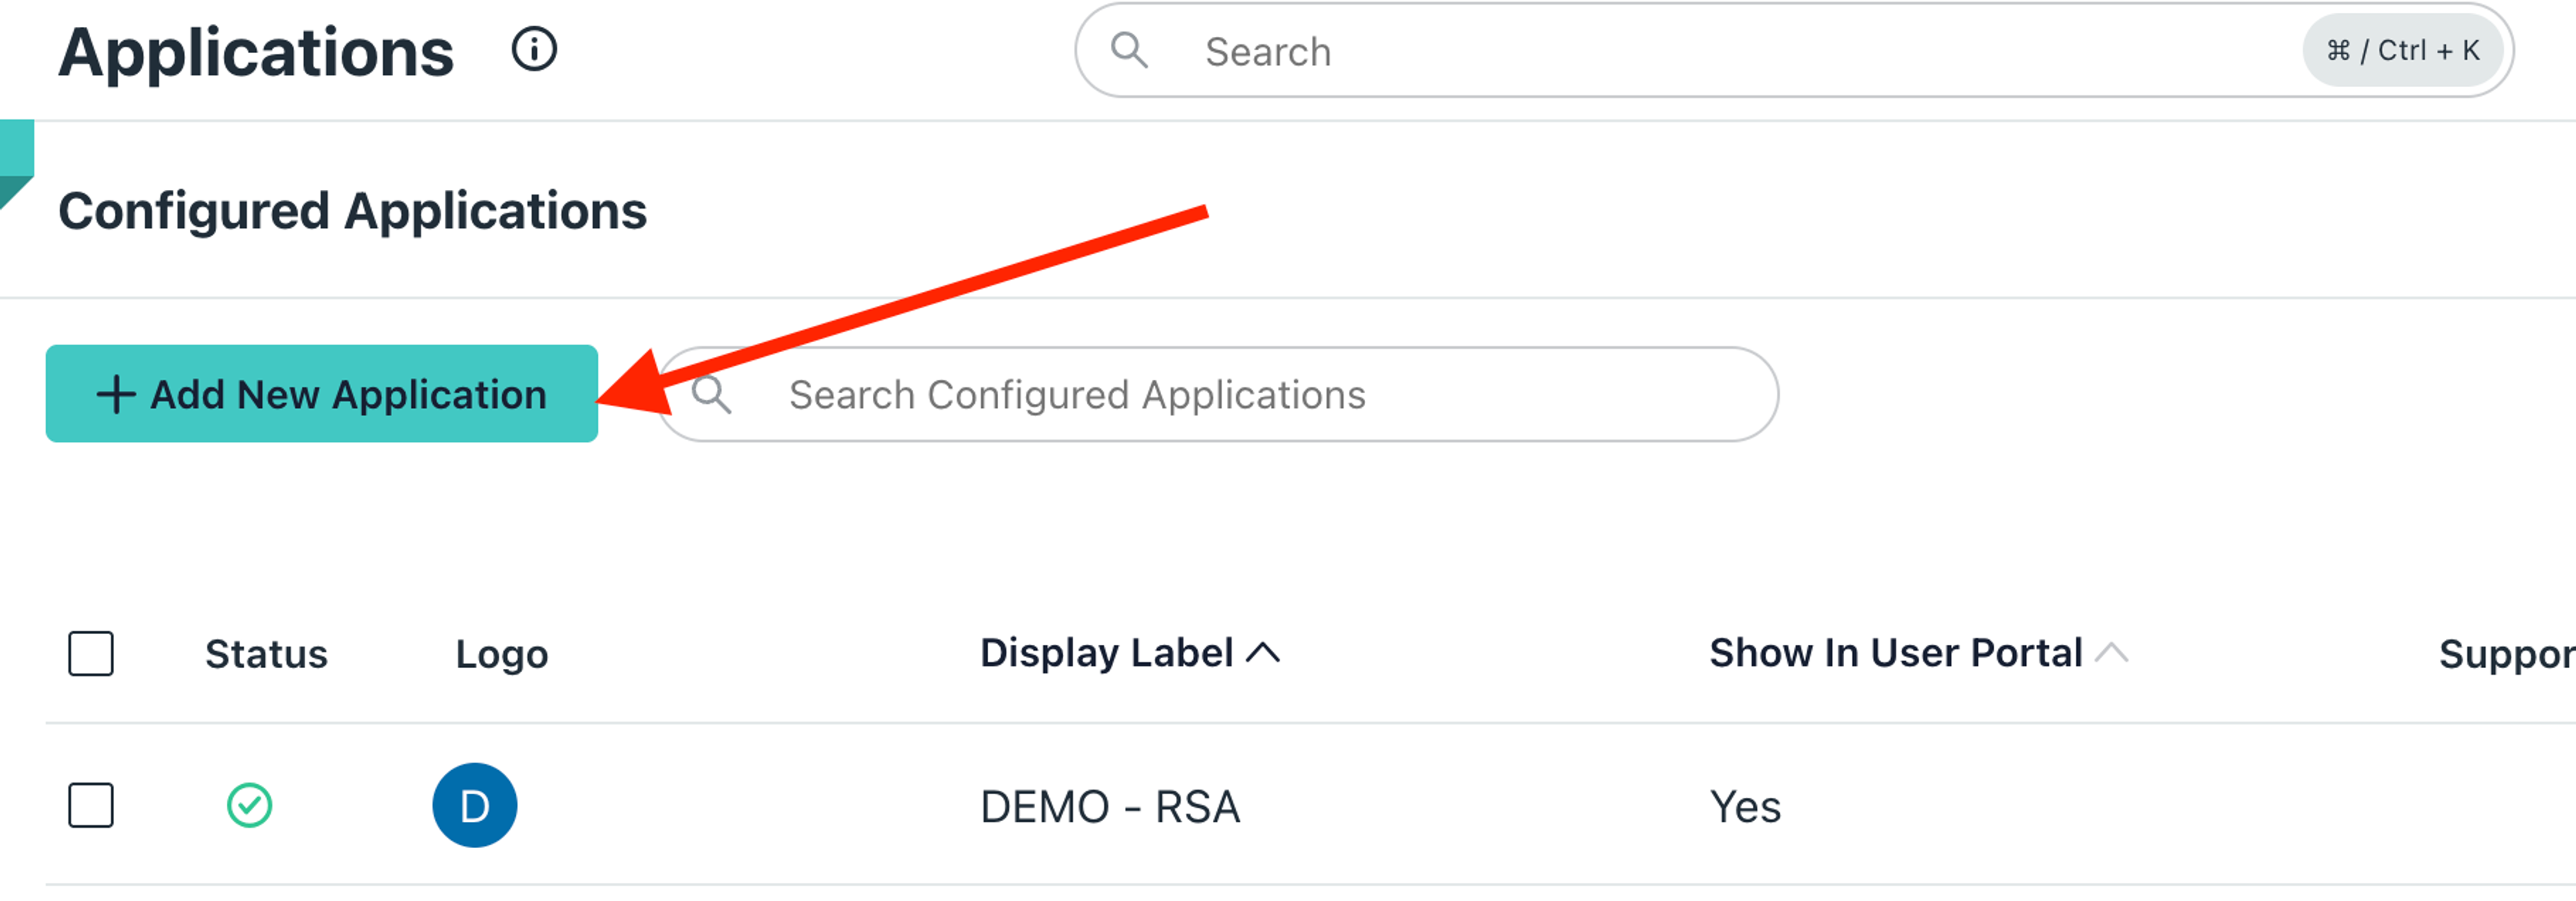
- Visit https://console.jumpcloud.com/#/applications.
- Select "Add New Application".
- Select "Custom Application" and "Next".
Configure the app
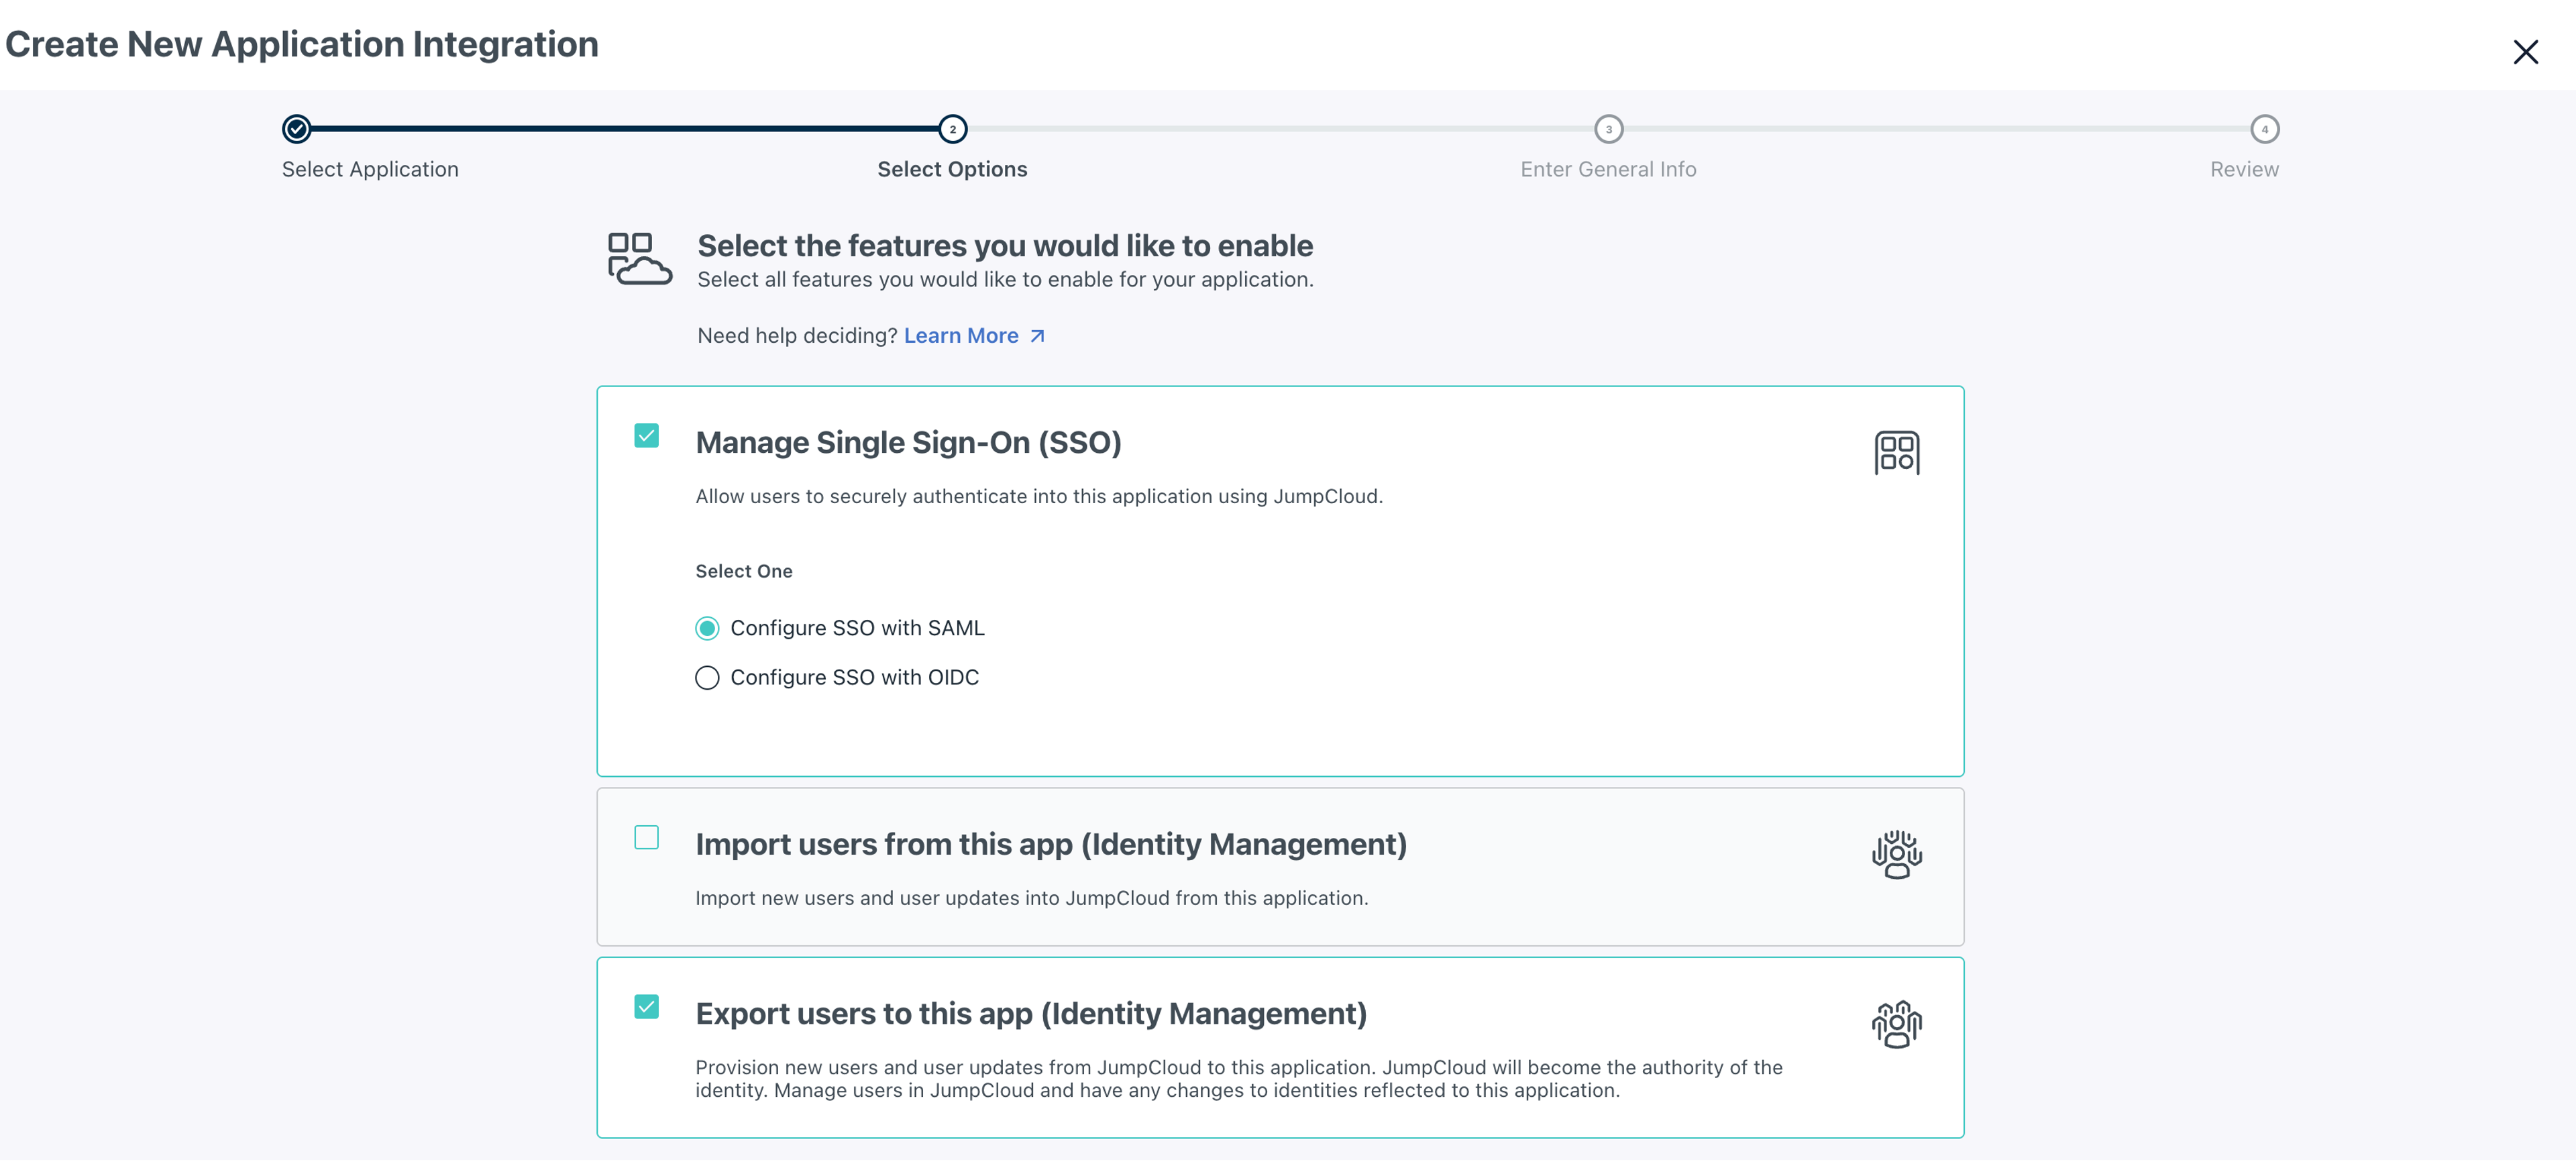
Select the following options:
- Manage Single Sign-On (SSO): This will need to be checked along with "Configure SSO with SAML".
- Export users to this app (Identity Management): You will want this checked if you plan on mapping roles from Sanity.
You will now see this app within JumpCloud and continue configuring.
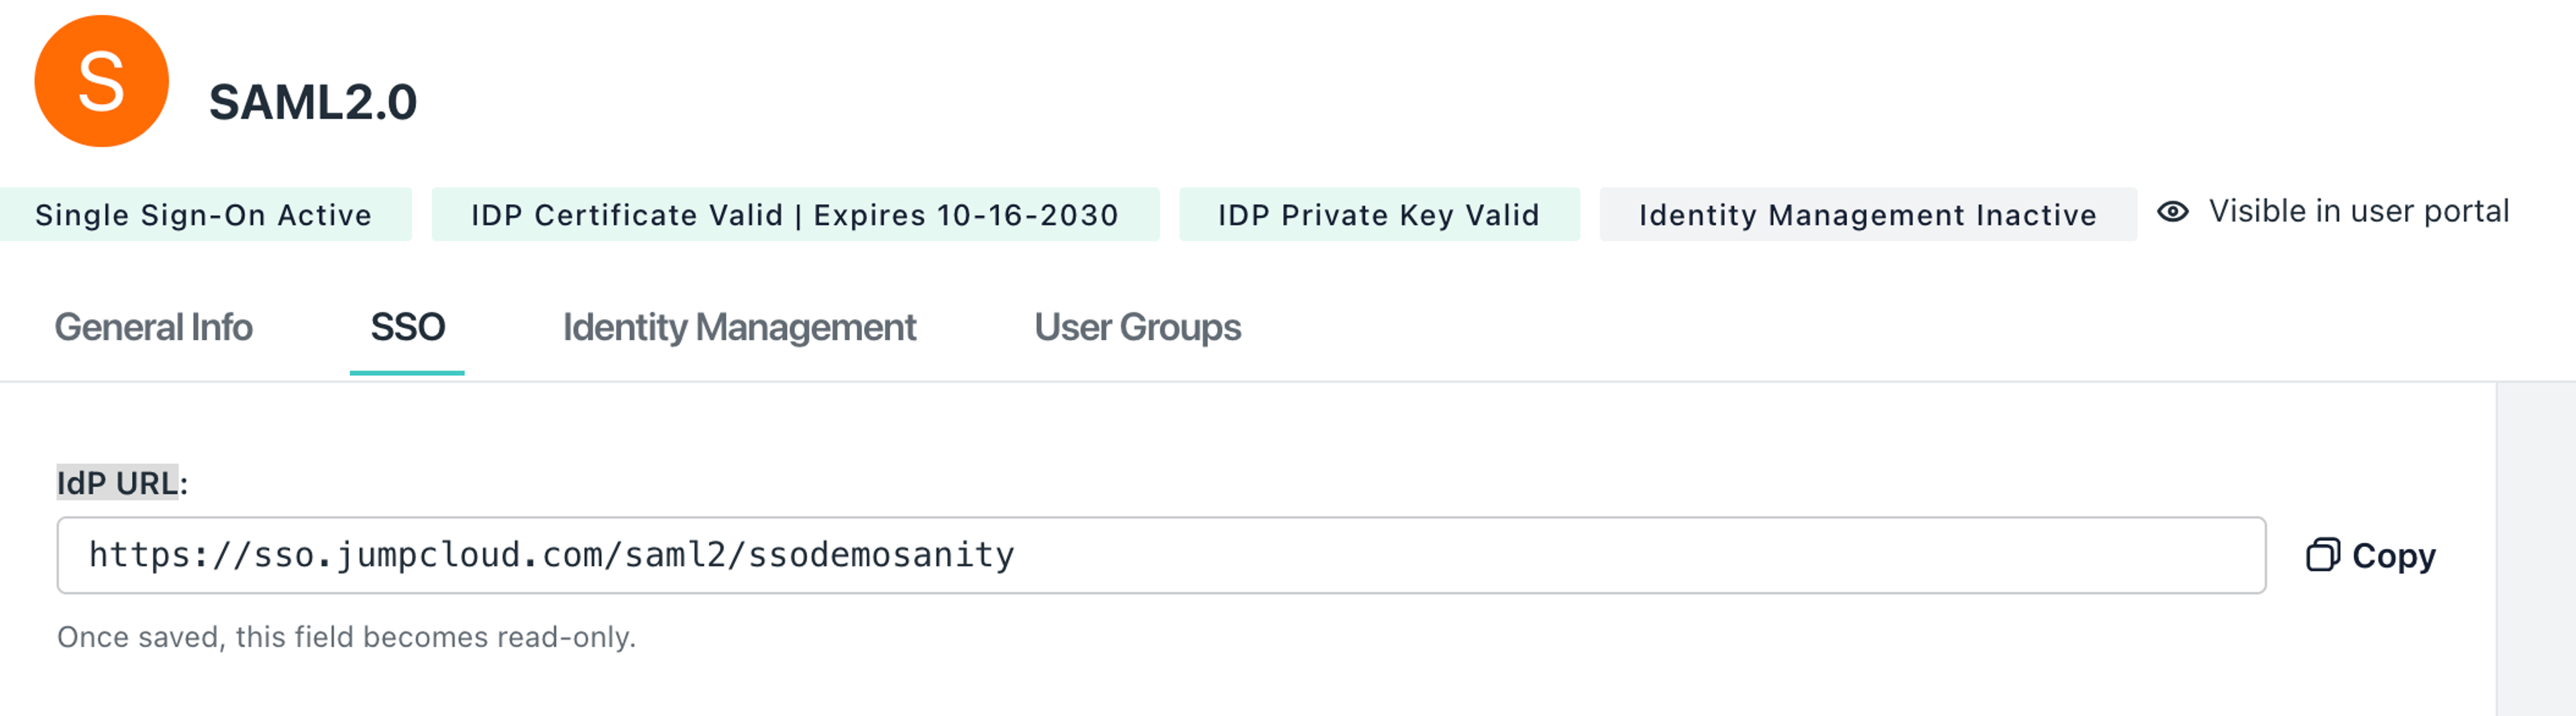
Configure the app's SSO settings
Select the app while in the admin portal and navigating to the SSO tab. You will be able to upload the Sanity XML metadata the pervious step.
Add Attributes to JumpCloud
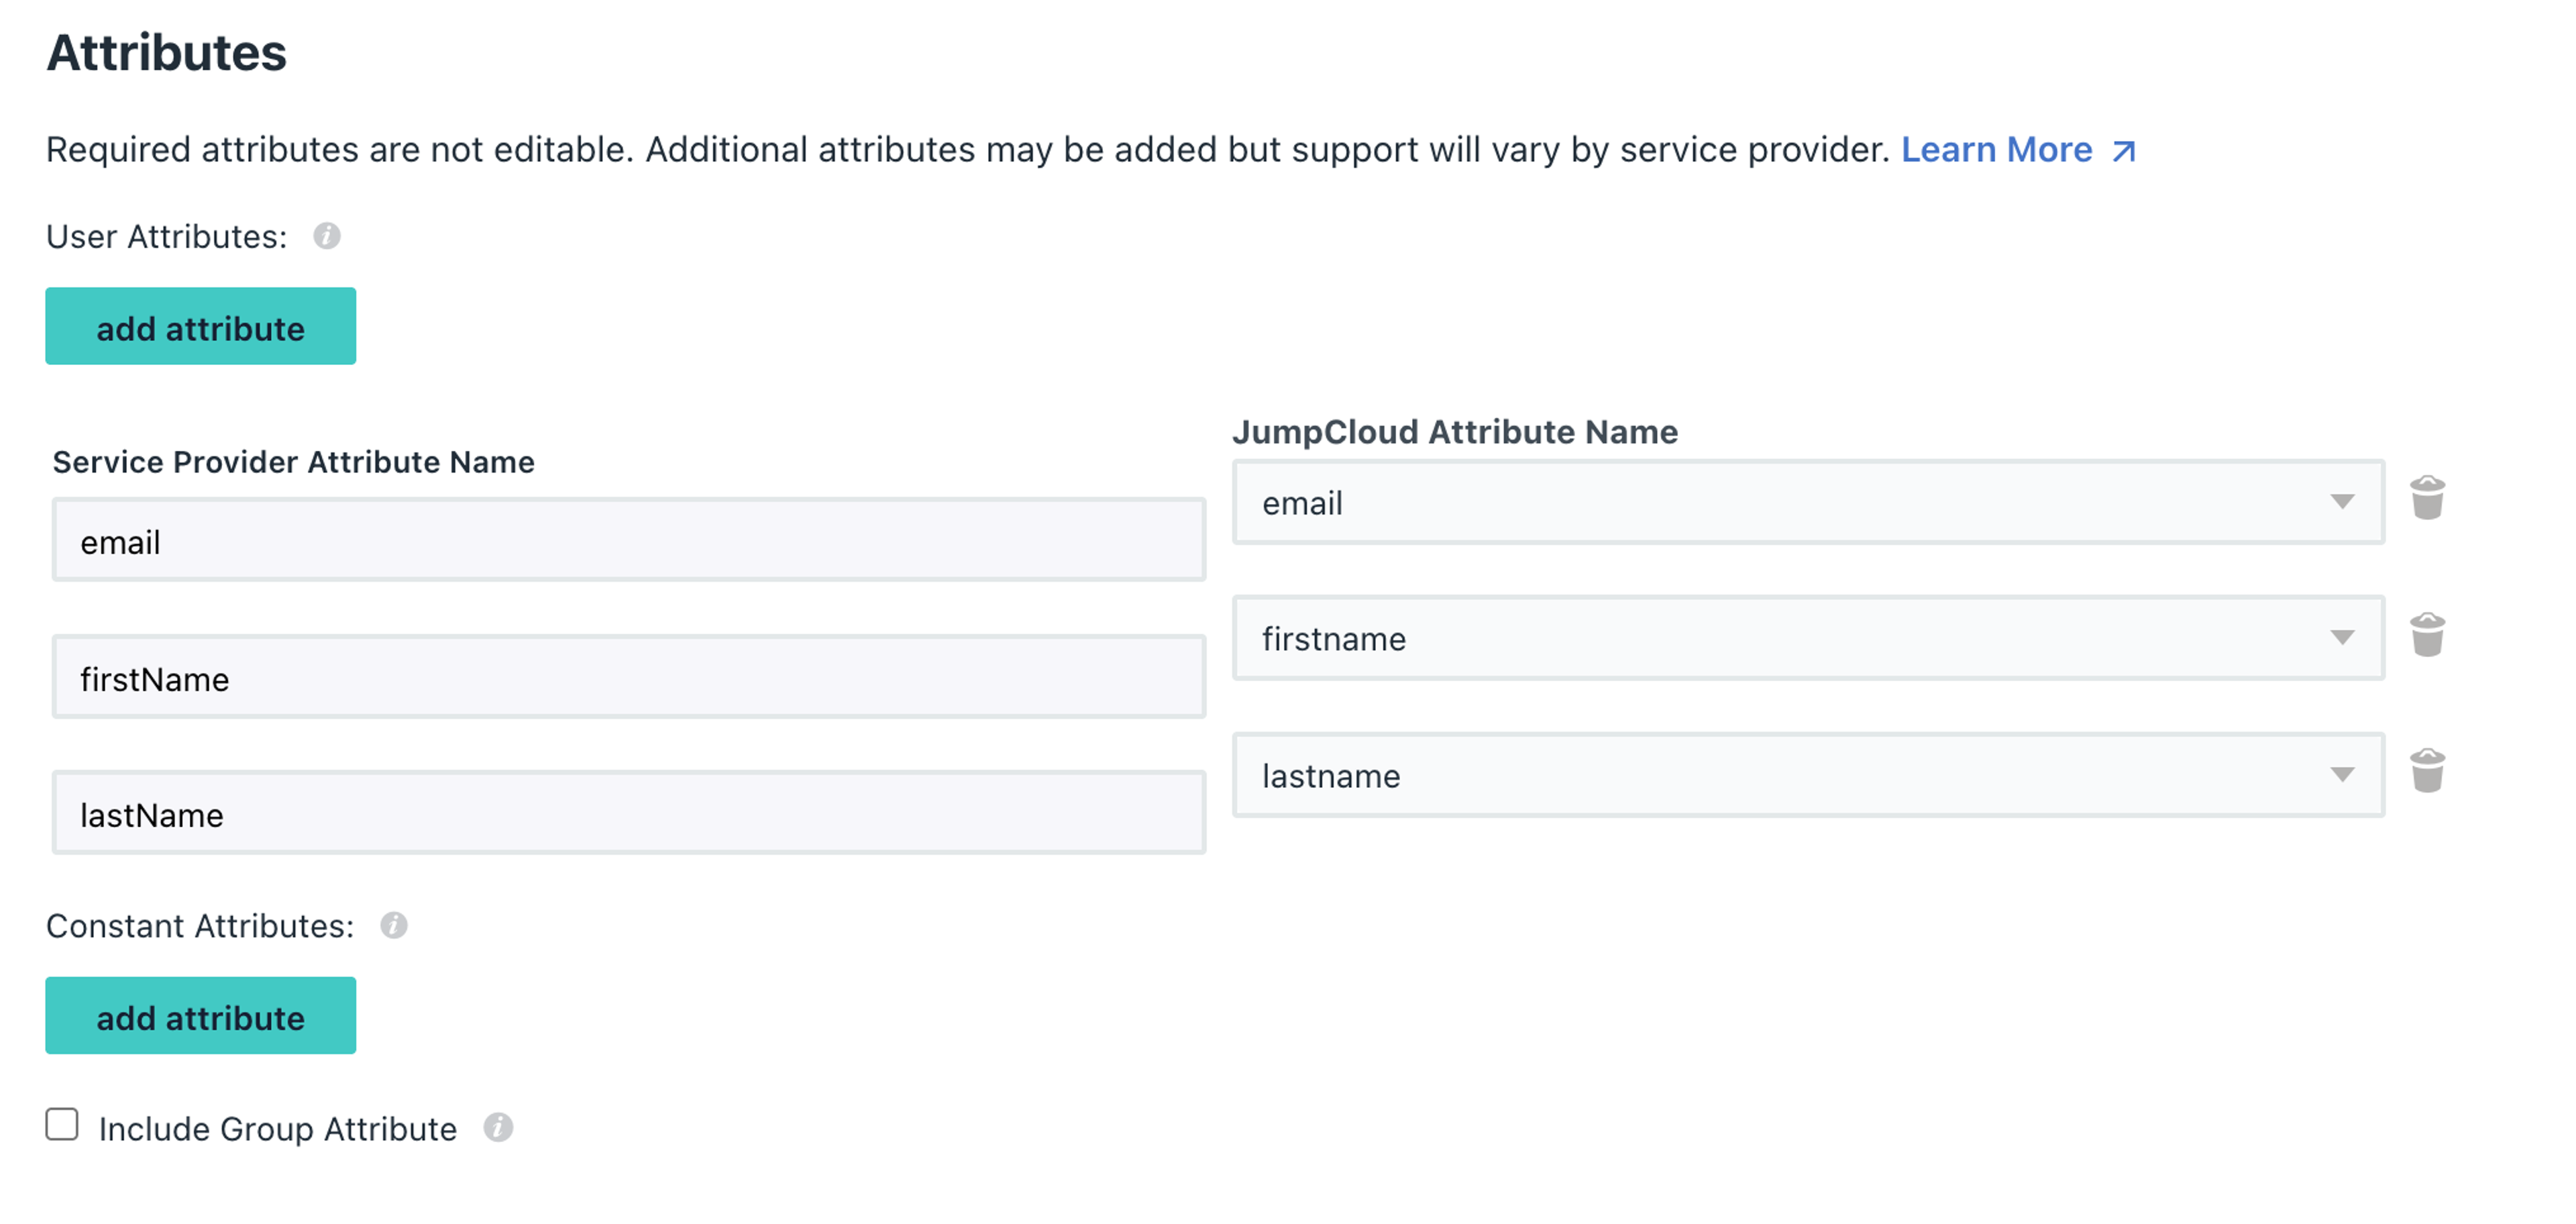
The email, firstName, lastName attributes are required while id and displayName are optional. These are case sensitive and can be mapped to the corresponding names in JumpCloud as shown above.
Set Default Relay State
You will need to set the Default RelayState option within JumpCloud to correctly navigate to your studio or project within Sanity. If this is left blank, you may see unexpected behavior with role mapping and where you are routed to after logging in. We have a further guide here that goes over steps to complete this.
Configure SSO settings within Sanity
Now that you have JumpCloud set up you can setup within Sanity.
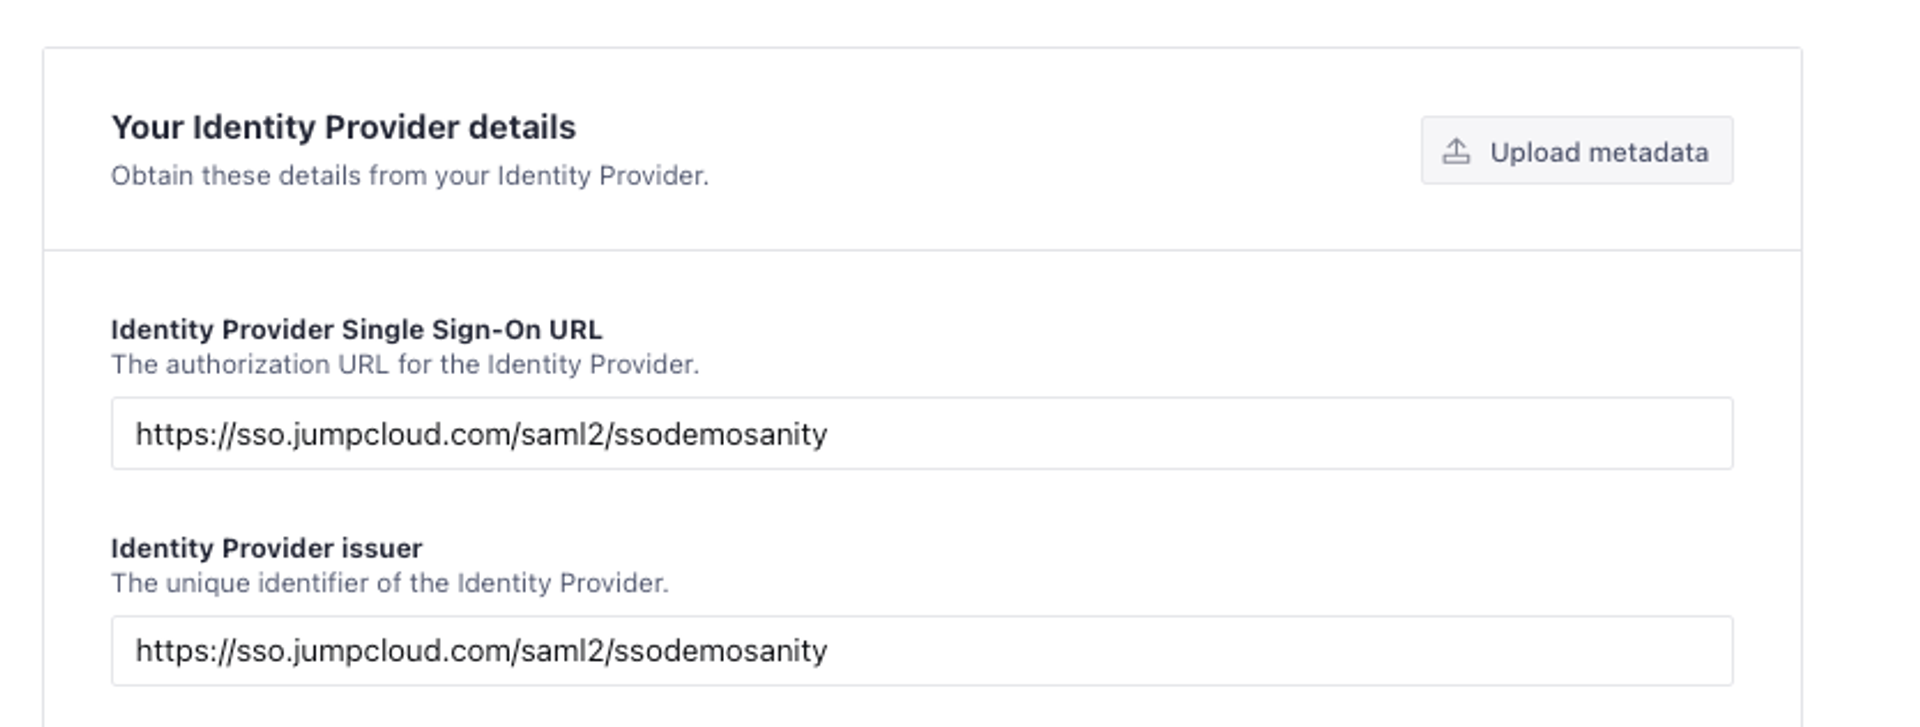
Add Identity Provider details
Sanity required the Identity Provider Single Sign-On URL, and the Identity Provider issuer which maps to the IdP URL from JumpCloud.
Copy these values from JumpCloud to the fields in Sanity Manage.
Enable role mapping
If you want to manage your roles through JumpCloud's Users Groups, you can set up role mapping within your Sanity settings. More on this here.
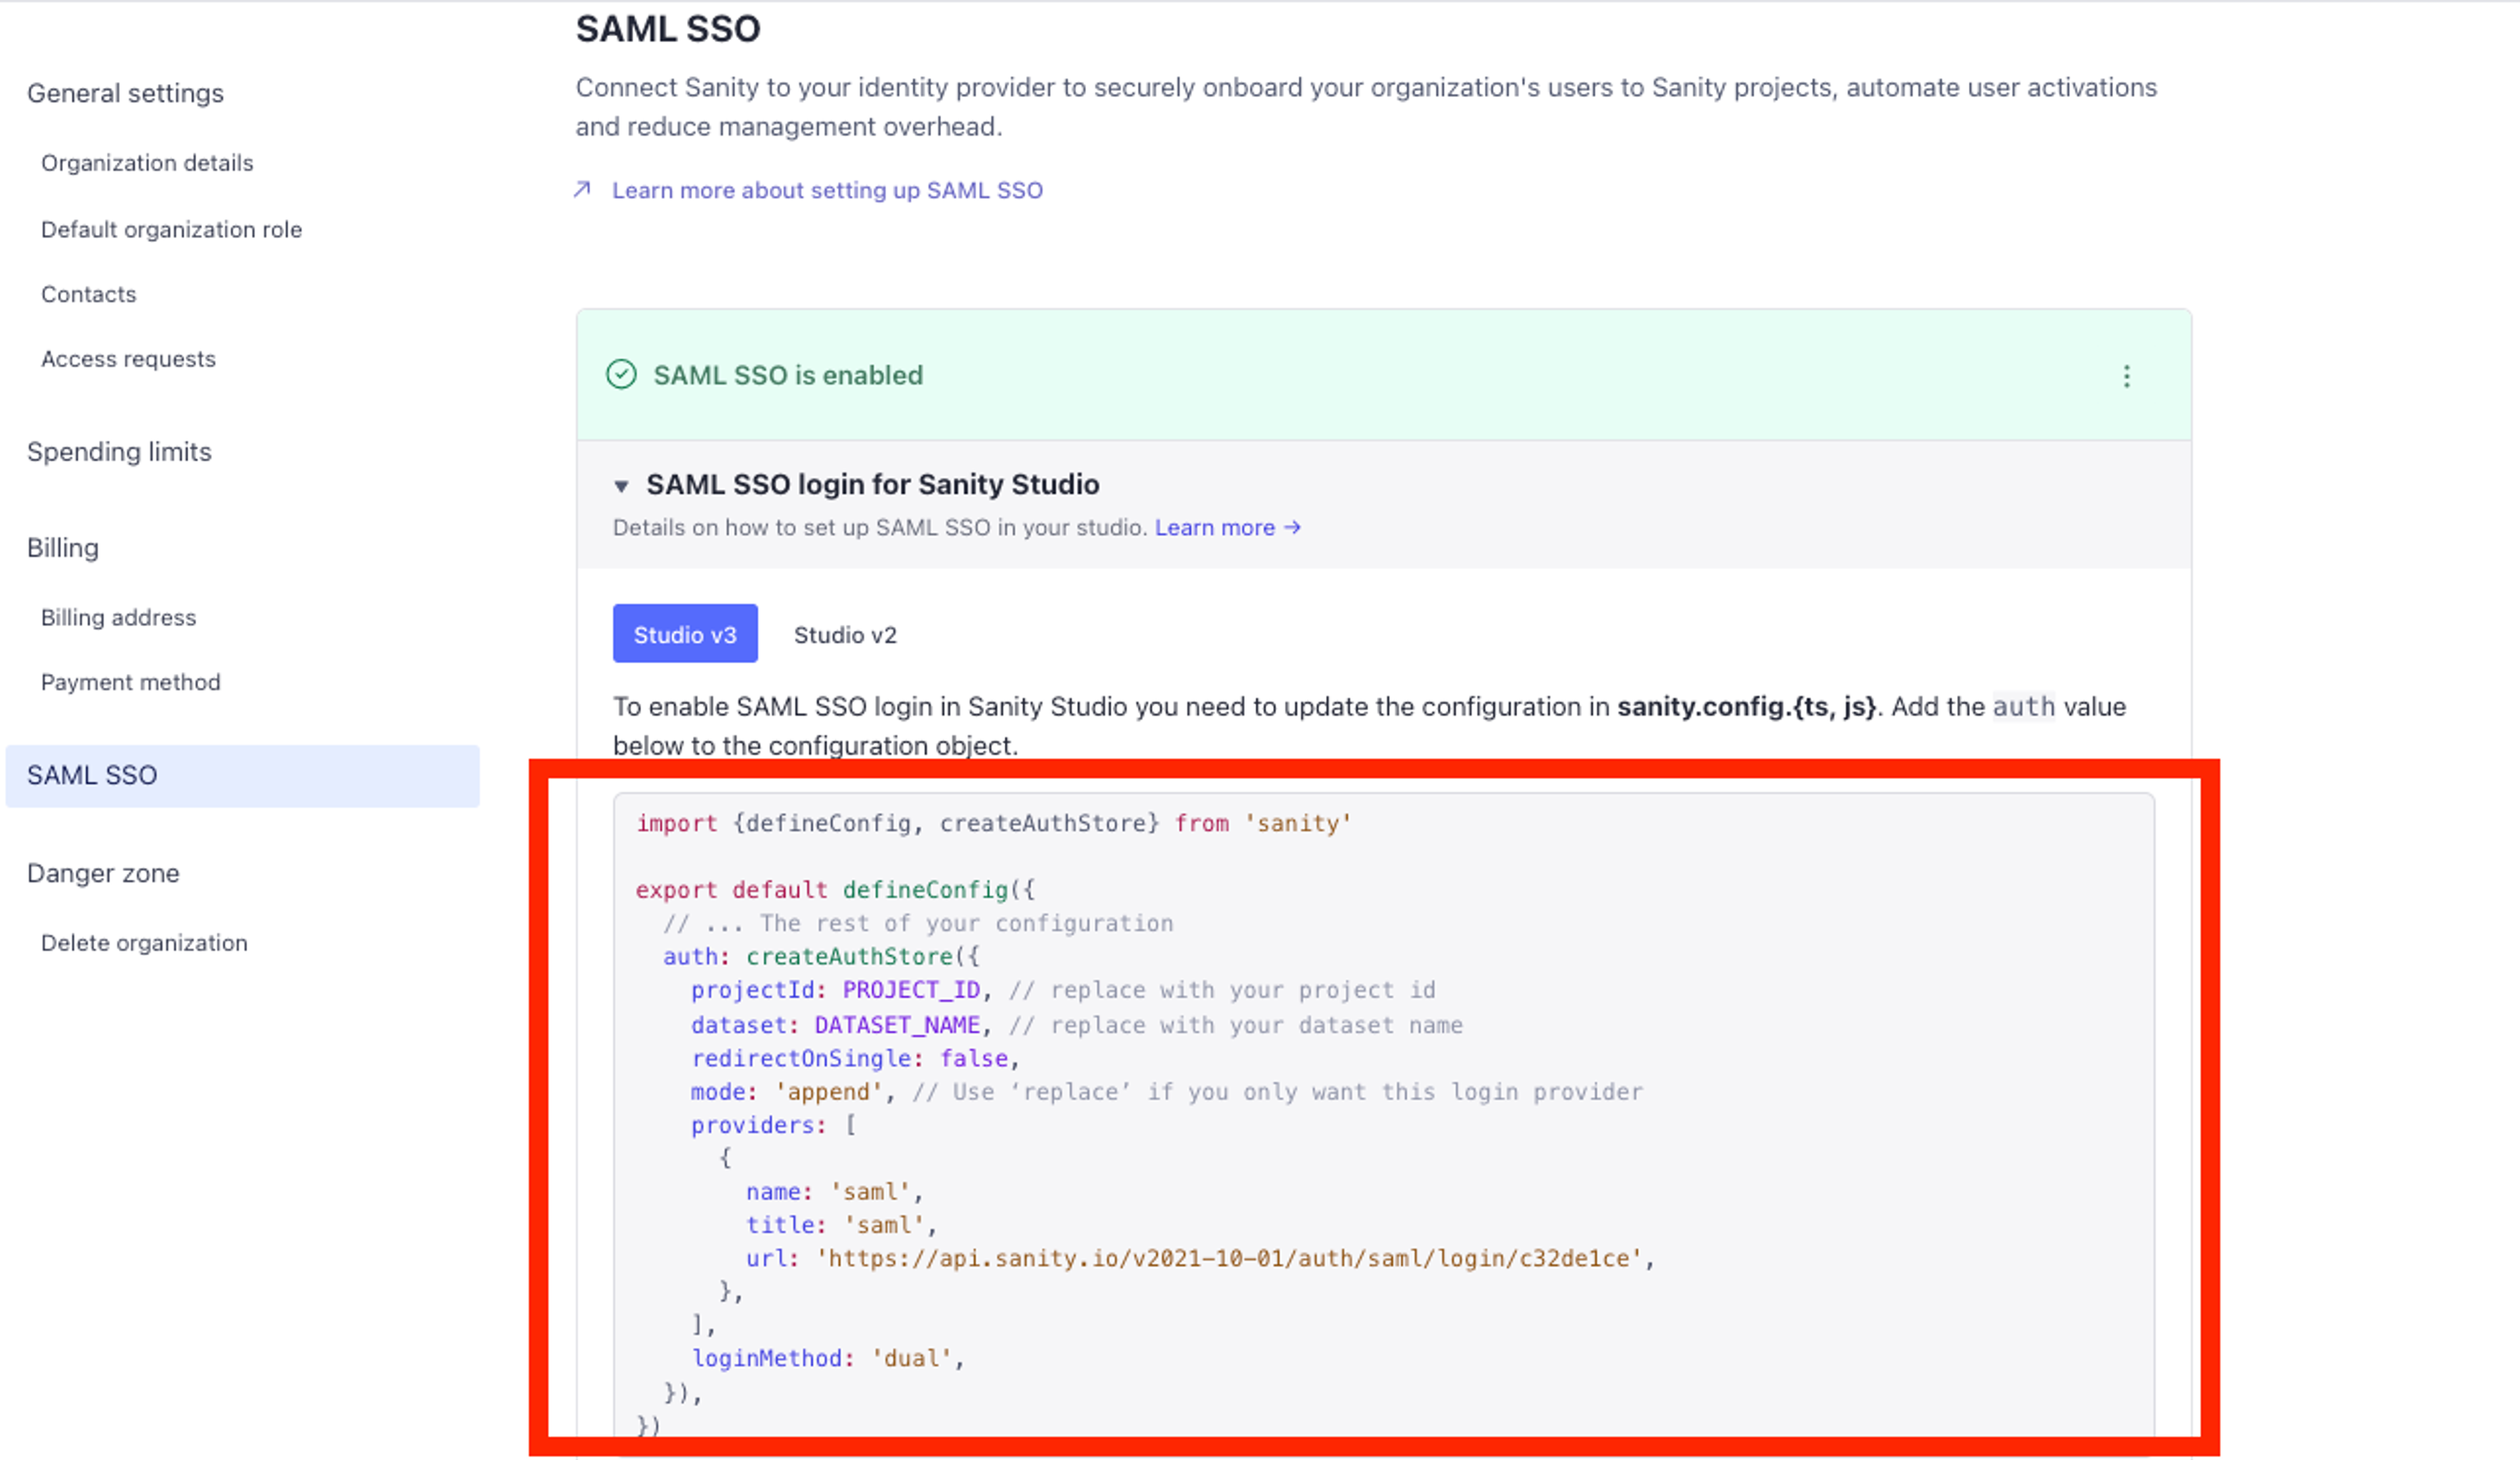
Add JumpCloud to your studio code
You will need to add a login button for SSO when users land on your studio url. Otherwise they will not be able to login with JumpCloud and may cause confusion for the users. Within your Sanity SAML SSO settings, copy the code snippet and add to your Studio config (sanity.config.ts) as shown in the example.
Once this is added and your studio is deployed you should be all set to test the login.
Common Errors
- Receiving a 422 error:
{"statusCode":422,"error":"Unprocessable Entity","message":"child \"attributes\" fails because [\"value\" must contain at least one of ...- There is an issue with your claims. All claims are case sensitive and are required.
- Groups are not being role mapped properly
- Ensure you are sending the groups attribute and it is mapped to Group Names in your Ping configuration. It will need to be lower case exactly like 'groups'
- When I access Sanity from my IdP dashboard, I receive:
{ "id": "3431pXO", "displayName": "Sanity Support", "email": "sanity@sanity.io", "familyName": "Sanity Support", "givenName": "Sanity", "middleName": null, "imageUrl": null, "provider": "saml-f6a94", "tosAcceptedAt": "2024-11-20T18:51:57.264Z", "createdAt": "2024-11-20T18:51:57.264Z", "updatedAt": "2024-11-20T18:51:57.535Z", "isCurrentUser": true, "providerId": "49jc94jf949930304jkojfciojlj934003490943" }- It does not appear you have set up your default relay state within your IdP, you will need to also configure within your Idp settings. You can follow our guide on setting the default relay state.