Release Actions
Create custom actions that display alongside the default Content Release actions.
Release Actions lets you customize and control operations users can perform on a content release. When you create a custom release action it will be available in the actions menu in the release overview and details screens.
This is a paid feature
This feature is available on certain Enterprise plans. Talk to sales to learn more.
Prerequisites:
- Custom release actions require Sanity Studio v4.7.0 or later.
- Release actions are part of Content Releases. If you're not using content releases as part of your workflow, they won't apply. Instead, check out document actions.
Limitations:
- At this time, custom release actions cannot extend or overwrite existing actions.
Create a release action
To set up a new release action component you need to complete the following steps:
- Define a release action component
- Register the release action component to the
releases.actionsarray in your Studio's workspace configuration.
In this example, we'll create an action that logs details about the release to the console.
Create an action component
Start by creating an action component. We recommend using an actions directory in your Studio project, or even an actions/releases directory if you plan to have multiple document, field, and release actions.
For this example, we'll create the component in our Studio project in actions/index.ts.
import type { ReleaseActionComponent } from "sanity";
import { BookIcon } from "@sanity/icons"; // Optionally, you can add icons

export const CustomReleaseAction: ReleaseActionComponent = ({ release, documents}) => {
  return {
    label: 'Log Release Info',
    icon: BookIcon, // Optional, make sure to install and import above
    disabled: false,
    title: 'Log information about this release to the console',
    onHandle: () => {
      console.group(`Release: ${release.metadata.title}`)
      console.log('Release ID:', release._id)
      console.log('Release State:', release.state)
      console.log('Release Type:', release.metadata.releaseType)
      console.log('Documents Count:', documents.length)
      console.log(
        'Documents:',
        documents.map((d) => d.document._id),
      )
      console.groupEnd()
    },
  }
}
Release actions accept an object containing the release and an array of documents. In this example, the action accesses these parameters and logs details about the release and any included documents.
Add the component to your studio config
Next, import the action component and add it to the releases.actions array in your studio's sanity.config.ts.
import {defineConfig} from 'sanity'
import { CustomReleaseAction } from './actions'

export default defineConfig({
  // ...
  releases: {
    actions: [CustomReleaseAction]
  },
  // ...
})
Run the action
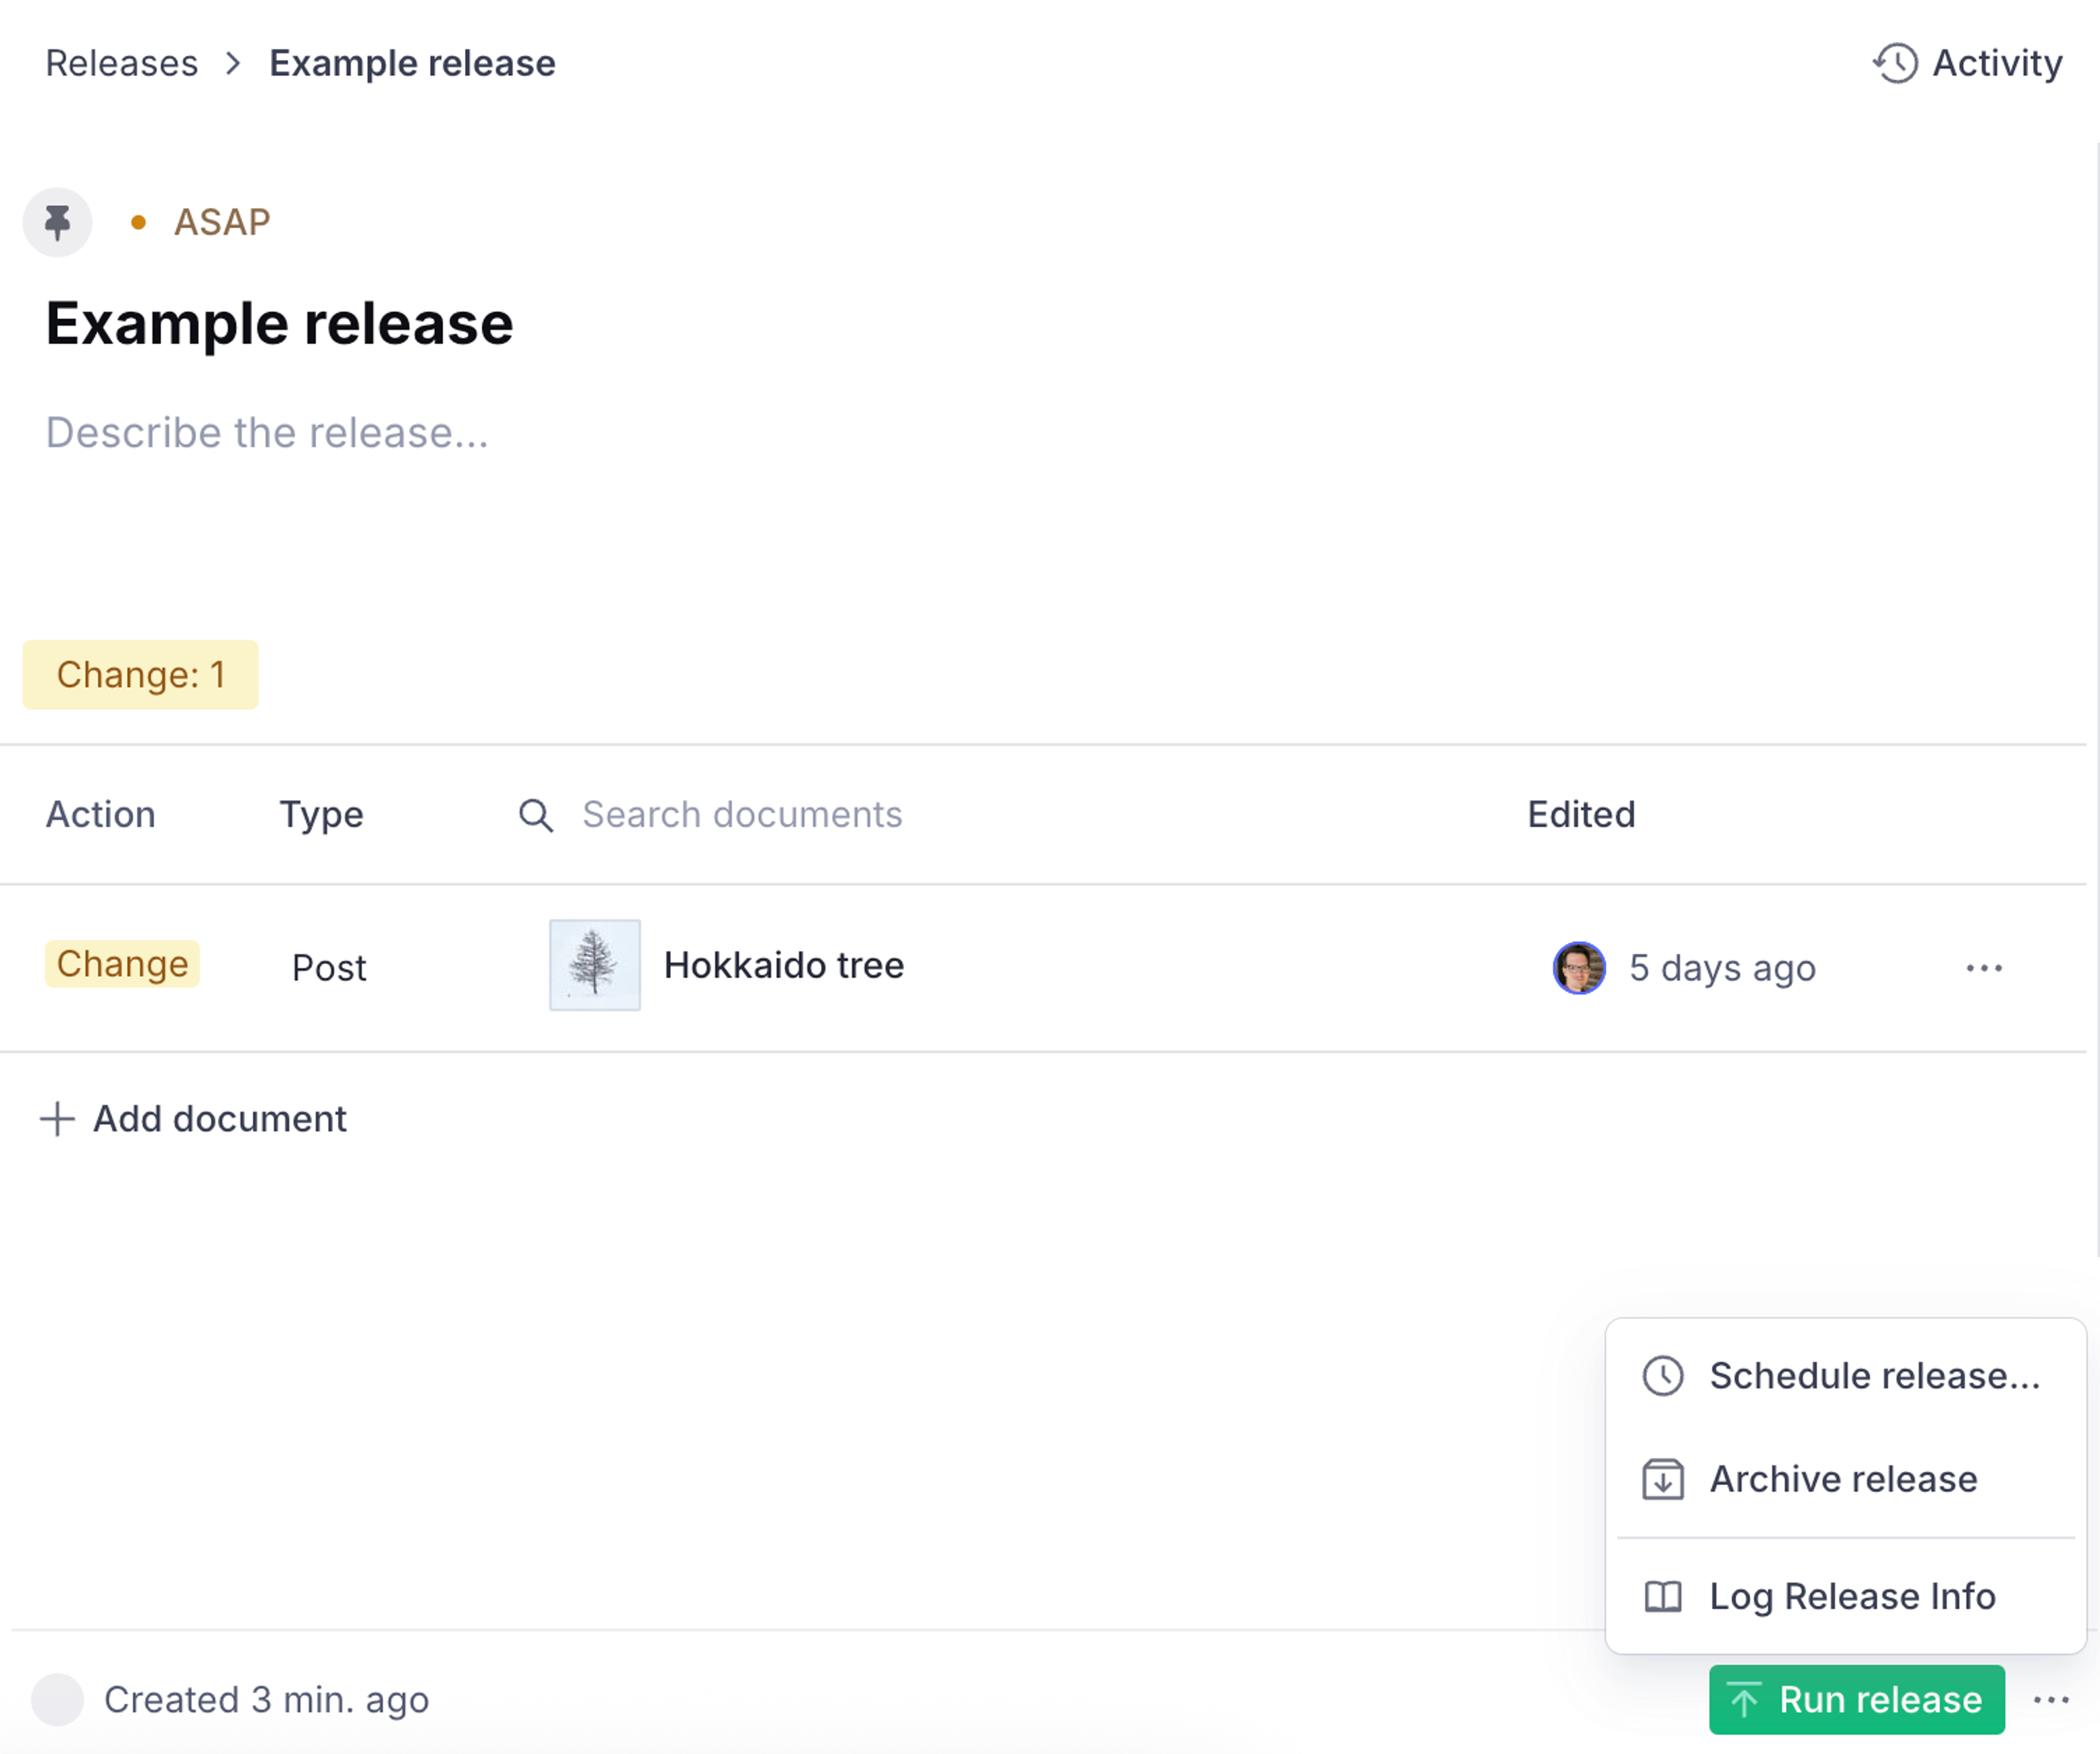
Now when you run your Studio locally or deploy the changes, you should see the action available from the "..." icon on the release page.
Selectively render actions
You can selectively render actions based on the studio context.
Release context
Retrieve information about the release by accessing the context.release object. In this example, the custom action becomes available only if the release is scheduled and contains documents.
import {defineConfig} from 'sanity'
import { CustomReleaseAction } from './actions'

export default defineConfig({
  // ...
  releases: {
    actions: (prev, context)=>{
      if (context.release.state === 'scheduled' && ctx.documents.length > 0) {
        return [...prev, CustomReleaseAction]
      }
      return prev
    }
  },
  // ...
})
In addition to release.state, you can access release.metadata to check the type, description, and title.
User context
Another common approach to filtering actions is by user role. In this example, the custom action only displays for users with the administrator role.
import {defineConfig} from 'sanity'
import { customReleaseAction } from './actions'

export default defineConfig({
  // ...
  releases: {
    actions: (prev, context)=>{
      if (context.currentUser?.roles.find(({name}) => name === 'administrator')) {
        return [...prev, customReleaseAction]
      }
      return prev
    }
  },
  // ...
})
The pattern of returning [...prev, newAction] ensures that any actions added outside of the main config, such as in a plugin, aren't overridden by this assignment.
Interact with built-in release actions
To call one of the built-in actions from within a custom release action, you can use the Sanity client by importing useClient.
In a custom action component:
import { useClient, getReleaseIdFromReleaseDocumentId, type ReleaseActionComponent } from "sanity";
import { BookIcon } from "@sanity/icons"; // Optionally, you can add icons
import { useRouter } from "sanity/router"

export const customReleaseAction: ReleaseActionComponent = ({ release}) => {
  // Get the release ID form the release system document ID
  // using the included helper.
  const releaseId = getReleaseIdFromReleaseDocumentId(release._id)

  // Set up a Sanity client
  const sanityClient = useClient({apiVersion: "2025-09-02"})
  const router = useRouter()

  // Handle the action
  const handleArchiveAndDelete = async () {
    await sanityClient.releases.archive({releaseId})
    await sanityClient.releases.delete({releaseId})

    // If action was on the release detail, navigate back to release's tool root
    // as once deleted, the release detail page will not exist anymore
    router.navigate({})
  }


  return {
    label: "Archive and delete",
    icon: BookIcon, // Optional, make sure to install and import above
    title: "Archive and delete this release",
    onHandle: handleArchiveAndDelete
  }
}
Then, as with the example earlier, add it to your release actions array in the sanity.config.ts file.
import {defineConfig} from 'sanity'
import { CustomReleaseAction } from './actions'

export default defineConfig({
  // ...
  releases: {
    actions: [CustomReleaseAction]
  },
  // ...
})