Scheduled drafts user guide
Learn to schedule individual drafts and browse scheduled drafts in the releases interface.
This guide is an overview of the scheduled drafts interface and workflow. For technical details on enabling/disable scheduled drafts in your studio, see the scheduled drafts configuration documentation.
Schedule a draft
You can schedule a draft from the document pane.
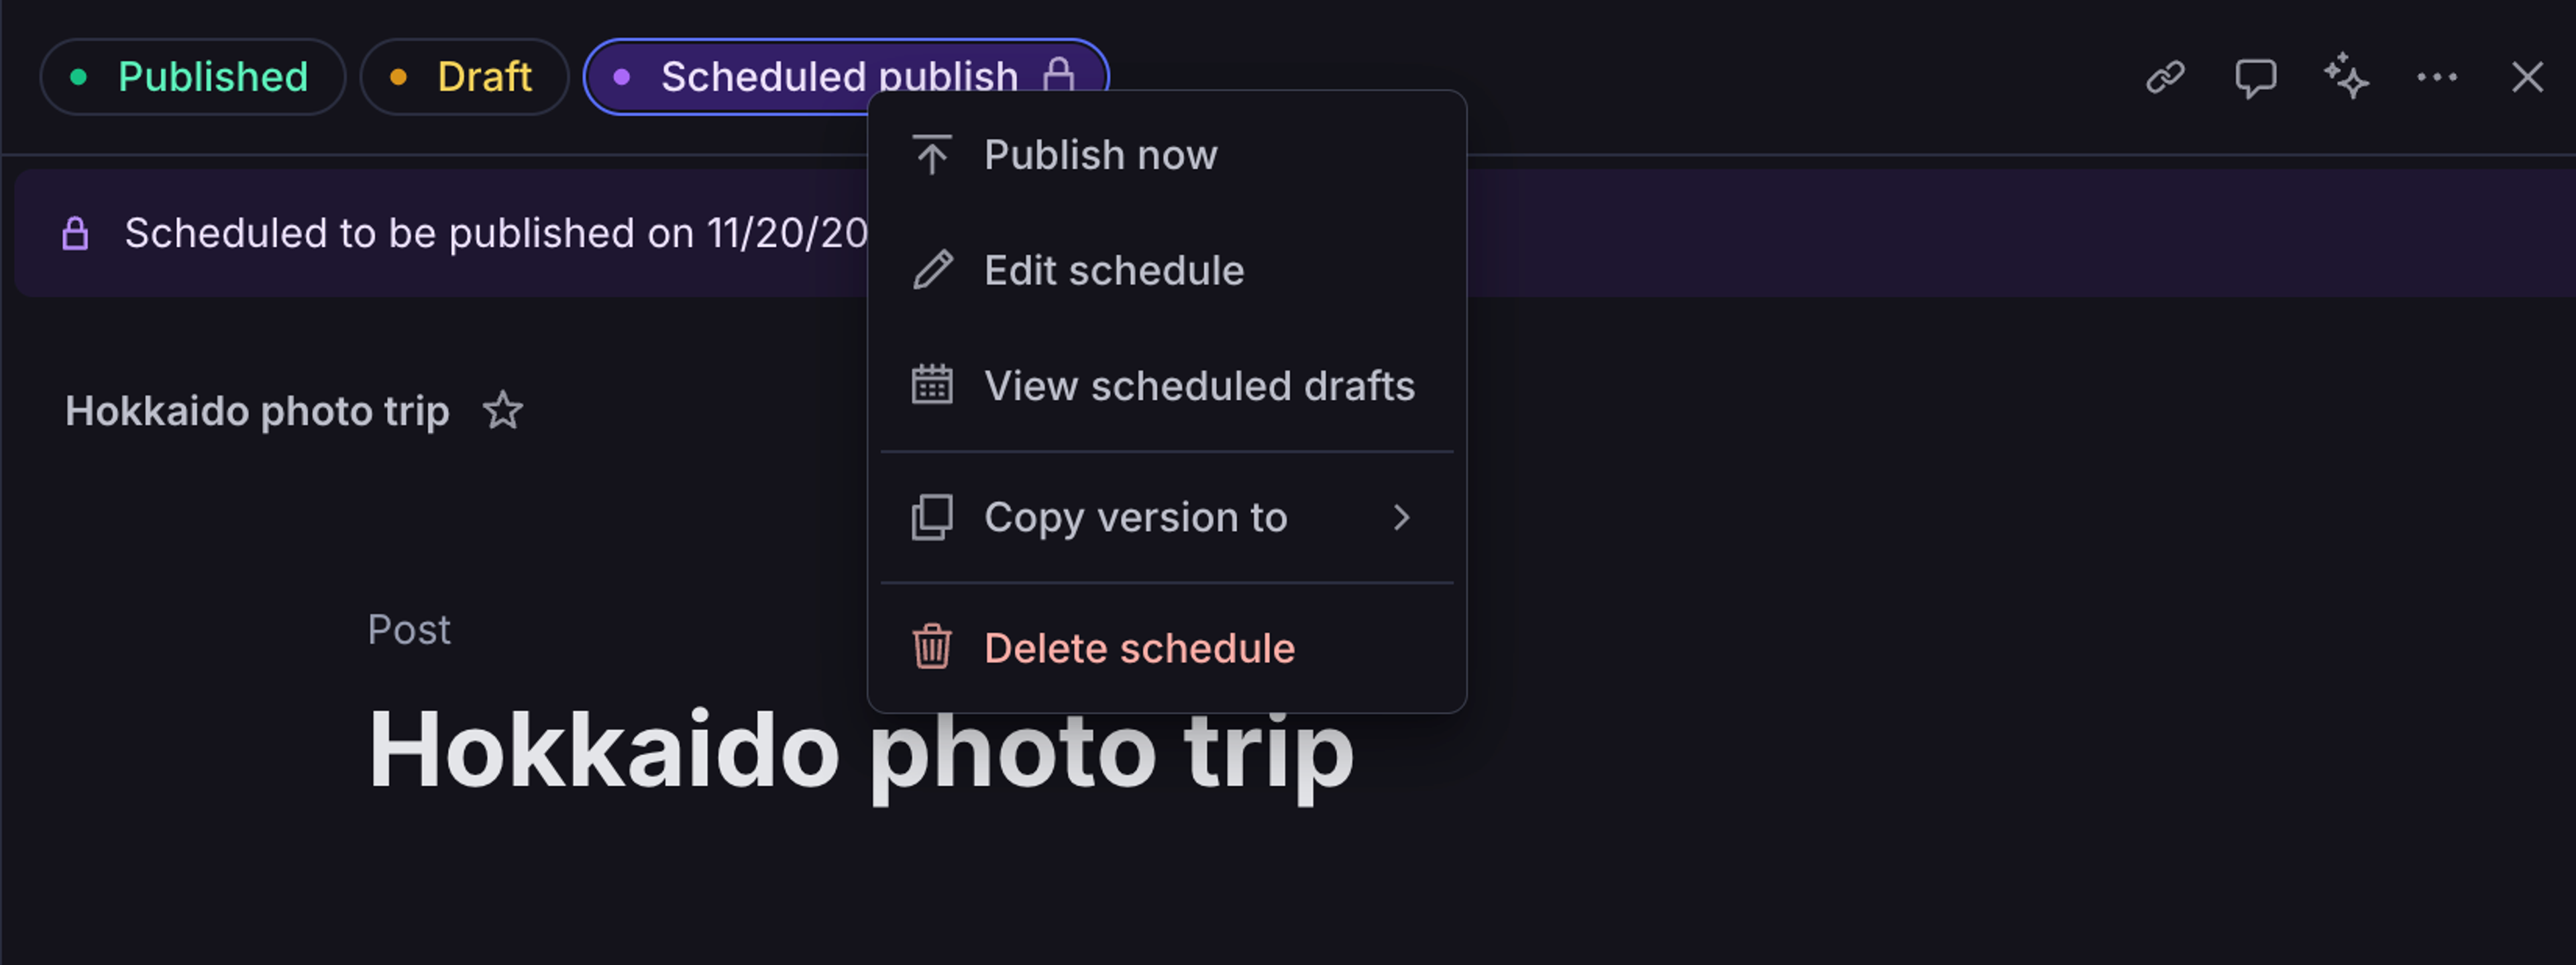
- From an existing document draft, select the document actions menu "..." next to the publish button.
- Then, select Schedule Publish and set a date and time in the future before confirming.
When a document contains a scheduled draft, you'll see a new pill alongside the perspectives at the top of the document pane.
View scheduled drafts
You can quickly jump from a document to the scheduled drafts page by right-clicking the "scheduled publish" pill at the top of the document, and selecting "View scheduled drafts"
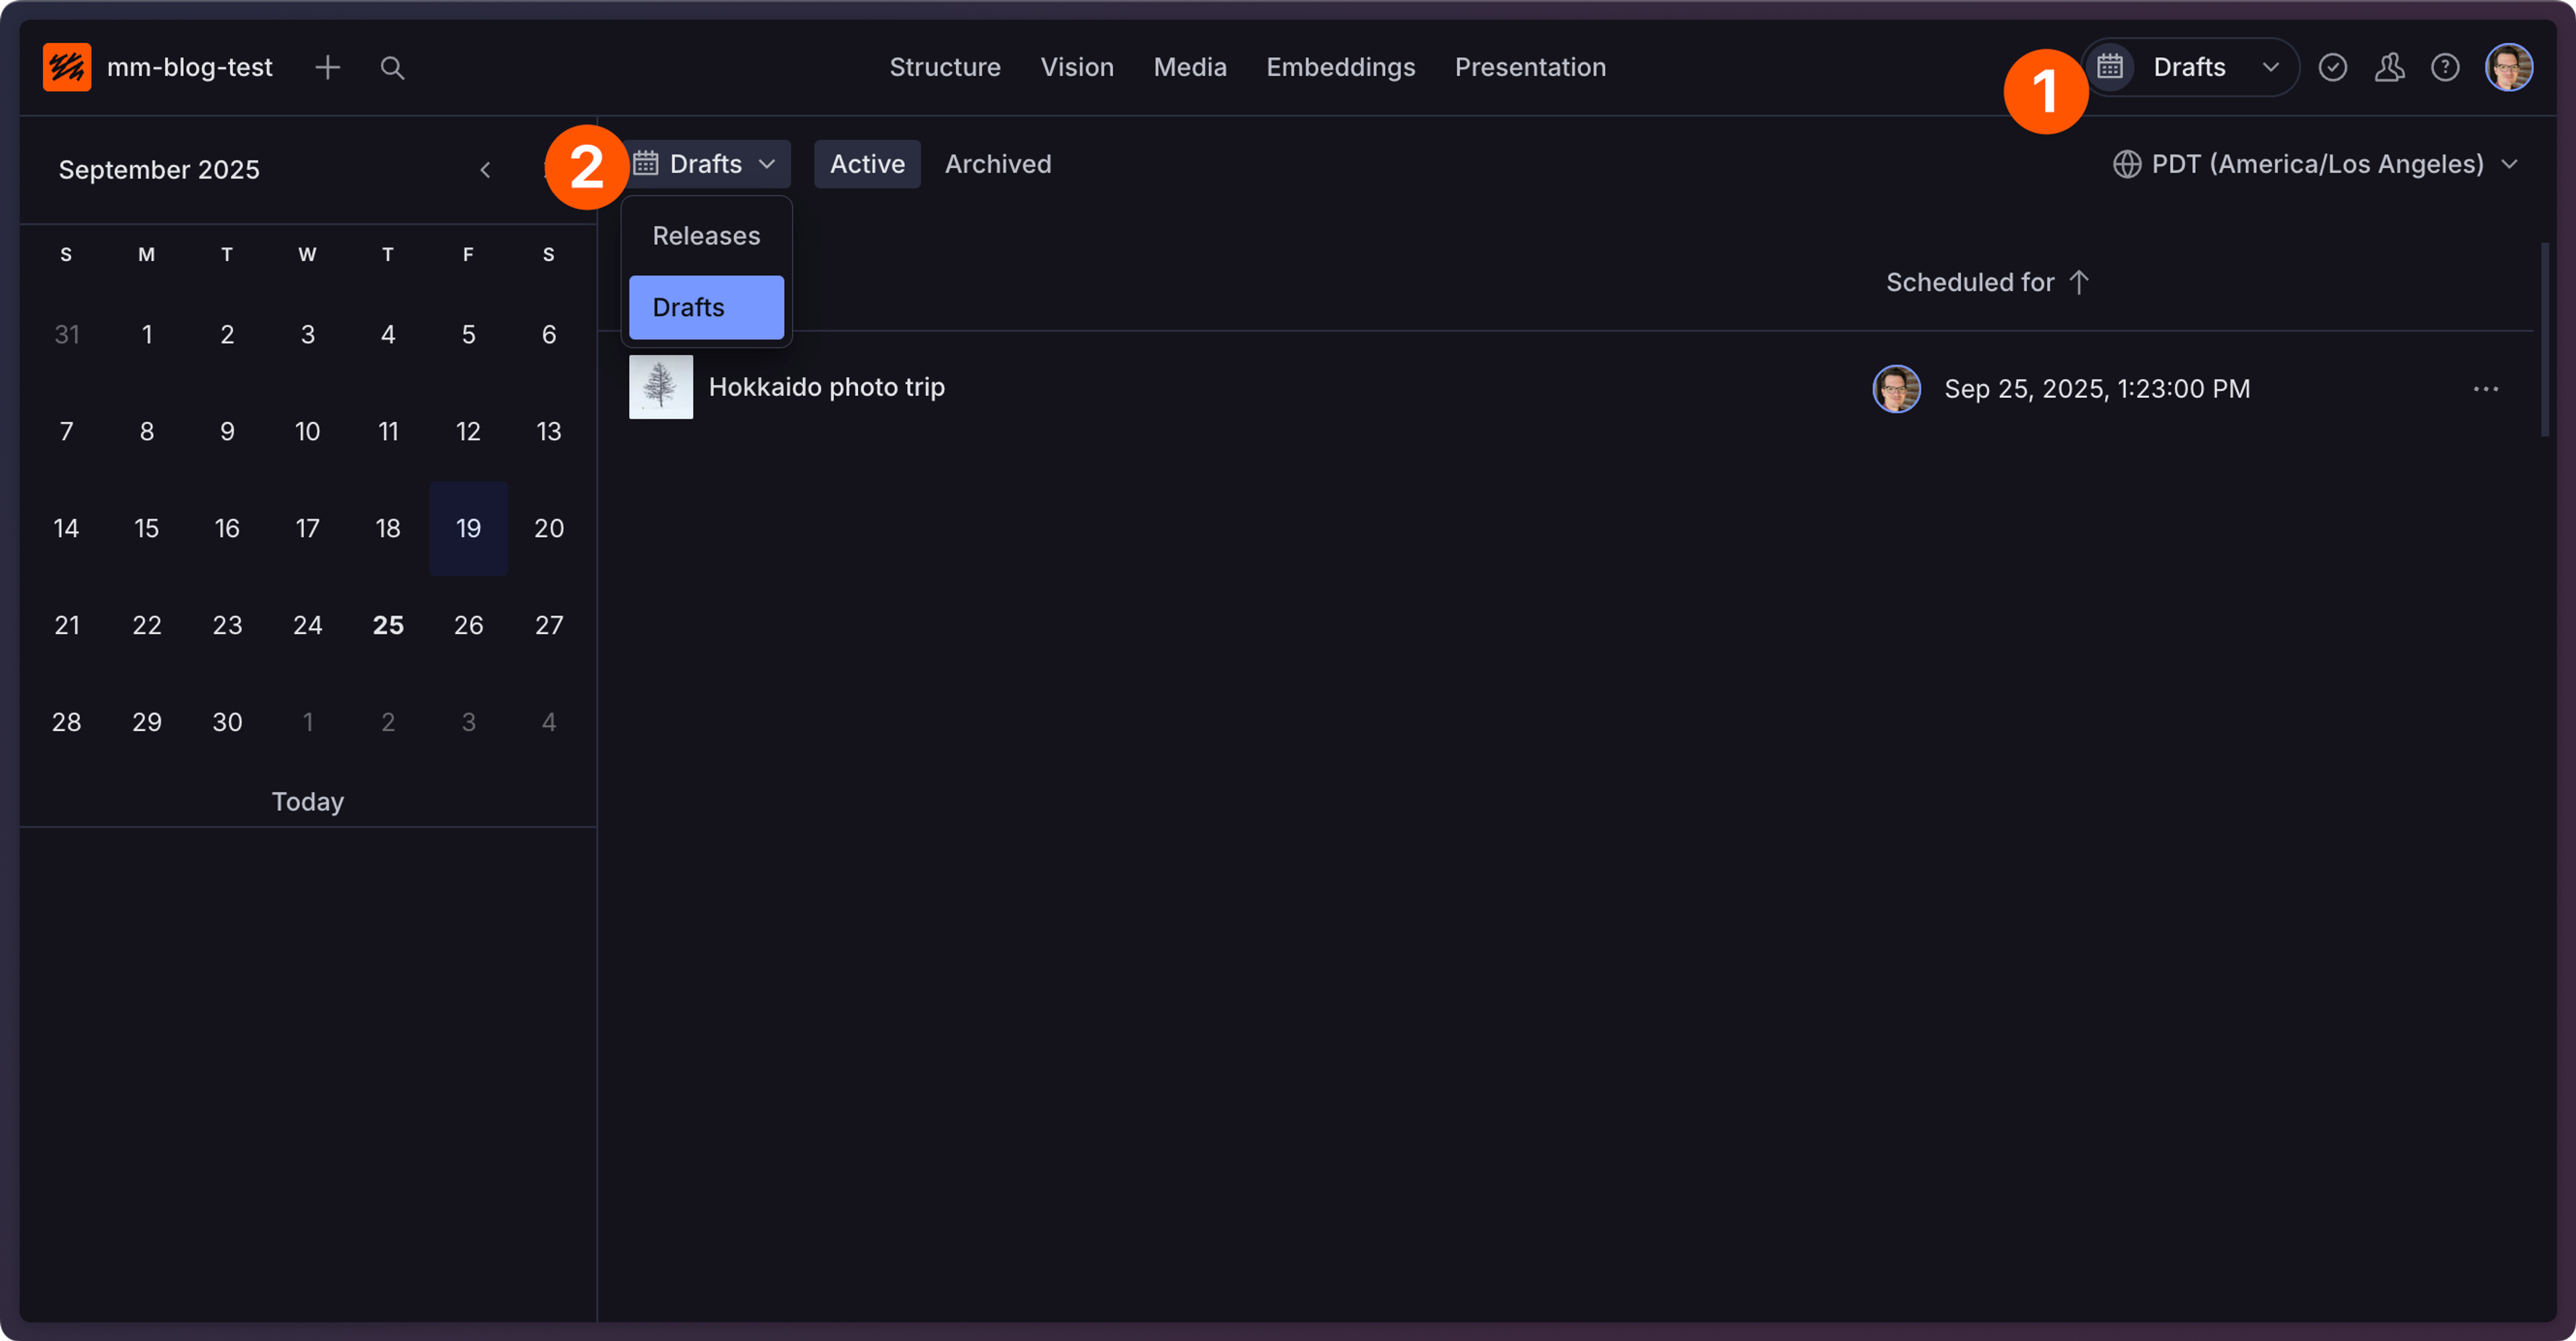
You can also navigate there by first going to the content releases screen.
- Select the calendar icon in the perspective picker to navigate to the content releases list.
- Select the Releases dropdown and select Drafts.
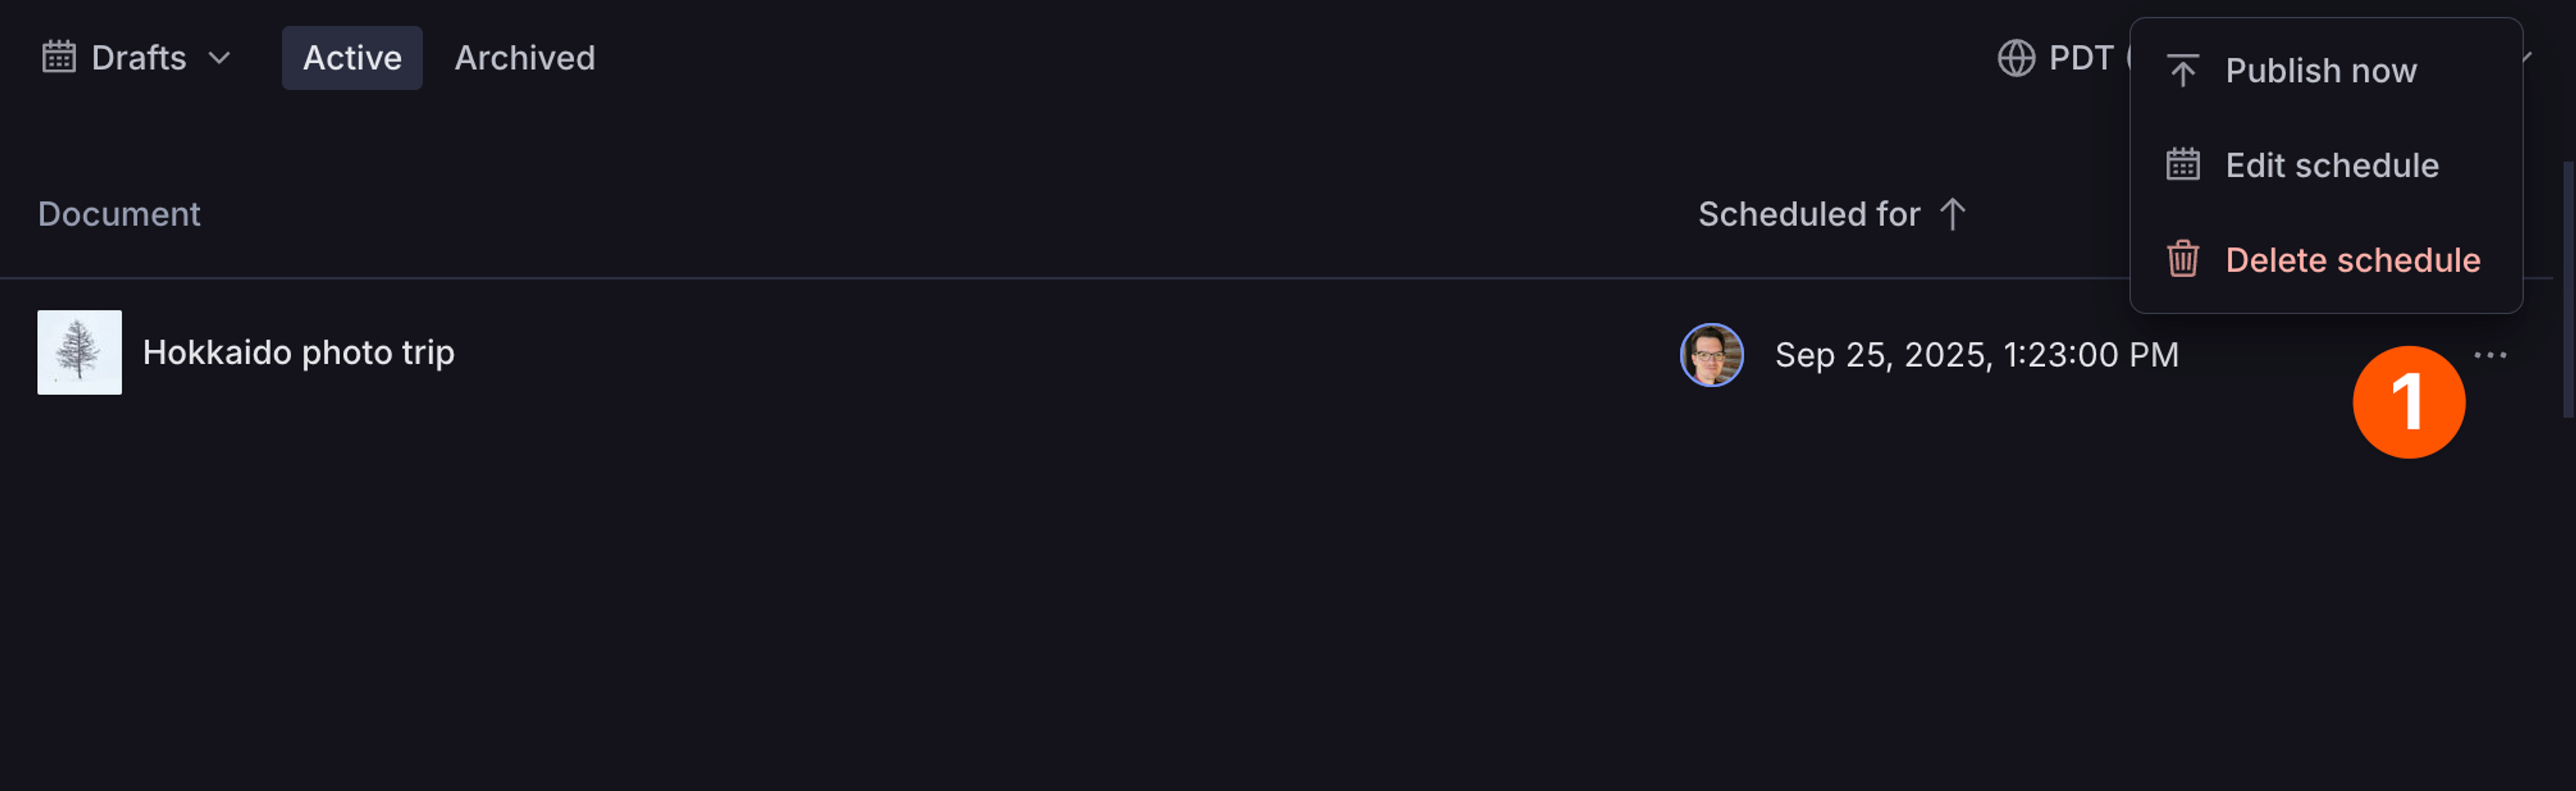
From here, you can edit individual draft schedules, delete drafts, or immediately publish them from the "..." menu in each row as shown at (1) in the screenshot below.
Edit a scheduled draft's contents
You can only have one scheduled draft scheduled per document at a given time. To make changes to the contents of a draft, you can right click the “Scheduled publish” pill at the top of the document and select “Edit schedule”. You can also use the "..." menu from the scheduled drafts list.
You can now make changes to the scheduled draft’s content. Click “Schedule Publish” document action, which will ask for confirmation of the publish date and time, and re-schedule the draft’s publish.
Use this same approach to edit only the date and time to publish the scheduled draft.